Kit-Forger
Kit-Forger makes CAD-ready profiles, solid bodies and meshes: tires and wire-spoke wheels; sci-fi panels, doors, shapes, objects, fasteners and ports; props from cameras and crates to trolleys, machinery and street furniture; and buildings, from a modular corridor kit to terraces and megastructures. Pick a preset or press Randomize, drag the result straight into Plasticity, and keep modelling. The less time you spend in Kit-Forger, the better: that is what it is built for.
Kit-Forger is made with Plasticity in mind, but it is not tied to it: its SVG, STEP and DXF files open in any CAD program that reads those formats, and its meshes are for Blender, game engines and other 3D programs.
Four modes
What comes out
- SVG: flat 2D profiles, drawn at 1 unit = 1 mm.
- STEP and DXF: the same profiles as 3D curves, each standing in its own plane, with a whole set in one file.
- Solid: finished solid bodies in a STEP file, built inside Kit-Forger by the Open CASCADE CAD kernel.
- Mesh: the same things as a mesh with quads, UVs and a material on every part, as OBJ, glTF or STL, made at once with no waiting.
Props and buildings need all three dimensions, so they come as Solid or Mesh only.
Everything you make with Kit-Forger is yours to use, sell and publish (see Licences).
What you need
- A PC with Windows 10 or 11, 64-bit, or a Mac with Apple silicon (M1 or later). Intel Macs are not supported.
- About 75 MB of disk space for the program and its CAD kernel.
- Plasticity, or another CAD program that reads SVG, STEP or DXF. STEP imports in Plasticity Indie and Studio; DXF imports in Plasticity Studio only.
This guide describes Kit-Forger version 0.9.0, the beta. The version number is shown in the About window.
Install
Kit-Forger comes as an installer for Windows (a file ending in .msi) and a disk image for the Mac (a file ending in .dmg). Both show the Kit-Forger licence agreement before anything is installed.
On Windows
When you run the installer, Windows may show a blue box titled Windows protected your PC. This is Windows SmartScreen. It appears because Kit-Forger is not code-signed, so Windows does not know its publisher yet. It does not mean anything is wrong with the file.
Click More info, then Run anyway. Your browser may also ask whether to keep the download; choose to keep it.
- Download the Kit-Forger installer, a file ending in
.msi. - Double-click it. If the SmartScreen box appears, click More info, then Run anyway (see above).
- The installer shows the Kit-Forger licence agreement. Read it, accept it, and let the installer finish. Windows asks whether to let the installer make changes to your device: choose Yes.
- Start Kit-Forger from the Start menu. The installer puts it in a Kit-Forger folder there, for everyone who uses the PC.
On a Mac
Kit-Forger is not notarized by Apple yet, so the first time you open it, macOS says it cannot check the app and does not open it. This does not mean anything is wrong with the app. You let it through once, in System Settings (step 5 below), and from then on it opens normally.
- Download the Kit-Forger disk image, a file ending in
.dmg, and double-click it. - The disk image shows the Kit-Forger licence agreement. Read it and click Agree.
- In the window that opens, drag Kit-Forger onto the Applications folder.
- Open Kit-Forger from Applications. macOS warns that it cannot check the app; click Done.
- Open System Settings, then Privacy & Security. Scroll down to the message about Kit-Forger, click Open Anyway, and confirm with your password or Touch ID.
What is installed where
On Windows, Kit-Forger installs into C:\Program Files\Kit-Forger:
| File or folder | What it is |
|---|---|
kitforge.exe | The program. |
kernel folder | The Open CASCADE CAD kernel that builds solid bodies, as two separate files, with a note on what they are and their licence texts. They are kept apart from the program on purpose: the kernel's licence lets you replace them with your own build of it. You never need to touch this folder to use Kit-Forger. |
LICENCE-AGREEMENT.txt | The Kit-Forger licence agreement. |
THIRD-PARTY-NOTICES.txt | Notices and licence texts of the open-source parts inside Kit-Forger. |
On a Mac, everything is inside Kit-Forger in Applications. The kernel folder and the two text files are in Contents > Resources (right-click the app and choose Show Package Contents to see them).
Your last session and your favourites are kept on your computer, not with the program.
Updates and uninstalling
- Kit-Forger does not update itself. A new version comes as a new download.
- On Windows, to remove Kit-Forger, open Windows Settings, then Apps, find Kit-Forger in the list of installed apps and choose Uninstall. The Uninstall Kit-Forger shortcut in
C:\Program Files\Kit-Forgerdoes the same. - On a Mac, drag Kit-Forger from Applications to the Bin (Trash).
Quick start
The shortest path from nothing to a tire in Plasticity.
One profile, dragged in
- Open Plasticity and Kit-Forger side by side.
- In Kit-Forger, click Tires at the top, then click any preset in the row of thumbnails, for example MOTO-17.
- Under Drag and export as, make sure SVG is chosen.
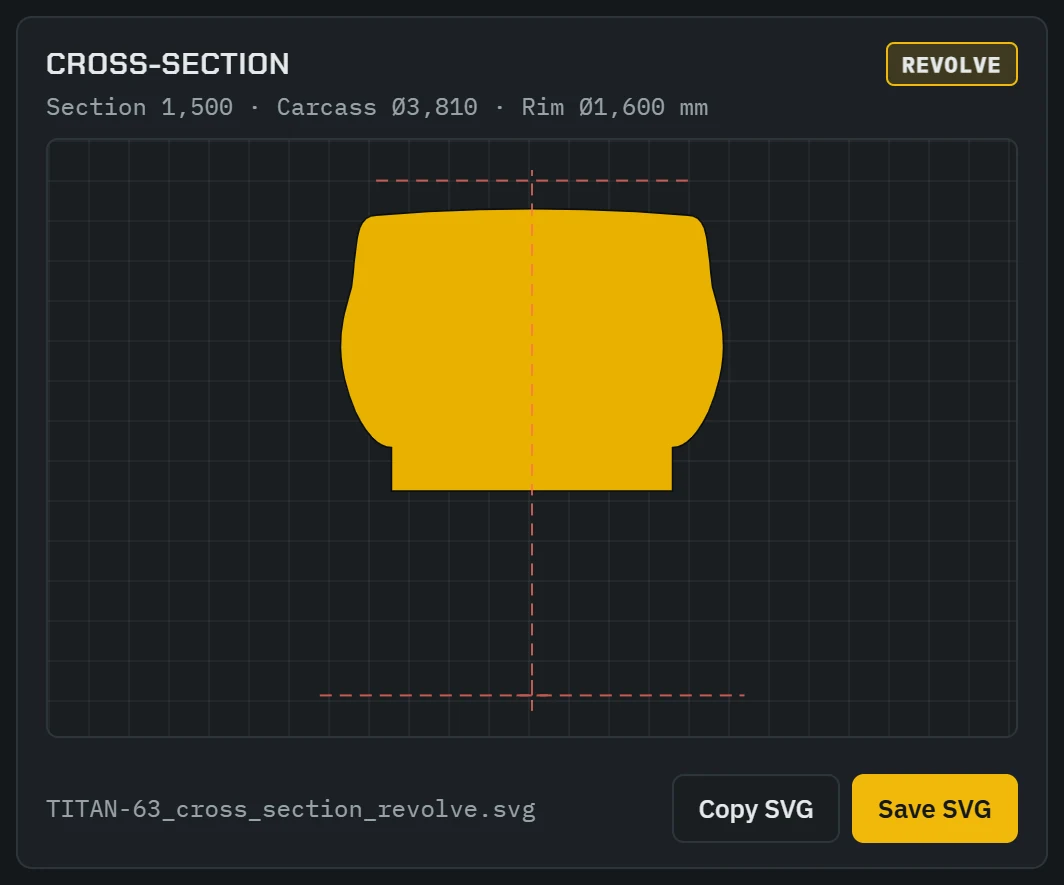
- Press on the Cross-section preview and drag it into Plasticity's viewport. The cursor carries a small picture of the profile. Let go over the viewport.
- In Plasticity, revolve the profile about its red axis line. That line is the axle.
Nothing has to be saved or exported first. Dragging also works into a folder or onto the desktop, which leaves the file there.
Dragging into the viewport is made for and tested with Plasticity. Other programs may or may not accept a dropped file. If yours does not, drag the preview into a folder, or use the export button, and import the file the way you usually do.
A whole set in one drop
- Under Drag and export as, choose STEP.
- Press on the dashed handle next to the export button (it reads Drag all 7 as one STEP) and drag it into Plasticity.
Plasticity takes one file per drop, so in STEP the whole set travels as one file, with each profile standing where it belongs around the wheel. See Formats.
A finished solid tire
- Under Drag and export as, choose Solid.
- Click the dashed handle. It reads Build solids. The window is busy for a few seconds while the bodies are built.
- When the handle reads Drag 2 solids (or another number), drag it into Plasticity.
More in Solid bodies.
A corridor piece
- Click Buildings at the top. It opens on the corridor kit, and the 3D view shows a corridor piece at once; drag in the view to turn it.
- Click a thumbnail, for example Arched hall, or move a slider such as Inside width. The view follows as you move it.
- Click the dashed handle. It reads Build solids; a dressed corridor piece takes 10 to 30 seconds.
- When the handle reads Drag 8 solids (or another number), drag it into Plasticity. Each part comes as a body of its own.
Props work the same way. More in Props and Buildings.
A mesh
- Under Drag and export as, choose Mesh. This works in every mode.
- Under Mesh file, choose OBJ + MTL, glTF .glb or STL.
- Click the export button. The mesh is made at once, with nothing to build first.
More in Meshes.
The window
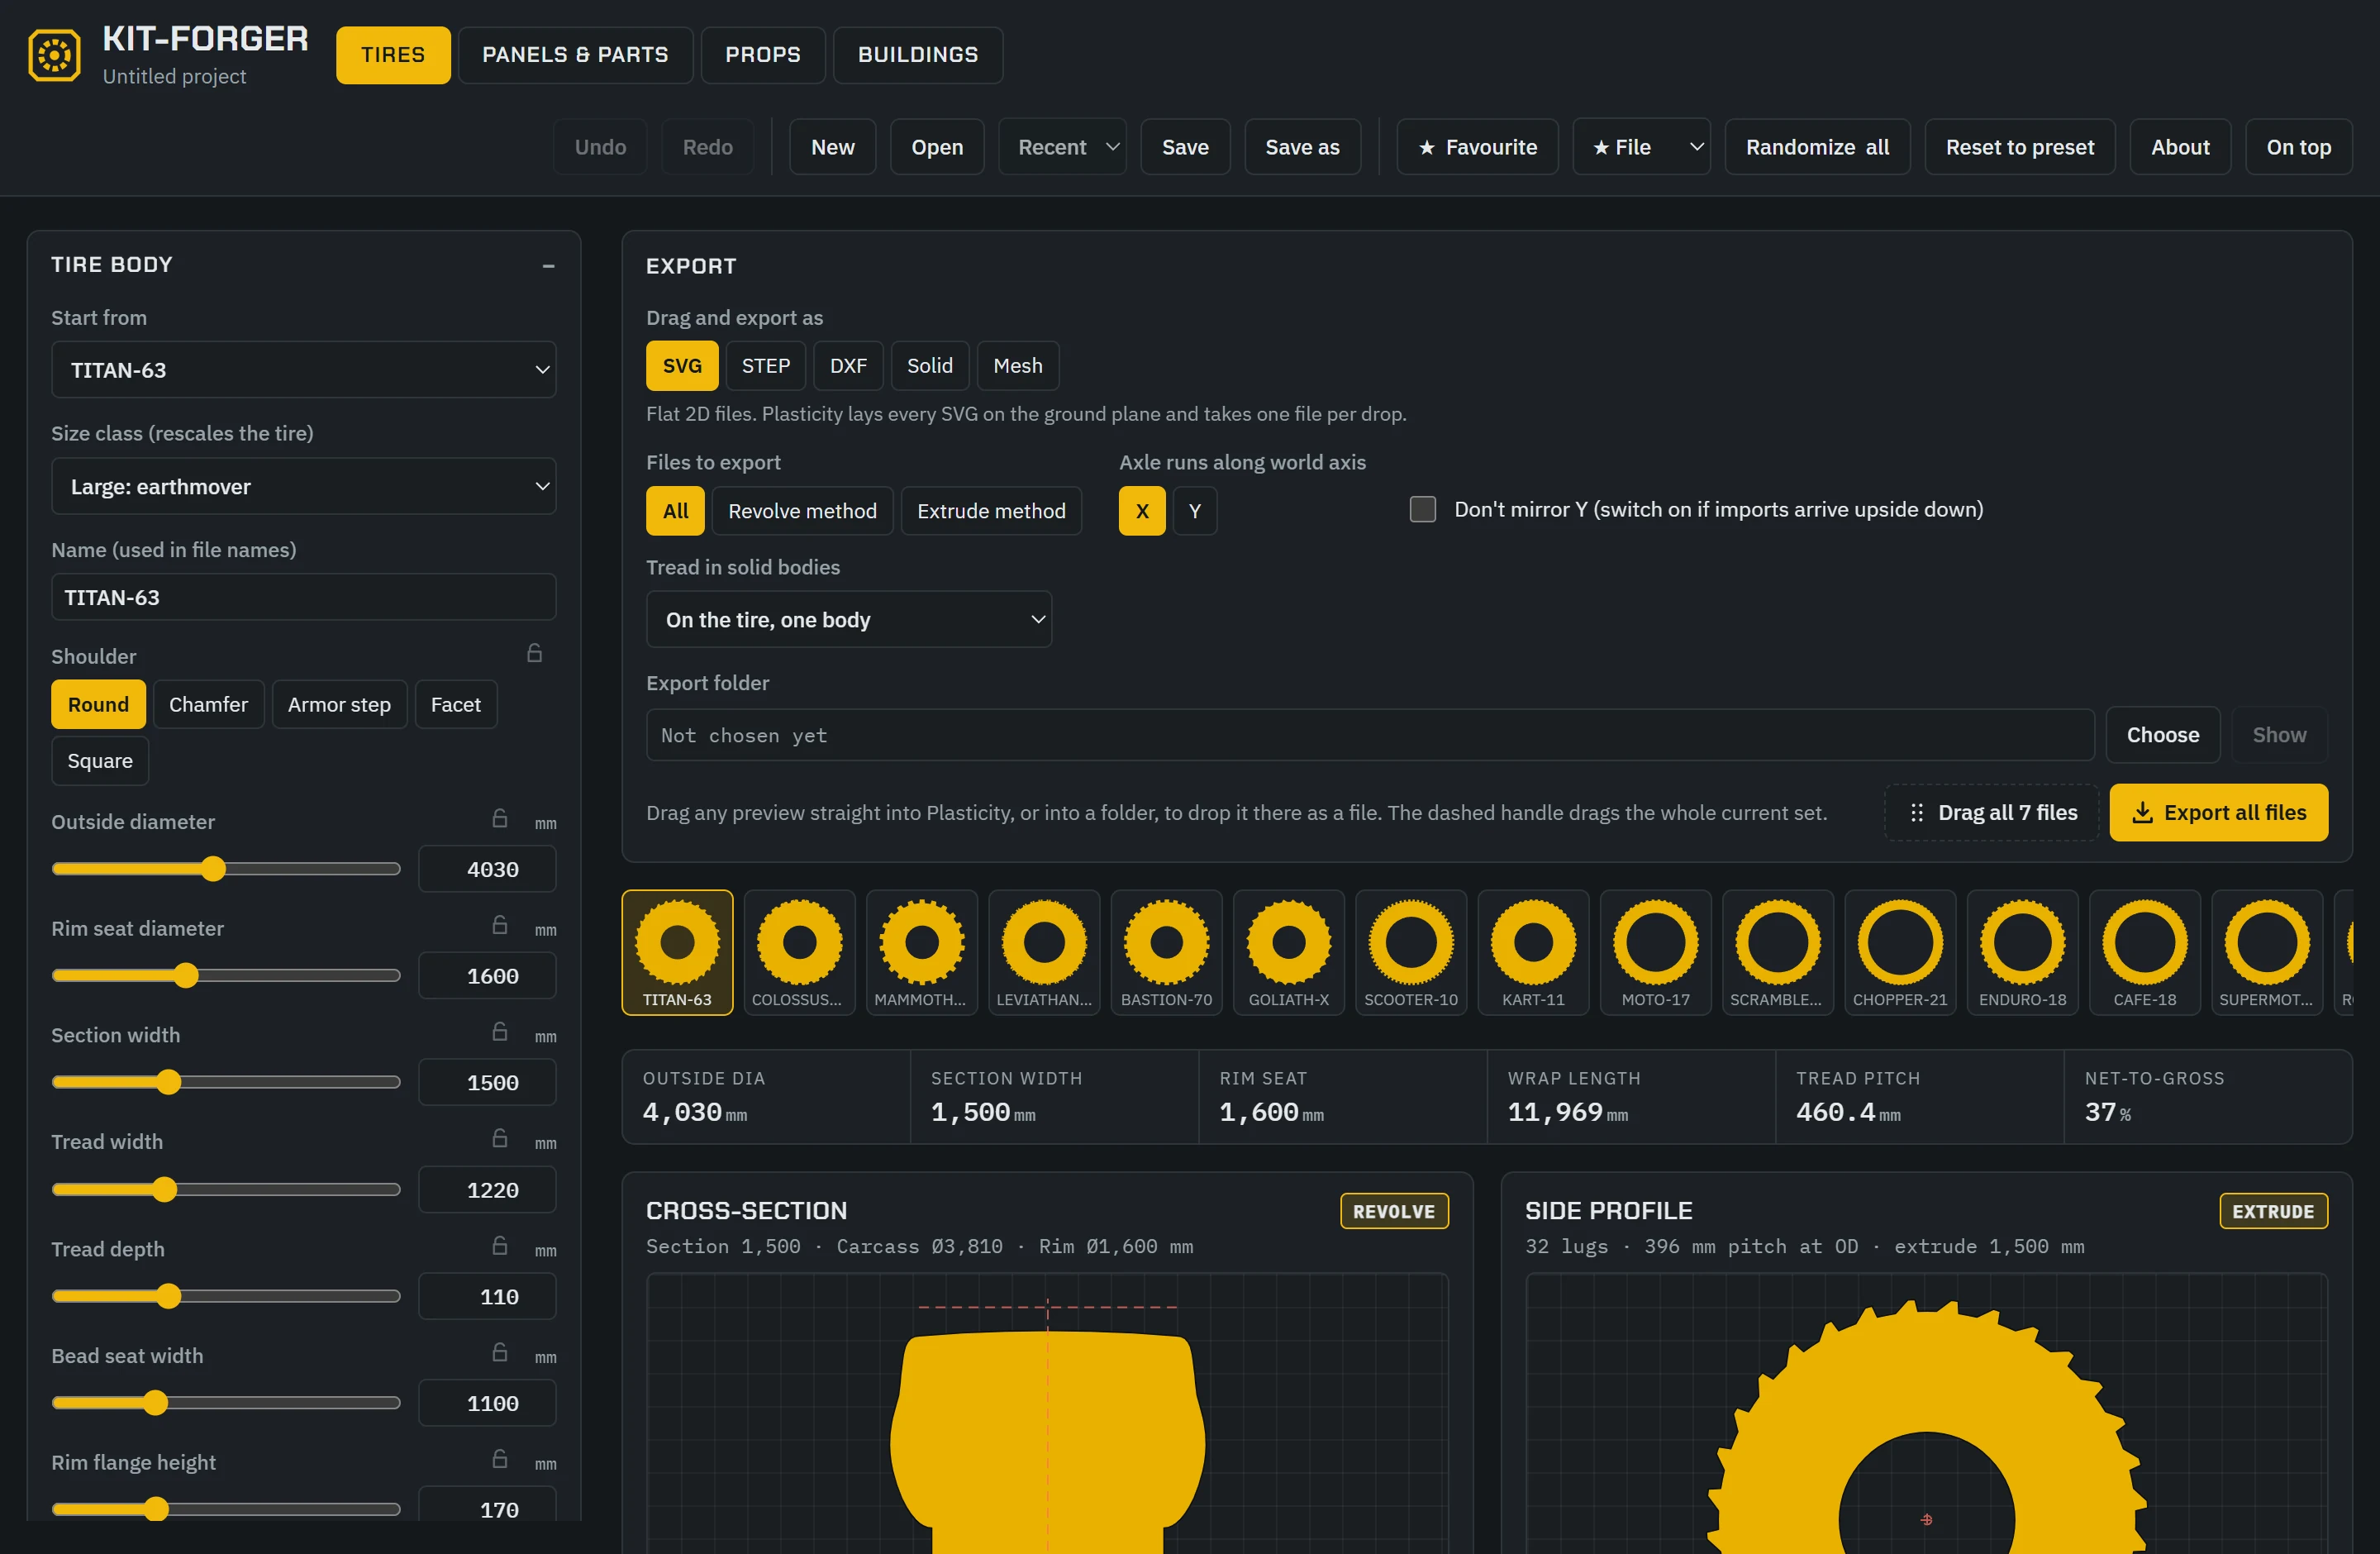
From top to bottom: the header, the controls on the left, and on the right the export bar, the row of thumbnails, a row of key sizes, and the preview cards.
Header

| Button | What it does |
|---|---|
| Tires Panels & parts Props Buildings | Switch between the four modes. The accent colour follows the mode: amber for tires, teal for panels and parts, violet for props, brick for buildings. In Panels & parts, Props and Buildings a second row of tabs appears; Props and Buildings each remember the tab you were on. |
| Undo Redo | Step back and forward through your changes, up to 150 steps. |
| New Open Recent Save Save as | Project files. See Projects and export. |
| ★ Favourite | Keep the current design as a favourite in the row of thumbnails. |
| ★ File | Save all favourites to a file, or load favourites from one. |
| Randomize all | A new random design. In Tires the size class stays as it is. In the other modes the button reads Randomize and changes the current tab. |
| Reset to preset | Back to the preset you started from. In Panels & parts the button reads Reset. |
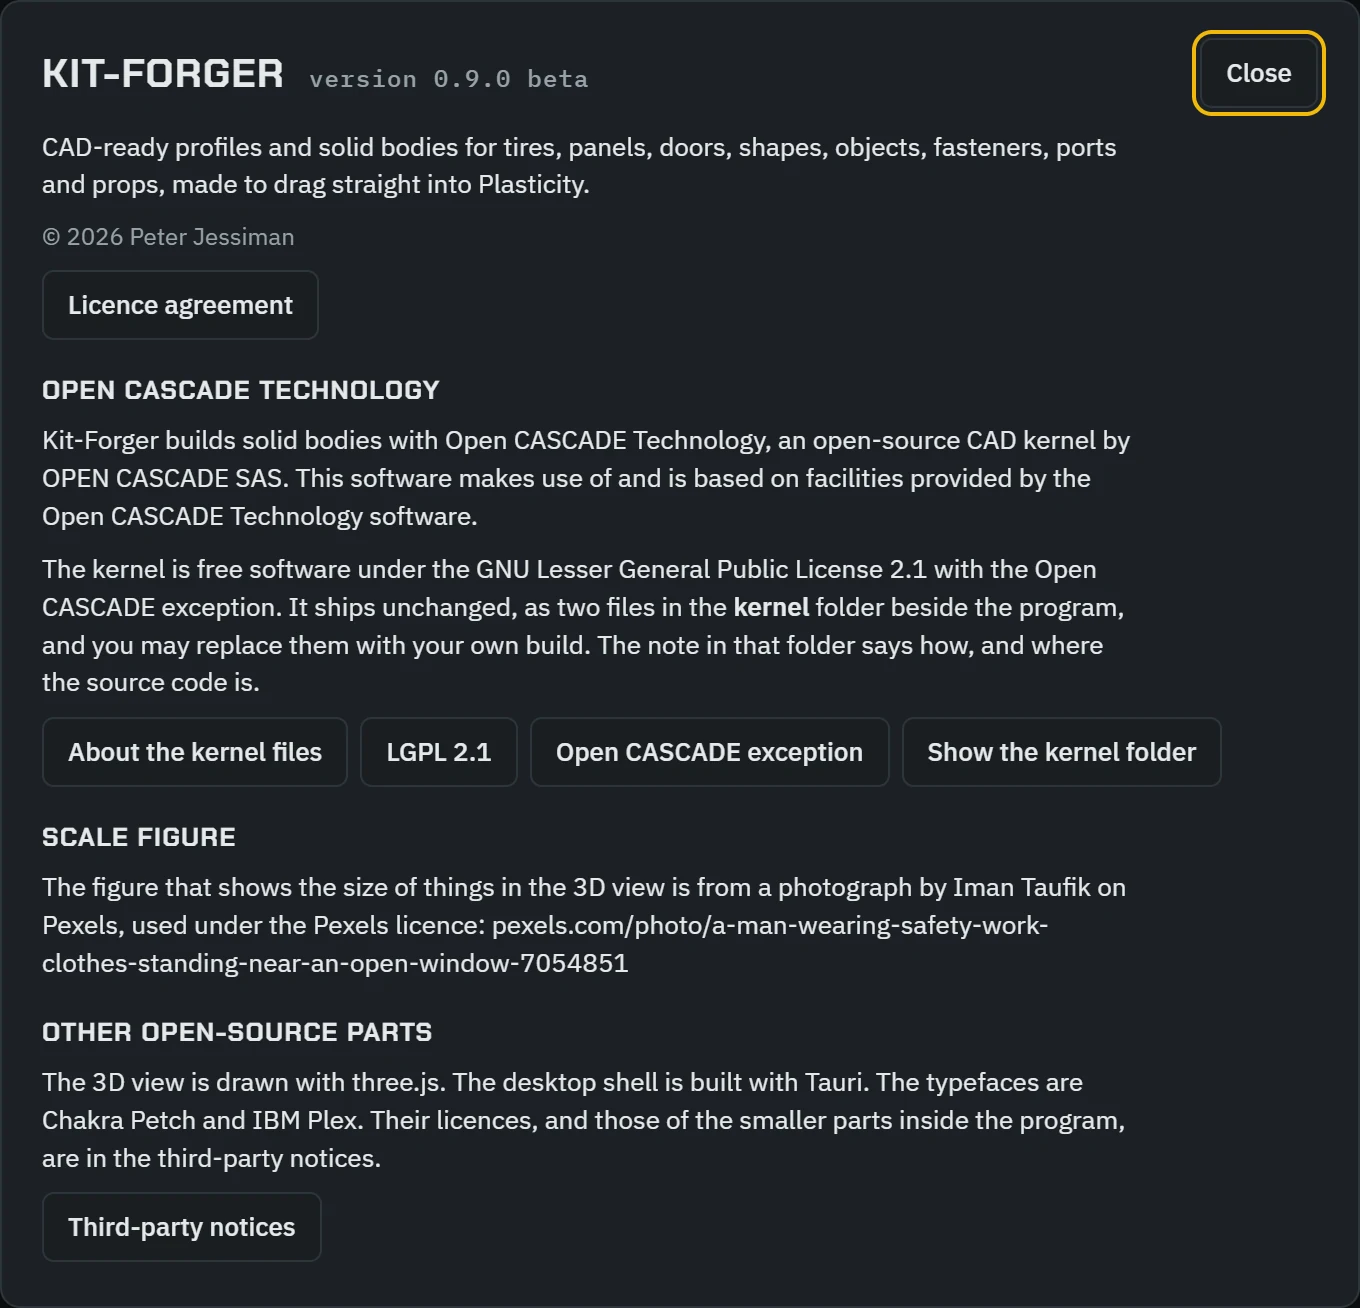
| About | Version, the licence agreement, and the open-source notices. |
| On top | Turn the window into a small panel that stays above Plasticity or any other program. See On top. |
Controls
The column on the left holds every setting of the current design, in groups that fold open and shut. Each number has a slider and a box to type into, and most have a padlock (see Locks). Settings that do not apply to the current choices are hidden. In Tires, when a value has to be limited to keep the shape valid, a note appears under its slider.
Export bar
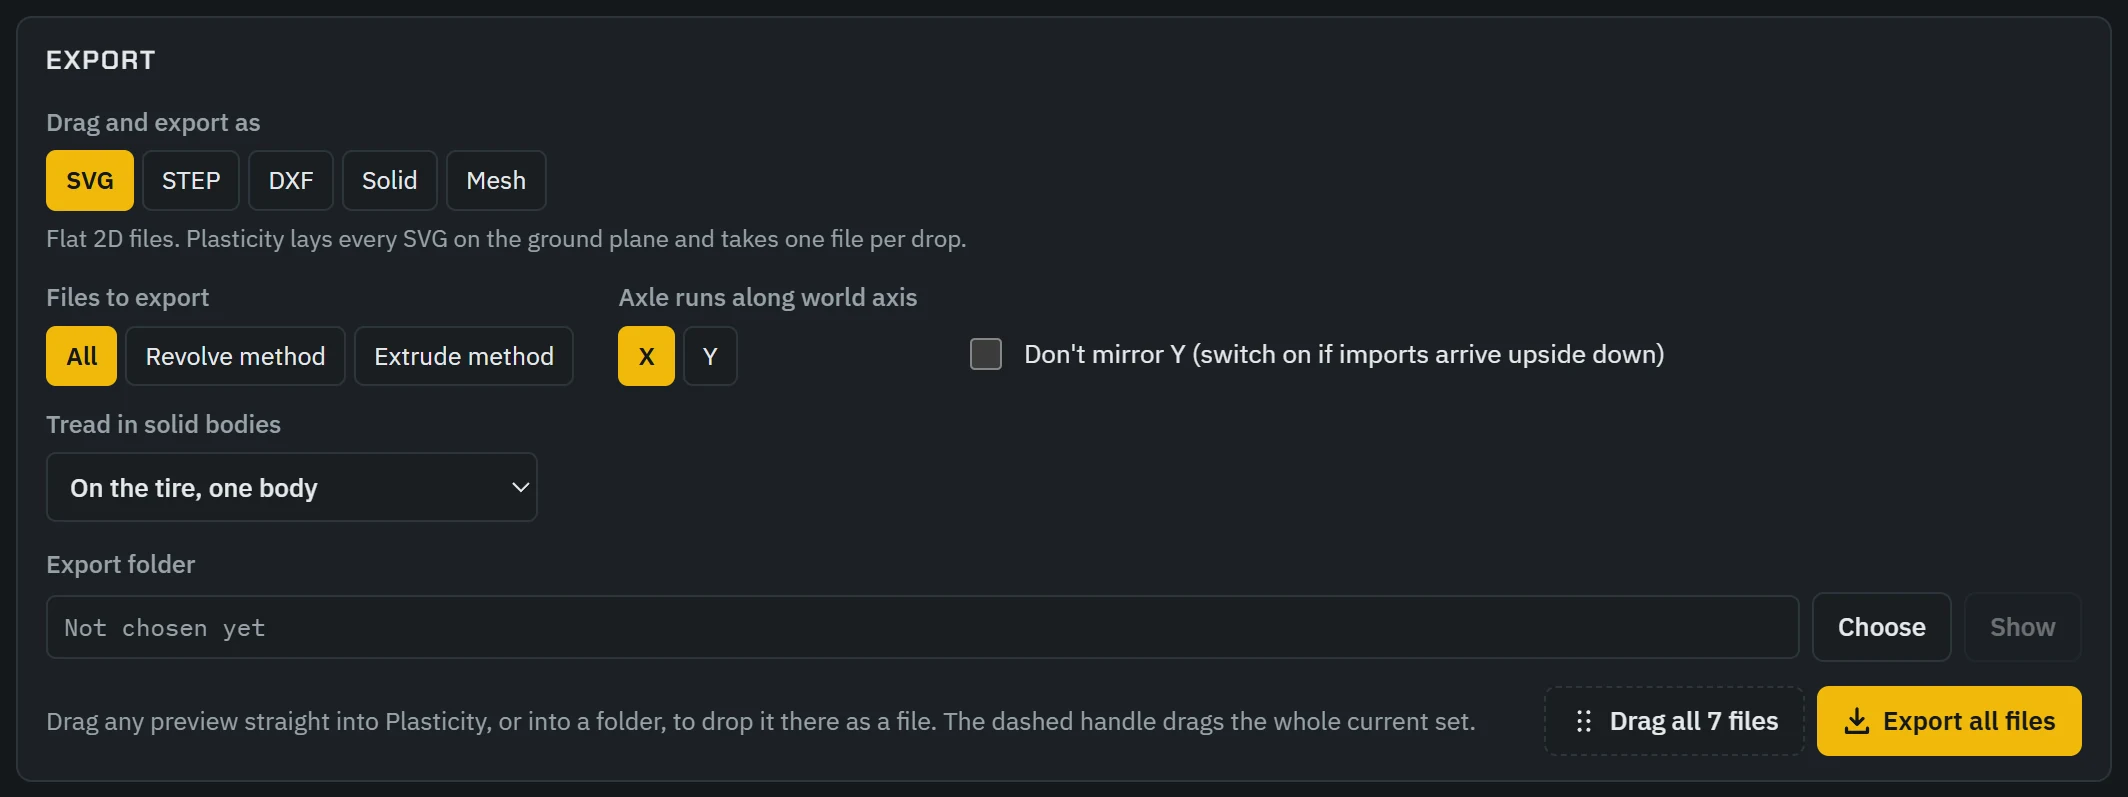
- Drag and export as picks the format for everything that leaves Kit-Forger: dragging, saving and exporting. The line under it describes the chosen format, and after a solid build it also tells you anything worth knowing about the result. In Props and Buildings only Solid and Mesh can be chosen.
- The export settings of the current mode or tab sit next to it.
- Export folder: Choose picks the folder exports go into; Show opens it.
- The dashed handle drags the whole current set. In the Solid format it first builds the bodies; a mesh is ready at once.
- The export button writes the current set into the export folder.
Thumbnails, sizes and previews
Under the export bar, a row of thumbnails loads a preset or one of your favourites with one click. Below it, a row of key sizes of the current design. Then the preview cards: each card is one file, with its name at the bottom, a Copy SVG button and a Save SVG button (it names the chosen format). A green line under a preview means the profile is clean; an orange one says what to look at. In Props and Buildings the 3D view sits under the export bar, above the thumbnails, and a list of parts takes the place of the preview cards (see Props).

Tires
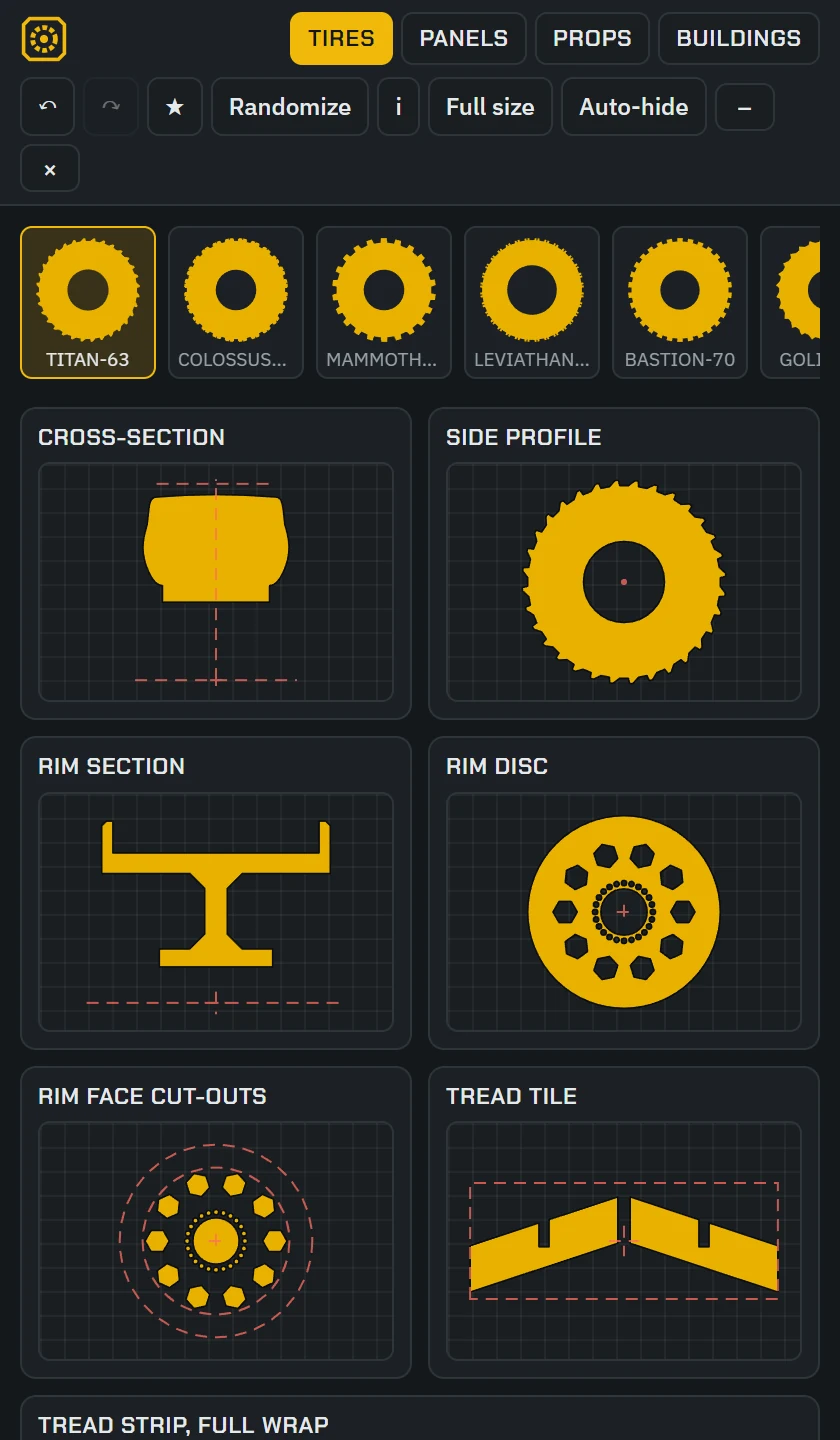
A tire design gives seven files that fit together: build the tire either by revolving its cross-section (the revolve method) or by extruding its side profile (the extrude method). A wire-spoke wheel gives up to three files more. Every file is drawn in world coordinates with 0,0 on the wheel centre, so the files line up with each other when imported. In the Mesh format the whole wheel leaves as one mesh instead (see Meshes).
The files
| Preview card | Label | Method | What to do with it |
|---|---|---|---|
| Cross-section | REVOLVE | Revolve | Revolve 360° about its red axis line (the axle). This is the tire body. |
| Side profile | EXTRUDE | Extrude | Extrude along the axle by the section width (the card says how far). A one-step tire with the lugs on its sides. |
| Rim section | REVOLVE | Revolve | Revolve on the same axis as the cross-section. This is the rim. |
| Rim disc | EXTRUDE | Extrude | Extrude to the wheel thickness you want. It fits the side profile's bore. |
| Rim face cut-outs | EXTRUDE-CUT | Revolve | Cut through the web of the revolved rim: spokes, windows and bolt holes. |
| Tread tile | PATTERN ×N | Revolve | One pitch of the tread. Emboss it once and repeat it N times around the tire (the label gives N). A continuous pattern is labelled CONTINUOUS. |
| Tread strip, full wrap | EMBOSS / WRAP | Revolve | The whole tread laid out flat, one wrap long. Wrap it around the crown and raise it by the tread depth. The card gives the wrap length, the raise, and how far to lift it to reach the crown. |
| Wire spokes | PIPE / SOLID | Both | Wire-spoke wheels only. In STEP and DXF, every spoke's centre line in 3D, ready to pipe. In SVG, a picture of the lacing. See Wire-spoke wheels. |
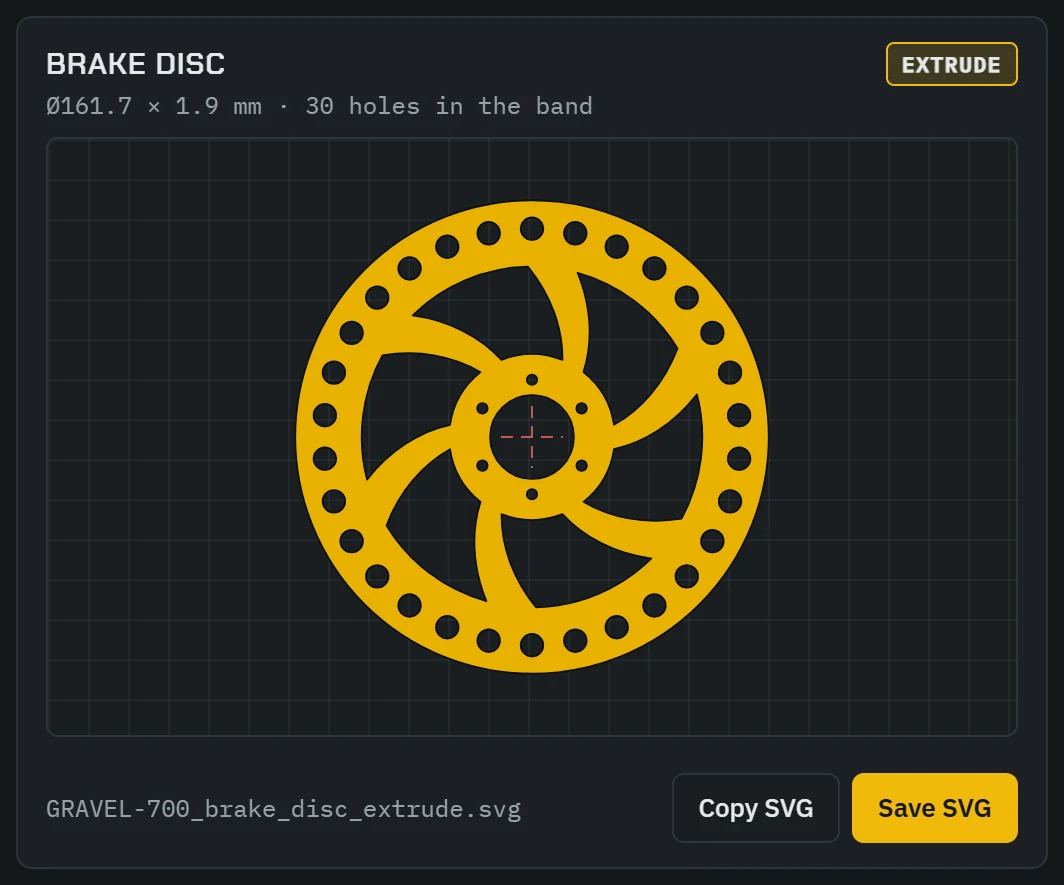
| Brake disc | EXTRUDE | Both | Wire-spoke wheels with a brake disc. Extrude it to the disc's thickness. |
| Chain sprocket or Cassette | EXTRUDE | Both | Wire-spoke wheels with a chain drive. Extrude each plate. |
Red dashed lines in a file are construction lines in their own group. Delete them after import if you do not need them.
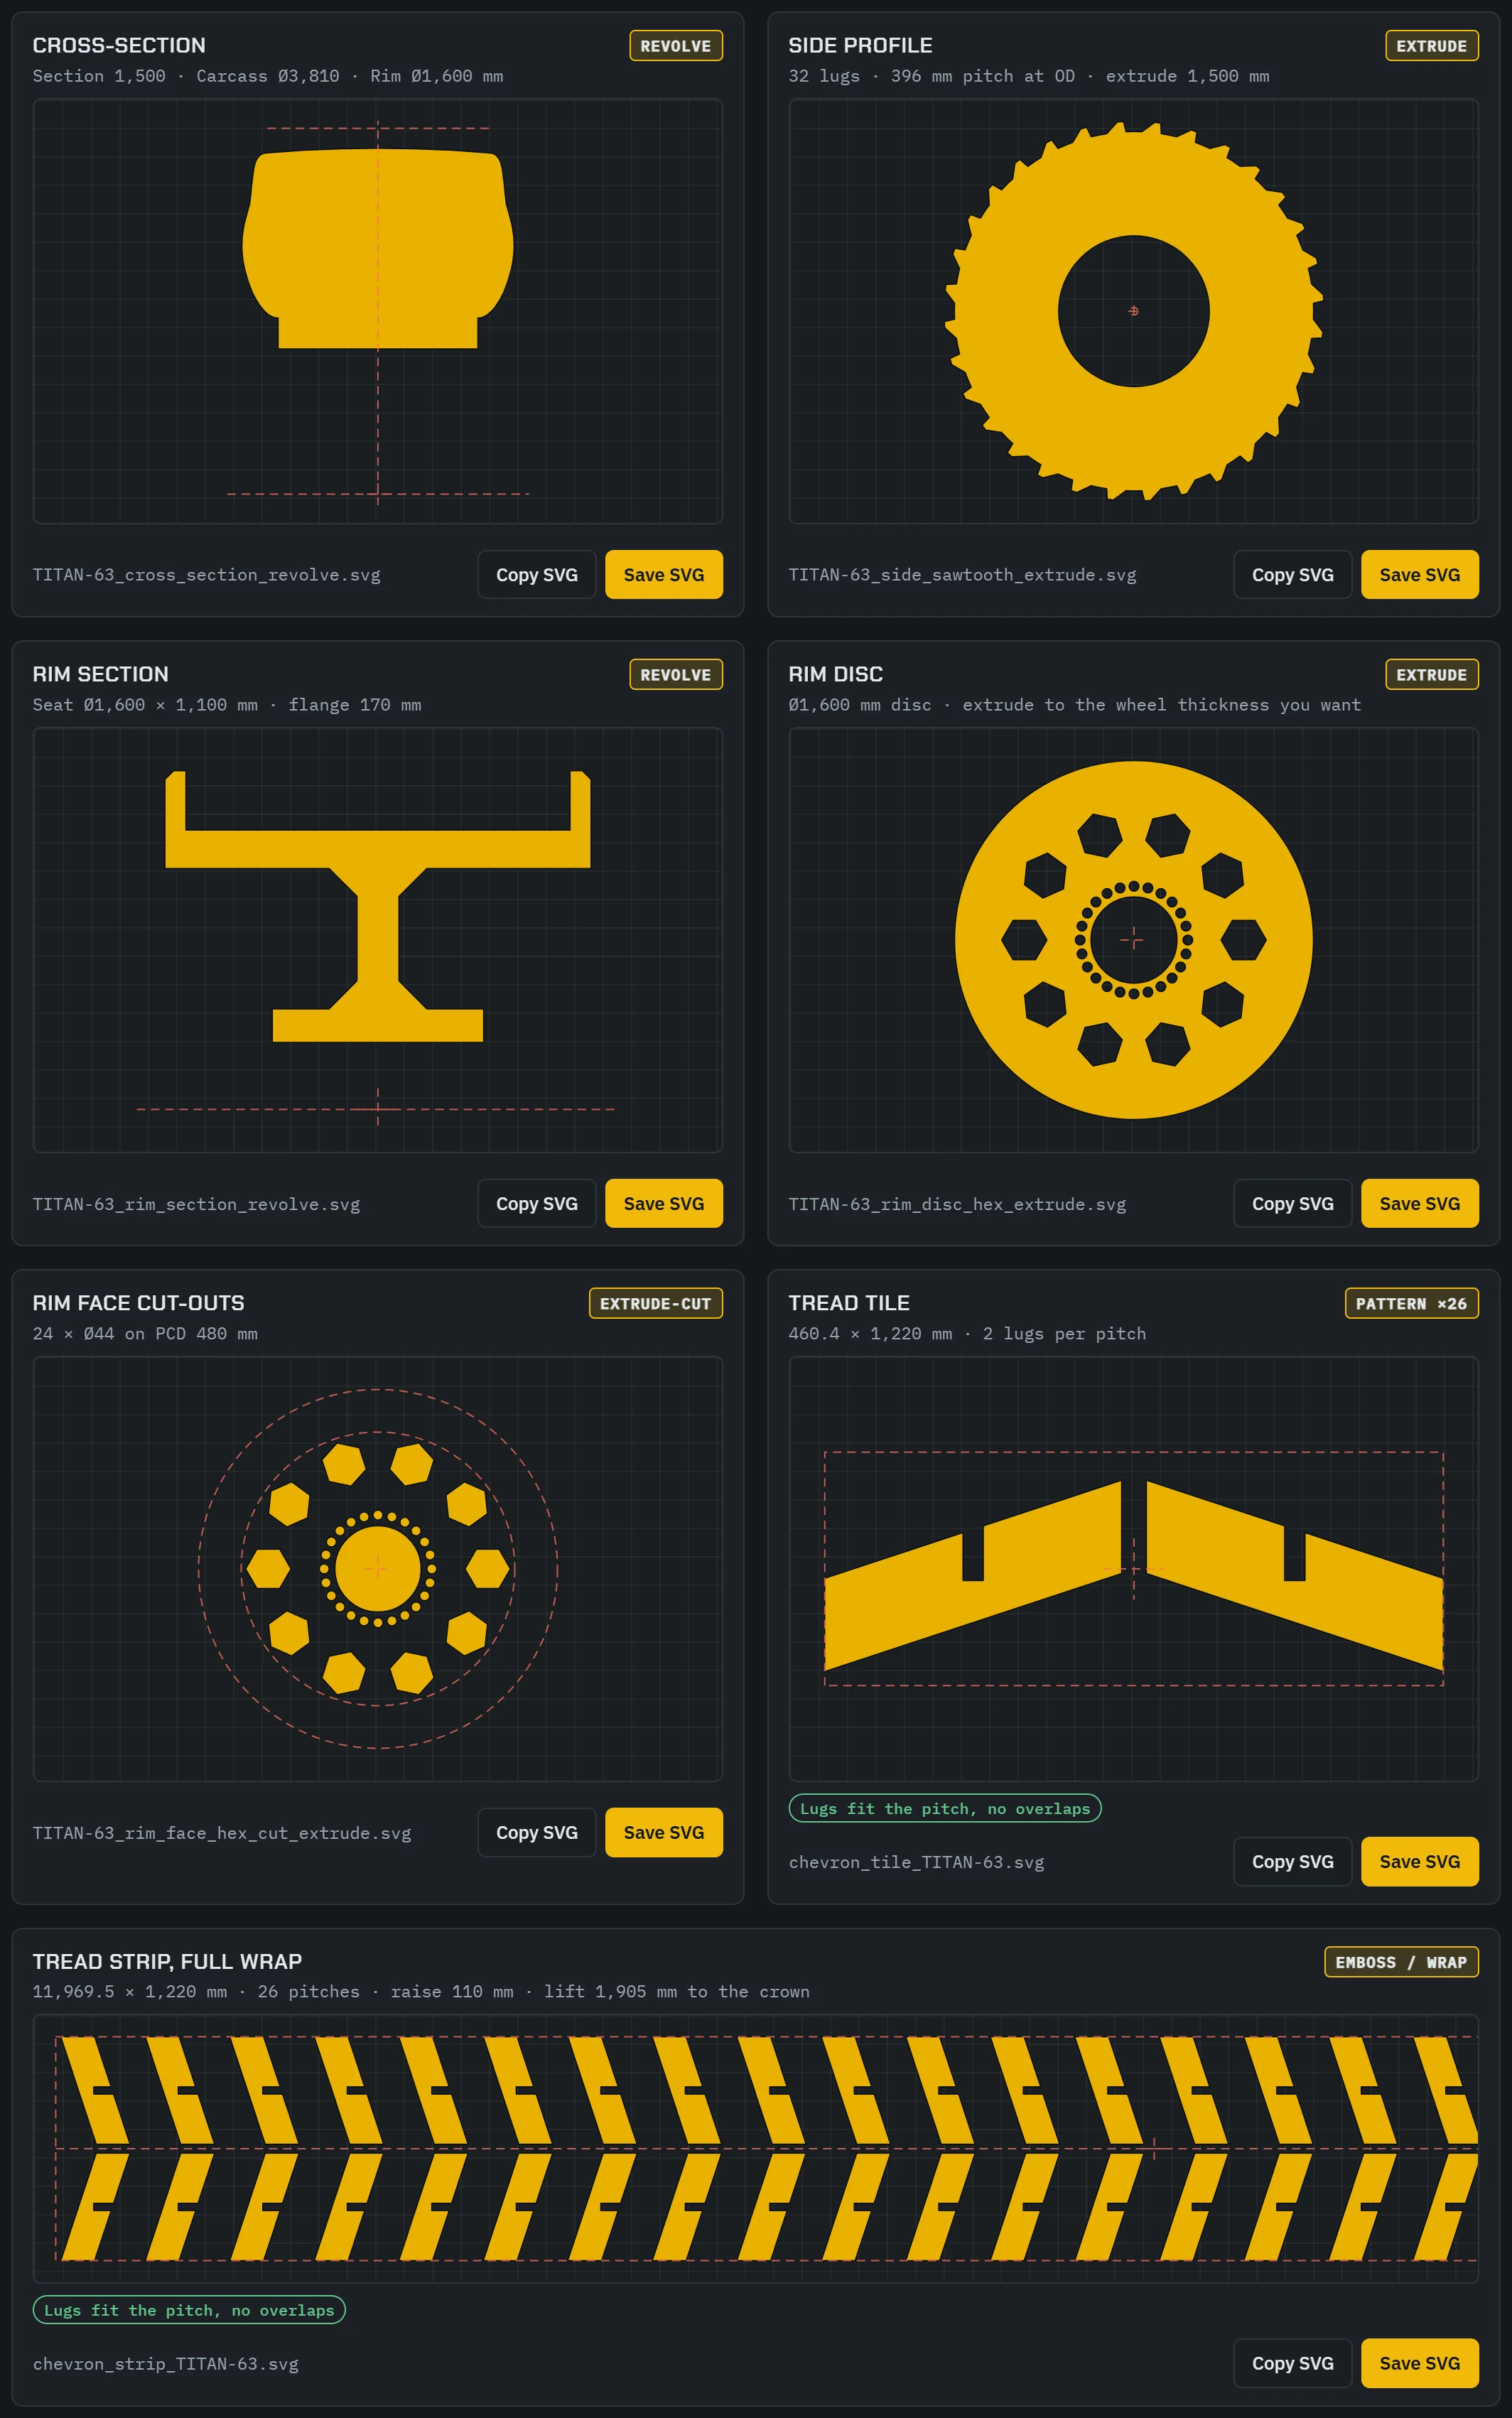
Export settings for tires
| Setting | What it does |
|---|---|
| Files to export | All, Revolve method (cross-section, rim section, rim face cut-outs, tread tile, tread strip) or Extrude method (side profile, rim disc). Only the chosen cards are shown, dragged and exported. |
| Axle runs along world axis | X or Y. |
| Don't mirror Y | Switch it on if SVG imports arrive upside down. It has no effect on STEP and DXF, which carry true 3D positions. |
| Tread in solid bodies | What becomes of the tread when solid bodies are built. See Tread in solid bodies. |
Controls
Four groups in the left column. Each group ends with a button that randomizes just that group (Randomize tire body, Randomize side profile and so on).

Tire body
- Start from: the preset the design is based on.
- Size class (rescales the tire): Micro (scooter, kart, robot), Bicycle (narrow tires on thin rims), Small (bike, car, 4x4), Medium (truck, tractor), Large (earthmover) or Mega (colossal). Changing it rescales the design, and the millimetre sliders change their range to suit. The Bicycle class has slider ranges of its own for the tire body, in bicycle sizes (width from 18 mm).
- Name (used in file names).
- Shoulder: Round, Chamfer, Armor step, Facet or Square.
- Sizes in mm: Outside diameter, Rim seat diameter, Section width, Tread width, Tread depth, Bead seat width, Rim flange height, Crown bulge.
- Under the sliders Kit-Forger shows sizes that follow from them: carcass diameter, sidewall height, aspect ratio and wrap length.
Side profile
- Lug style: Paddle, Sawtooth, Armor, Twin bar, Round, Castle or Fang.
- Lugs around (8 to 80), Lug width and Lug lean (both in % of the pitch).
- Airless web (cut-out windows): cuts windows through the sidewall, with Web windows, Window sweep and Spoke width.
Tread pattern
- Pattern: one of 28, in five groups (listed below).
- Repeats per revolution (8 to 120).
- Rows across the tread (1 to 8), for the patterns built in rows.
- Lug size, Sweep / lean (for patterns that lean), Slot / sipe width.
- Sipes, slots and cell holes and Flip rolling direction.
Under the tread tile and strip a line says whether the lugs fit the pitch without overlapping.
Rim
- Wheel face: Straight spokes, Twin spokes, Turbine blades, Sector windows, Radial slots, Star (inward points), Triangles (outward points), Hex pockets, Round holes, Mesh (two hole rows), Solid disc or Wire spokes (laced).
- Spokes / cut-outs (3 to 24), Opening size, and Sweep for turbine blades, sector windows and radial slots.
- Hub size, Axle bore, Bolt holes (3 to 48), Bolt hole diameter, Bolt circle.
- Web offset (dish) and Drop-centre well.
- With Wire spokes (laced) chosen, the settings that only a disc wheel has hide, and the wire wheel's own settings appear. See Wire-spoke wheels.
Wire-spoke wheels
A wire wheel is laced the way bicycle and motorbike wheels are: a hoop, a hub with two flanges, and spokes that run in turn to the near and the far flange, leading and trailing, passing each other on the way. Each spoke can have a bent head at the hub and a nipple at the hoop.
- In the Rim group, set Wheel face to Wire spokes (laced). Or load a preset that has one: SCRAMBLER-19, CHOPPER-21, ENDURO-18, CAFE-18, SUPERMOTO-17, PRAM-12 or any of the Bicycles.
- Set the lacing: Spokes (12 to 72, in fours) and Crossings (0 = radial), from 0 for a radial wheel to 4.
- Choose Solid and build, or drag the Wire spokes card as STEP for the spoke centre lines.
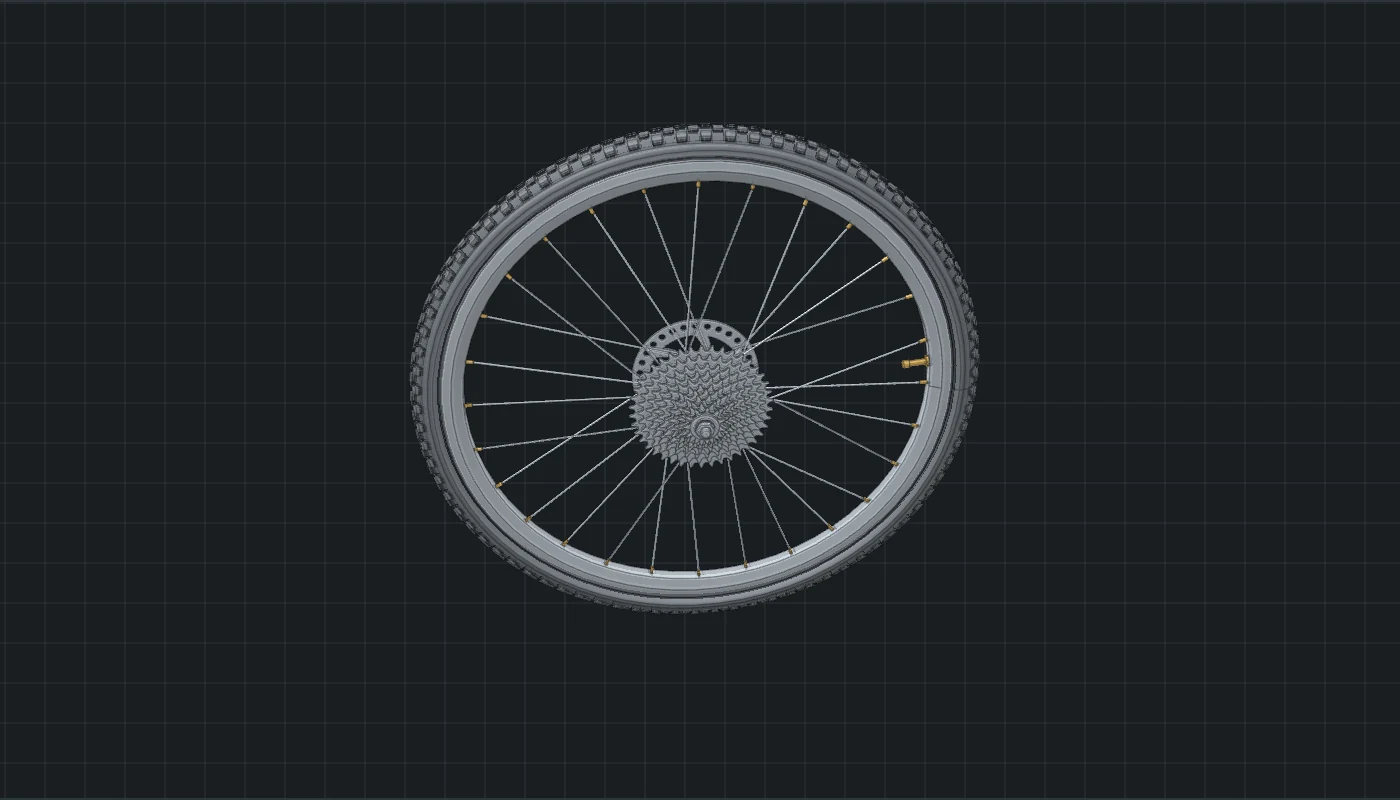
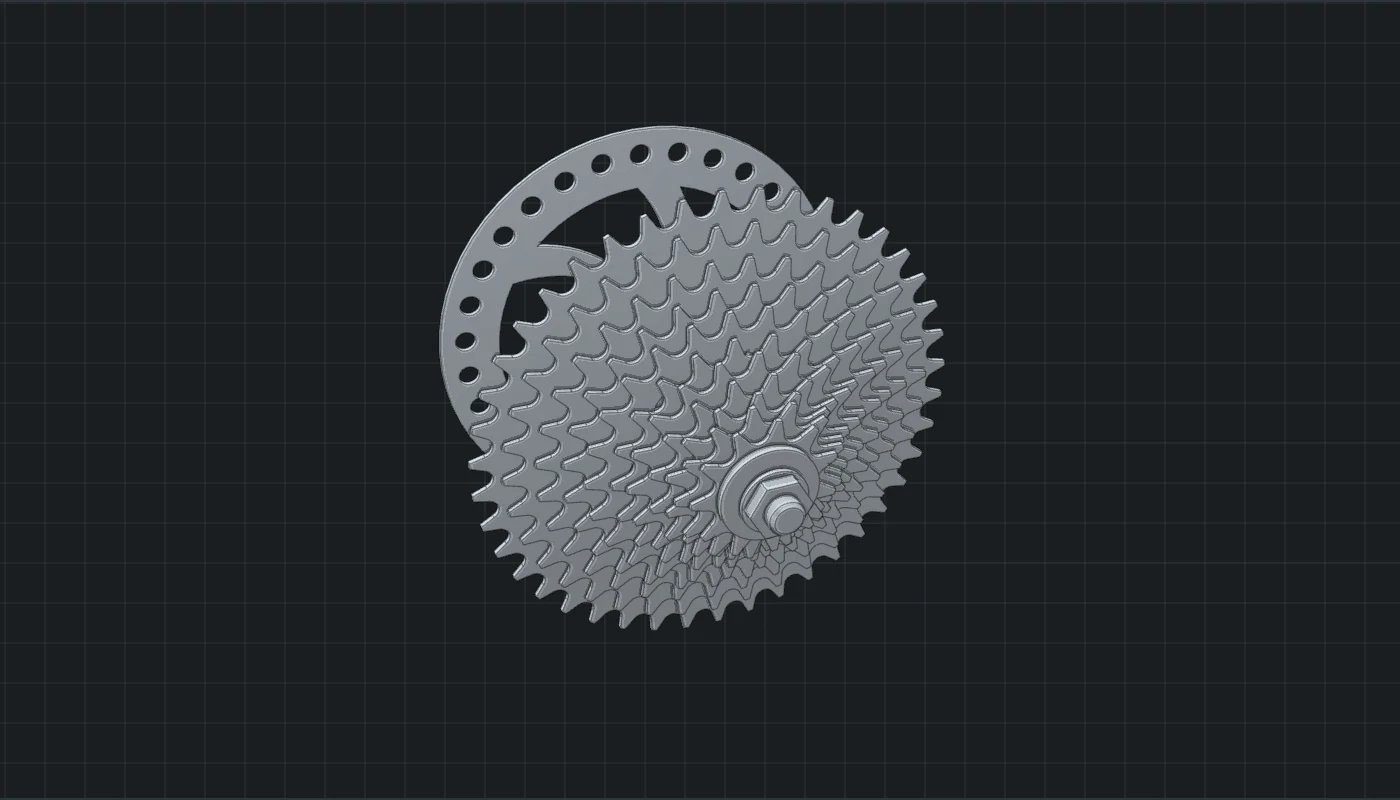
Wire wheel settings
They sit in the Rim group and show only for a wire wheel.
- Spokes, Crossings (0 = radial), Spoke thickness.
- Hub flange size, Hub barrel and Flange spacing (up to 600% of the seat width: a bicycle hub is far wider than its rim).
- Nipples at the rim and Bent spoke heads at the hub. Without bent heads the spokes are plain straight bars and the hub has no holes: quicker to build, and a lighter file.
- Hoop section: Box section, V section or Deep aero. Hoop depth (0 = standard) and Hoop wall (0 = standard) in mm; the standard size follows the rim diameter and is far too heavy for a bicycle.
- Valve: a hole through the hoop between two spokes, and a stem with nut and cap.
- Hub: Plain barrel, Bicycle hub (waisted between the flanges) or Drum with fins.
- Axle with nuts: an axle through the bore with a washer and a hexagon nut on each end.
- Brake disc (left) with Brake disc size: a drilled disc on swept arms, bolted to a flange the hub grows for it.
- Chain drive (right): Nothing, Chain sprocket or Cassette (bicycle). Sprocket teeth (largest) sets the teeth; Sprockets in the cassette (2 to 13) runs from that size down to 11 teeth.
Axle bore, Web offset (dish) (it shifts the hub sideways) and Drop-centre well apply to a wire wheel too. A value that cannot be built is limited, with a sentence under its slider.
The wire wheel's files
Spokes that cross in depth cannot be drawn flat, so the Wire spokes card gives something different in each format:
- SVG: the lacing seen along the axle, each spoke a flat bar. A picture of the pattern, not something to build from.
- STEP and DXF: every spoke's centre line in 3D, where it runs in the wheel, to pipe in your CAD program.
- Solid: finished spokes, with the hoop, hub and nipples as bodies of their own (see Solid bodies).
The rim section holds the hoop and the hub to revolve; the rim face holds one flange's spoke holes. The Brake disc and Chain sprocket or Cassette cards are flat profiles to extrude. In SVG they lie flat; in STEP and DXF they stand where they sit on the hub.
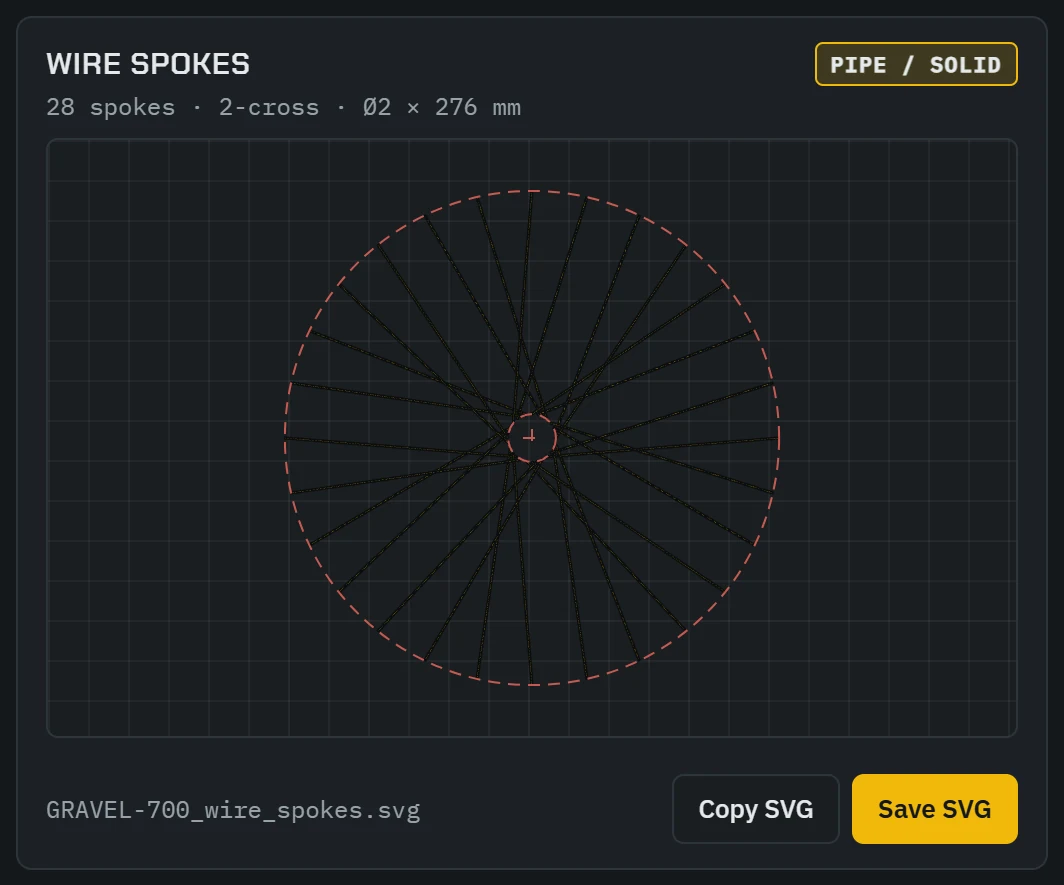

Bicycles
A bicycle tire is far narrower for its diameter than the other size classes reach. Choose the size class Bicycle: narrow tires on thin rims, or a preset from the Bicycles group. In this class Randomize all draws bicycles: a real bead seat size, a tire from 23 to 100 mm wide, and a wire wheel with bicycle parts. Locked values stay.
- The hoop has no spoke holes: the nipples (or the spoke ends) stop exactly on its underside. From outside the wheel looks the same.
- Spokes are straight from hub to hoop and pass each other with a small gap where a real wheel's would touch. Both sides are laced alike.
- Sprocket teeth are a simple round-seat shape, not a standard tooth form. The sprockets of a cassette are flat plates.
- The hub's flange for the disc or sprocket has no bolt holes; the disc and sprocket plates have them.
- A cassette adds about ten seconds to a build and about 4 MB to the STEP file.
- No chain, brake caliper or quick-release lever.
Presets
38 presets in five groups. Loading one keeps your export settings and locks.
| Earthmover | TITAN-63, COLOSSUS-80, MAMMOTH-L5, LEVIATHAN-W, BASTION-70, GOLIATH-X |
|---|---|
| Everyday vehicles | SCOOTER-10, KART-11, MOTO-17, SCRAMBLER-19, CHOPPER-21, ENDURO-18, CAFE-18, SUPERMOTO-17, ROADSTER-18, TRAIL-35, MUDDER-37, HAULER-22, AGRI-38 |
| Bicycles | ROAD-700, GRAVEL-700, MTB-29, BMX-20, TRACK-700, FATBIKE-26, CRUISER-26 |
| Carts and trolleys | HANDTRUCK-10, BARROW-16, PRAM-12, TROLLEY-125, SKATE-70 |
| Sci-fi | ROVER-M, CRAWLER-9, CYBERCYCLE-26, RAPTOR-45, HELIX-55, ORBITAL-48, TITANOMACH-200 |
For a castor, a rail wheel, a pulley or a gear, see Castors & wheels in Props.
Tread patterns
28 patterns, grouped in the Pattern menu as they are here.
Classic
- Chevron (directional)
- Arrow segment (directional)
- Wide lug L5
- Straight bar
- Rock block with sipes
- Hex cell
- Claw (curved, directional)
- Zigzag bar
- S-wave lug
- Staggered brick / all-terrain
- Shark-tooth triangles
- Diamond flotation
- Street ribs (continuous)
- Knobby (motocross)
- Tractor bar (ag)
- Tech plate (sci-fi)
Interlocking
- Z-block (mud terrain)
- Puzzle block (tab and notch)
- Plus-lock (crosses)
Overlapping lugs
- Overlapping bars (trials)
- Enduro paddle (curved)
- Hook lug (loader)
Road and street
- Slanted road blocks
- Sport slick with swept grooves
- Asymmetric road
Sci-fi and odd
- Track pads
- Rover grousers with studs
- Circuit traces
Interlocking and overlapping lugs reach into each other's space across the tread. No lug crosses from one pitch into the next: each fits inside its own pitch, which is what lets the tread be built as solids. Sport slick with swept grooves is a continuous pattern, like the street ribs.
Panels & parts
Click Panels & parts in the header. Six tabs appear under it, each its own generator with its own controls, presets and favourites.

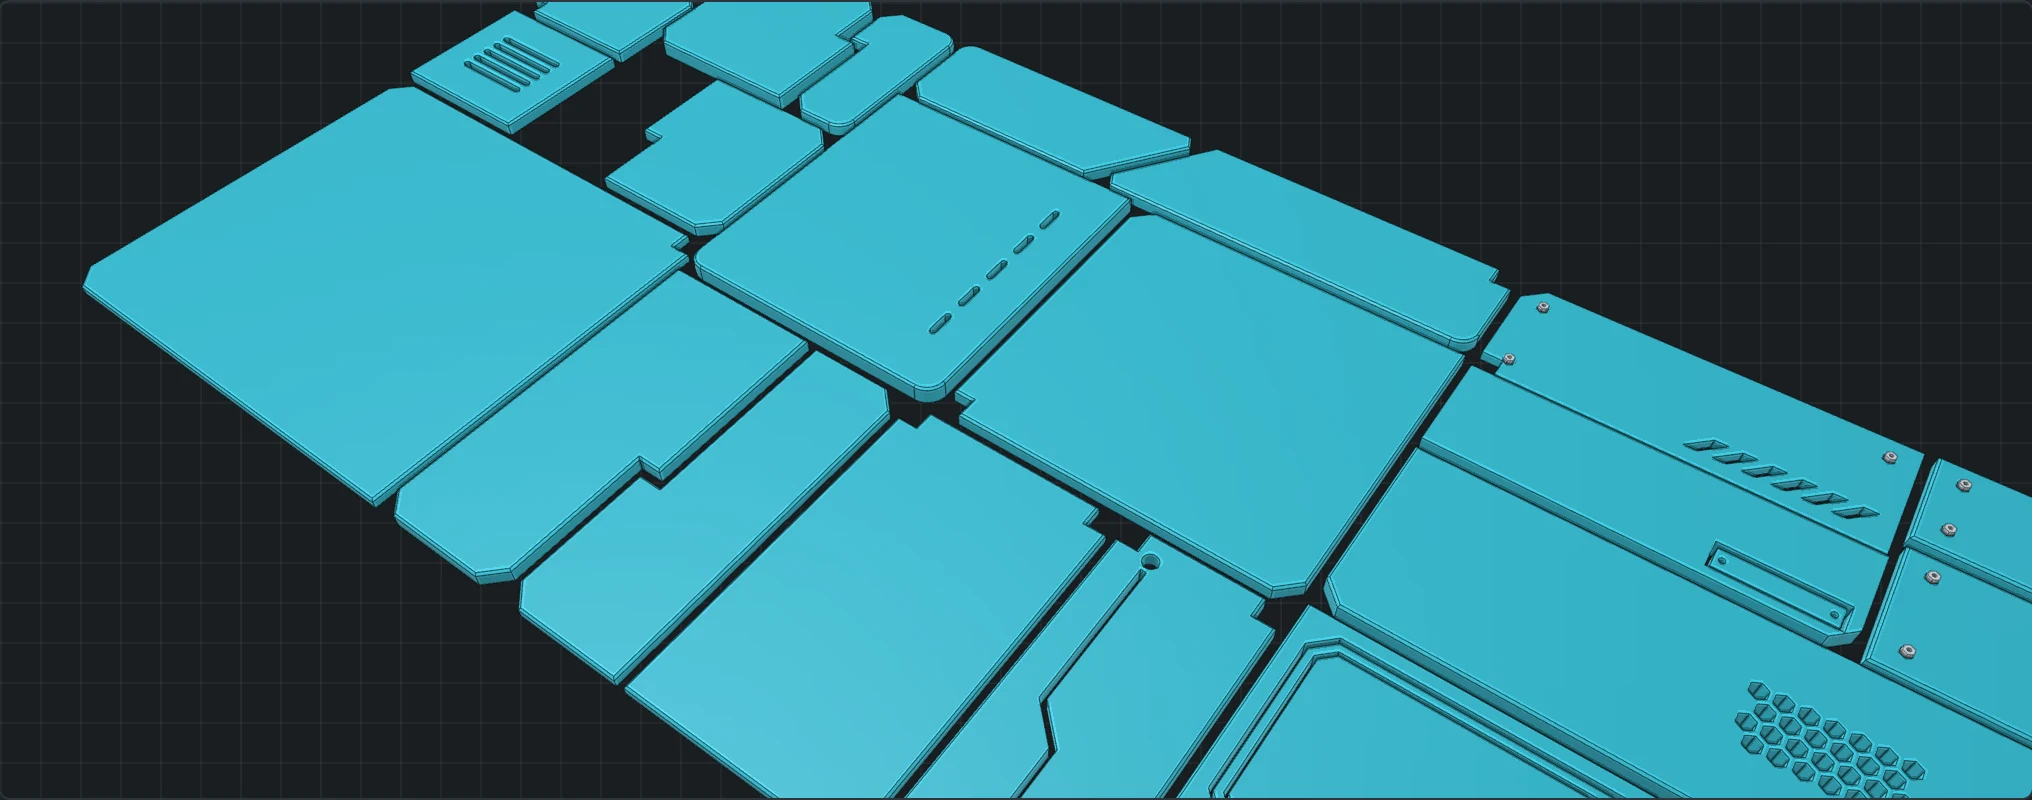
Every blue shape is a closed profile, and cut-outs inside a shape are holes. Every file is drawn in world coordinates; the red cross marks 0,0. In the Mesh format each tab's design leaves as a mesh instead (see Meshes).
Panel lines
A sheet of hull panels with seams, corners, insets and rivets. The gaps between the panels are the panel lines: emboss or raise the panels onto your surface, or project the sheet and cut the gaps.

- Sheet: Design style / preset, Seamless square tile (repeats in X and Y), Preview as a 2 × 2 repeat, sheet size, edge margin, Layout seed and New random layout.
- Layout: Grid (rectangles), Diagonal (the grid turned by Angle), Arc (curved seams) (bent by Bend), Radial (rings round a centre) or Hexagons. Insets and fasteners follow the layout. The seamless square tile is always a grid.
- Subdivision: how many times the sheet is split, the smallest panel, and how regular the split is.
- Seams: seam gap, jogged and diagonal seams, missing panels.
- Corners: corner size and the mix of chamfered, rounded, notched and scalloped corners.
- Insets: how many panels get an inset, and the mix of 16 kinds: louver vents, access hatches, double-line frames, round ports, hex grilles, dash rows, hazard stripes, circuit traces, grab recesses, label plates, gauge dials, gears, pressed ribs, speed lines, light strips and capsule windows.
- More insets: eight more kinds, each with its own mix: Latches, Slanted louvers, Warning triangles, Cable covers, Keypads, Displays, Chevron arrows and Perforated patches. They start at 0.
- Rivets: how many panels get rivets, their size and inset, and the Rivet layout: Corners, Along the edges, Double row, Two long sides, Round the inset, or Corners and mid-sides.
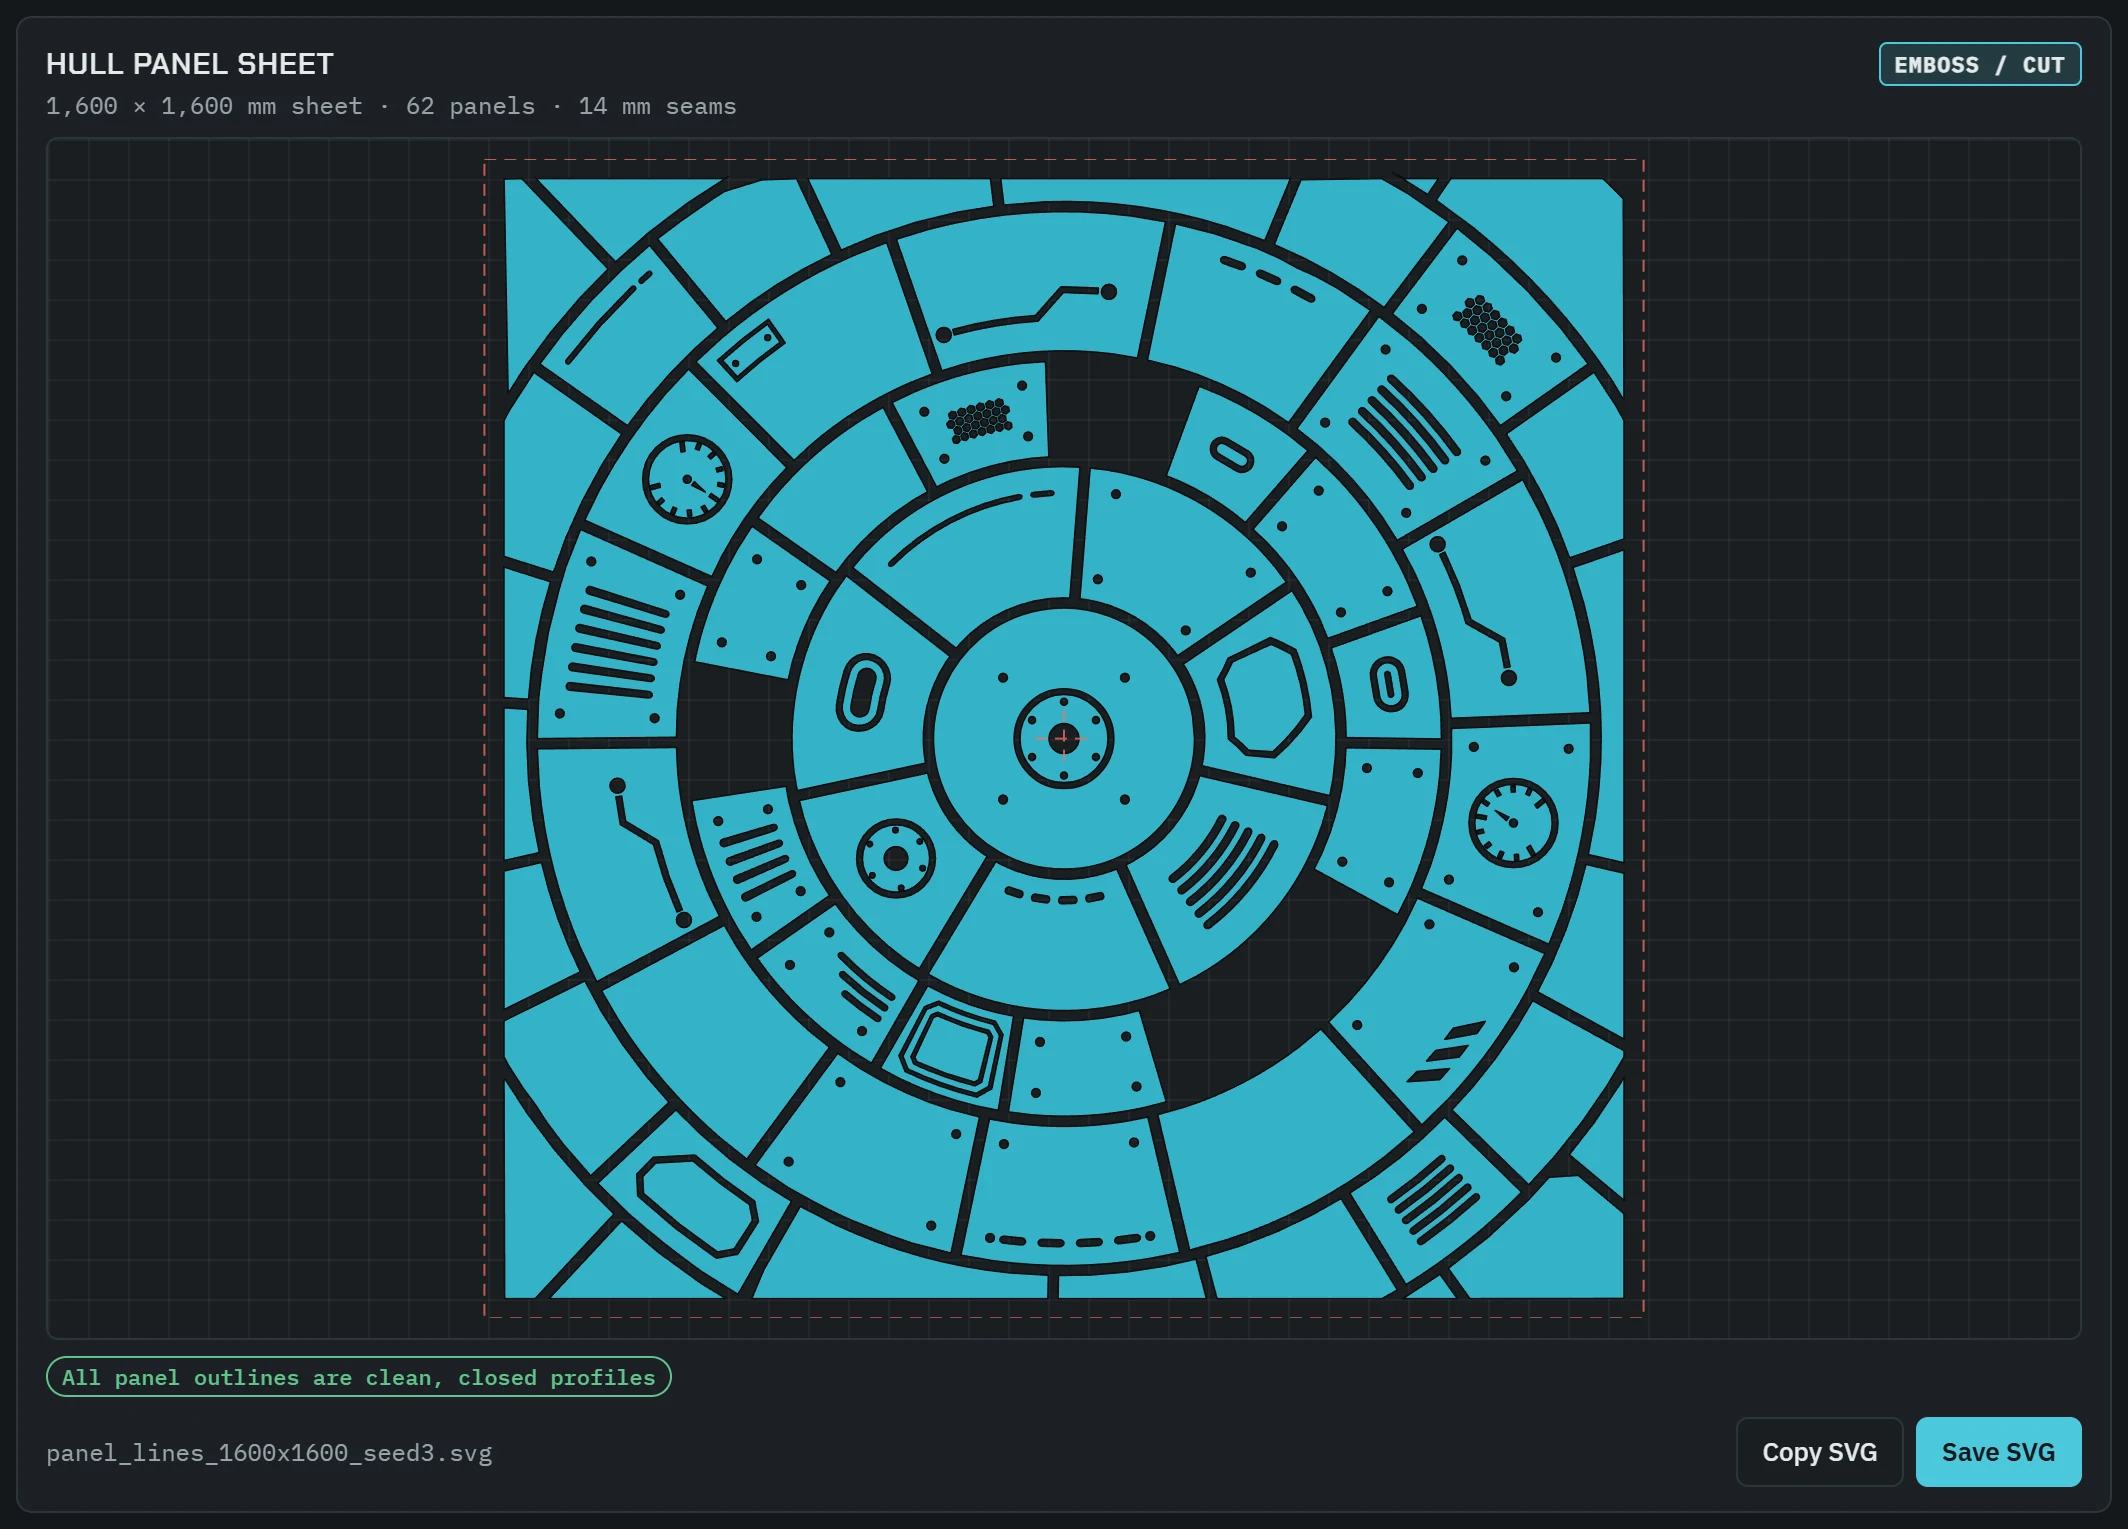
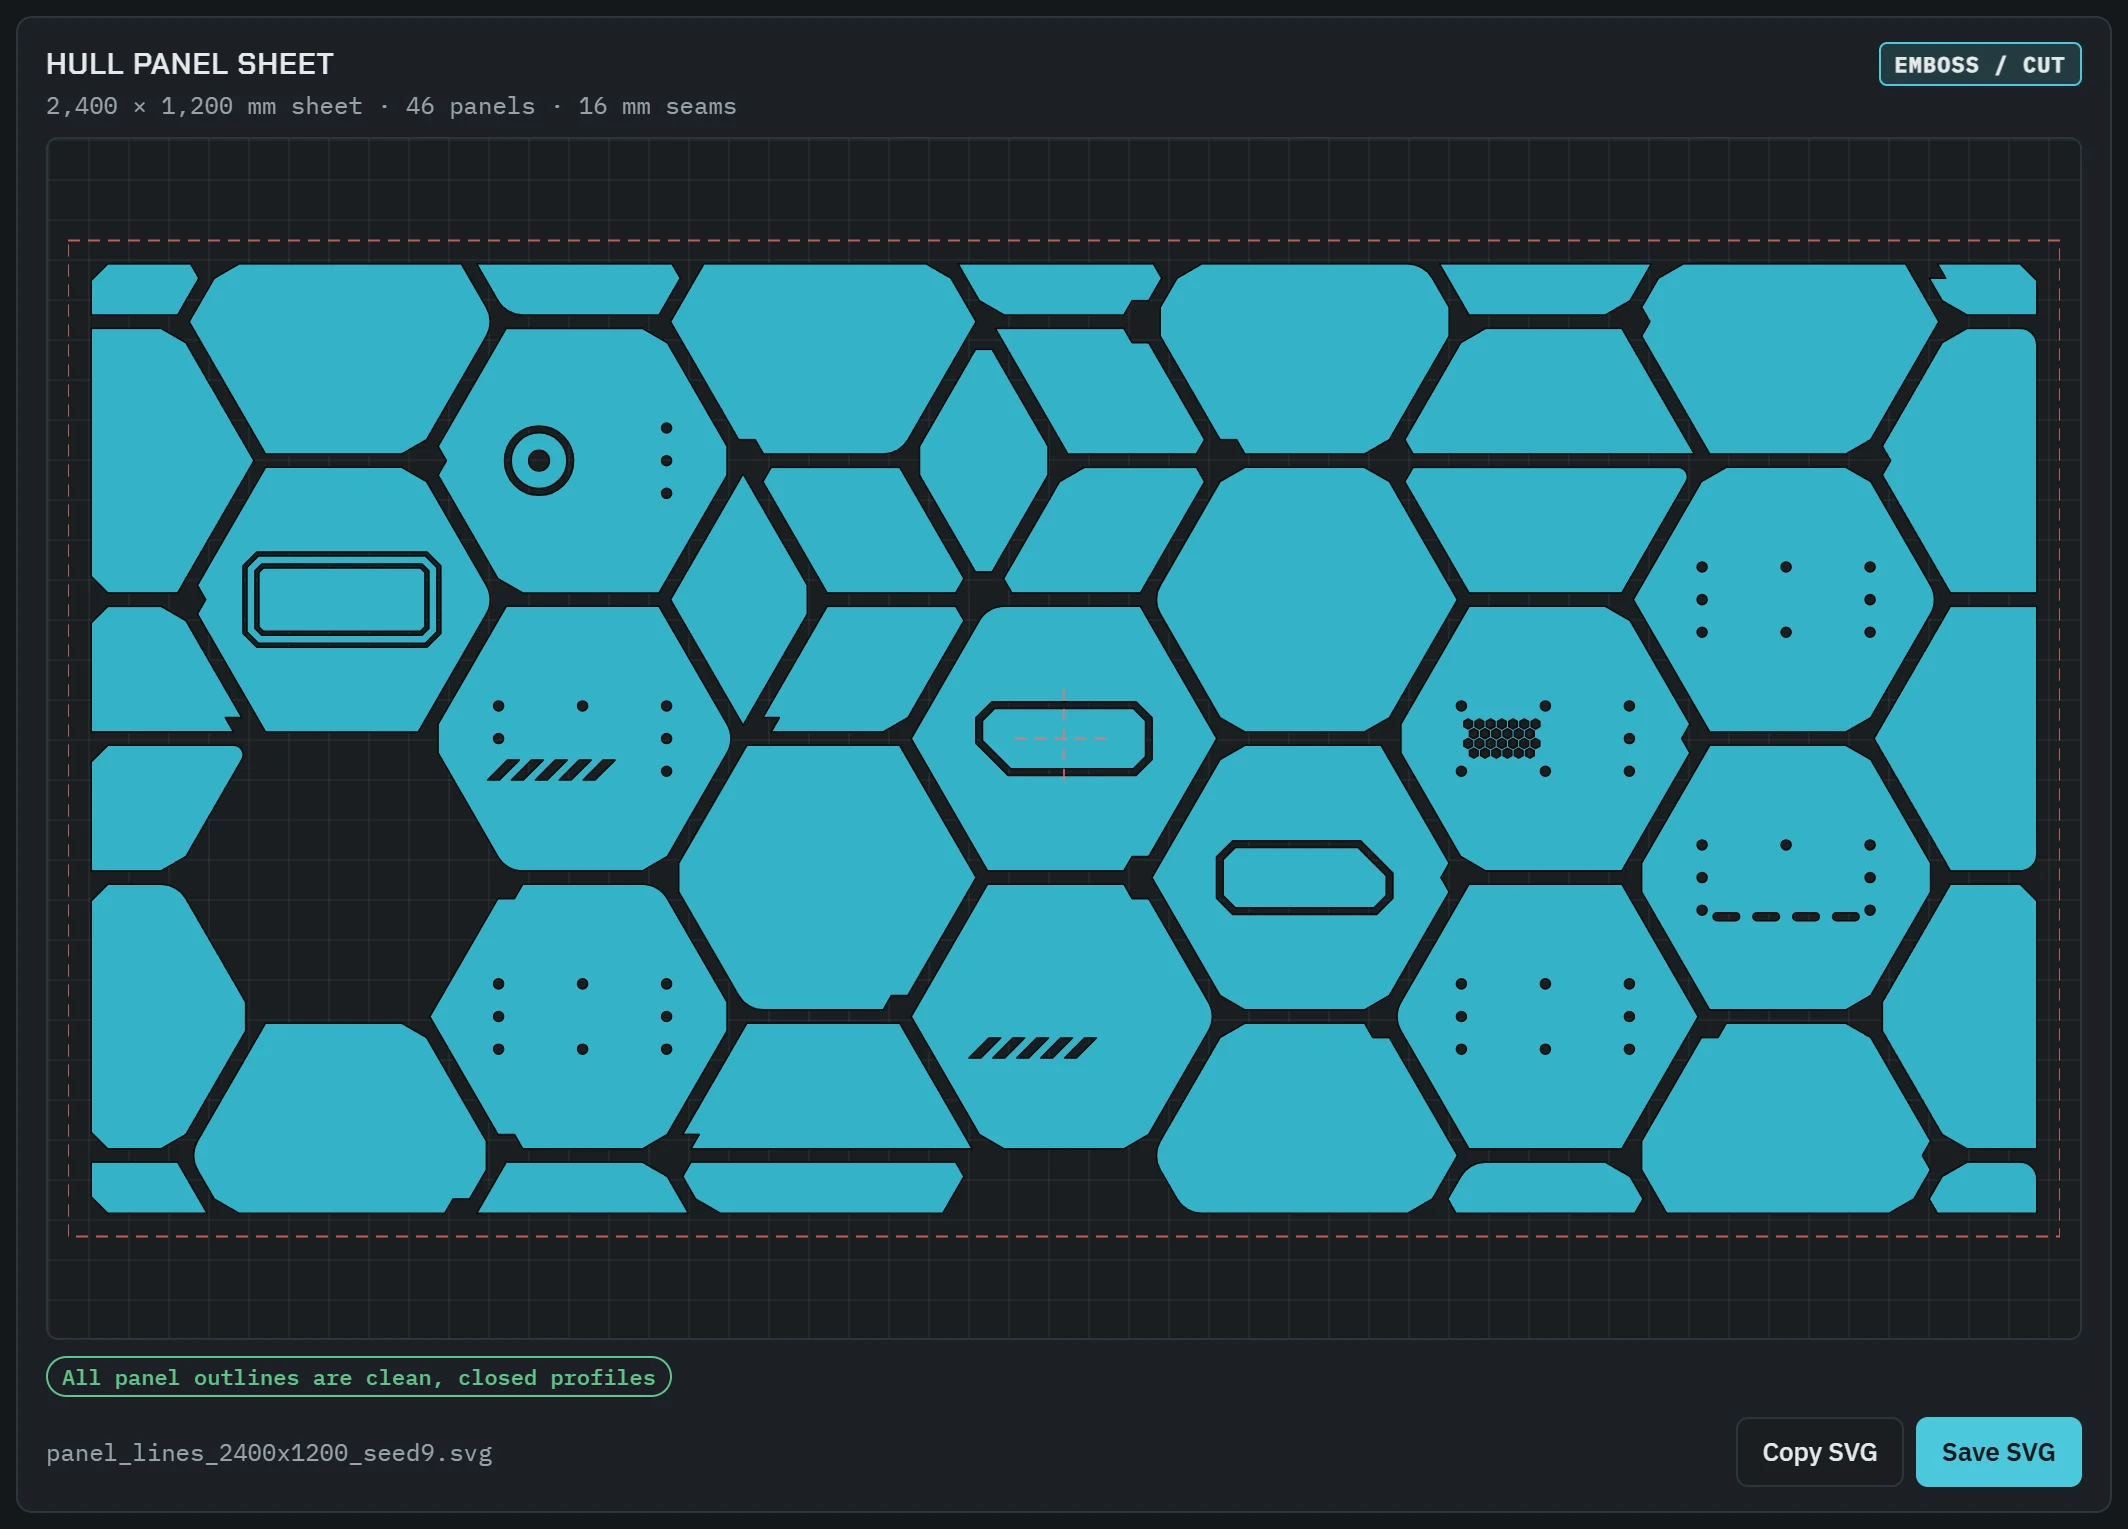
Presets (20): Hull plating, Style: Sleek, Style: Utilitarian, Style: Futuristic, Style: Retro-future, Style: Steampunk, Style: Dieselpunk, Industrial future, Cyberpunk circuit, Dense greebles, Armor slabs, Rounded tech, Clean grid, Corridor wall, Square tile: deck plate, Diagonal plating, Curved hull, Radial hatch, Hex armour, Service bay.
Doors & windows
A door or window: frame, leaves and the details on them. Extrude the frame and each leaf separately so they can slide apart.
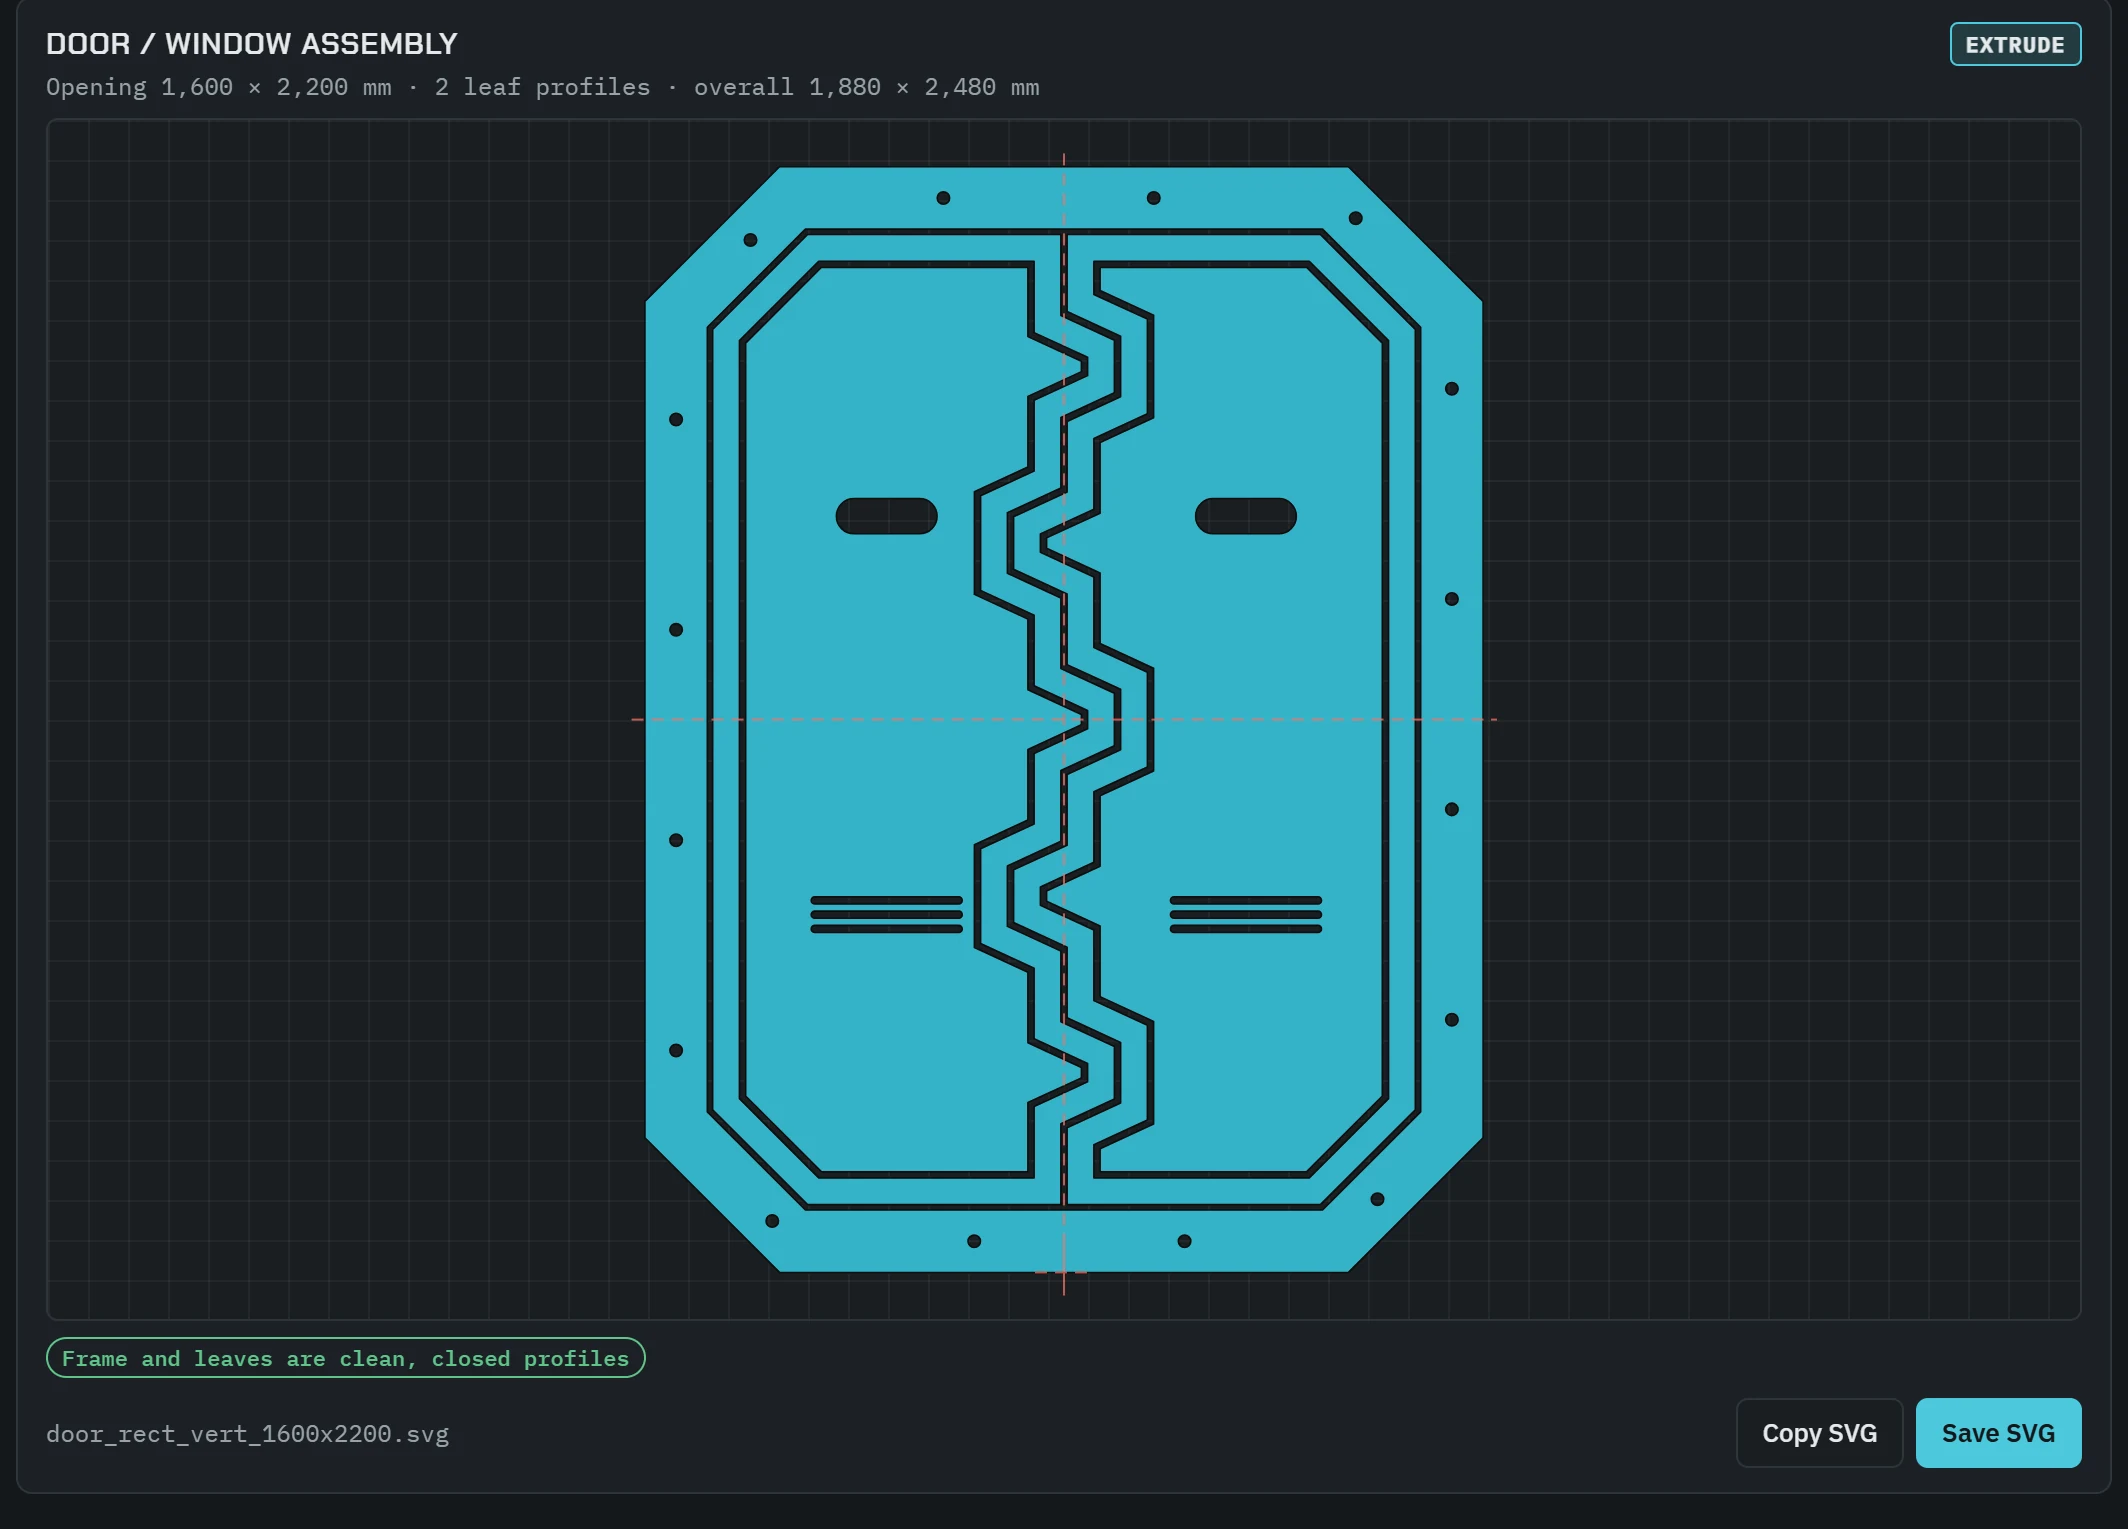
- Opening: shape (Rectangle, Arch top, Hexagon, Round / oval, Trapezoid, Keystone, Slanted, Capsule), size and corners.
- Frame: Include frame, frame width, leaf clearance, frame bolts.
- Leaves and seam: Split into a single leaf, two leaves (vertical, horizontal or diagonal seam), four leaves in a cross, a grid of panes, or iris blades; seam gap and Interlock teeth.
- Leaf details: inset grooves, a window (slot, round, hex or diamond), vent slots.
Presets (16): Blast door, Sleek slider, Retro pod door, Steampunk vault, Dieselpunk bulkhead, Iris hatch, Airlock, Hangar gate, Hex pod door, Vault cross, Window: viewport, Window: cockpit, Window: porthole, Window: slit, Slant bulkhead, Arch gate.
Shapes
Single sci-fi shapes to extrude or cut. The row of thumbnails shows the eight shape types instead of presets.

- Tech plate (cut corner, insets)
- Hazard stripe bar
- Perforated vent plate
- Louver vent
- Access hatch
- Notched tech frame
- Chevron markings
- Segmented reactor ring
The Shape group sets size and corners; the Details group shows the settings of the chosen type.
Objects
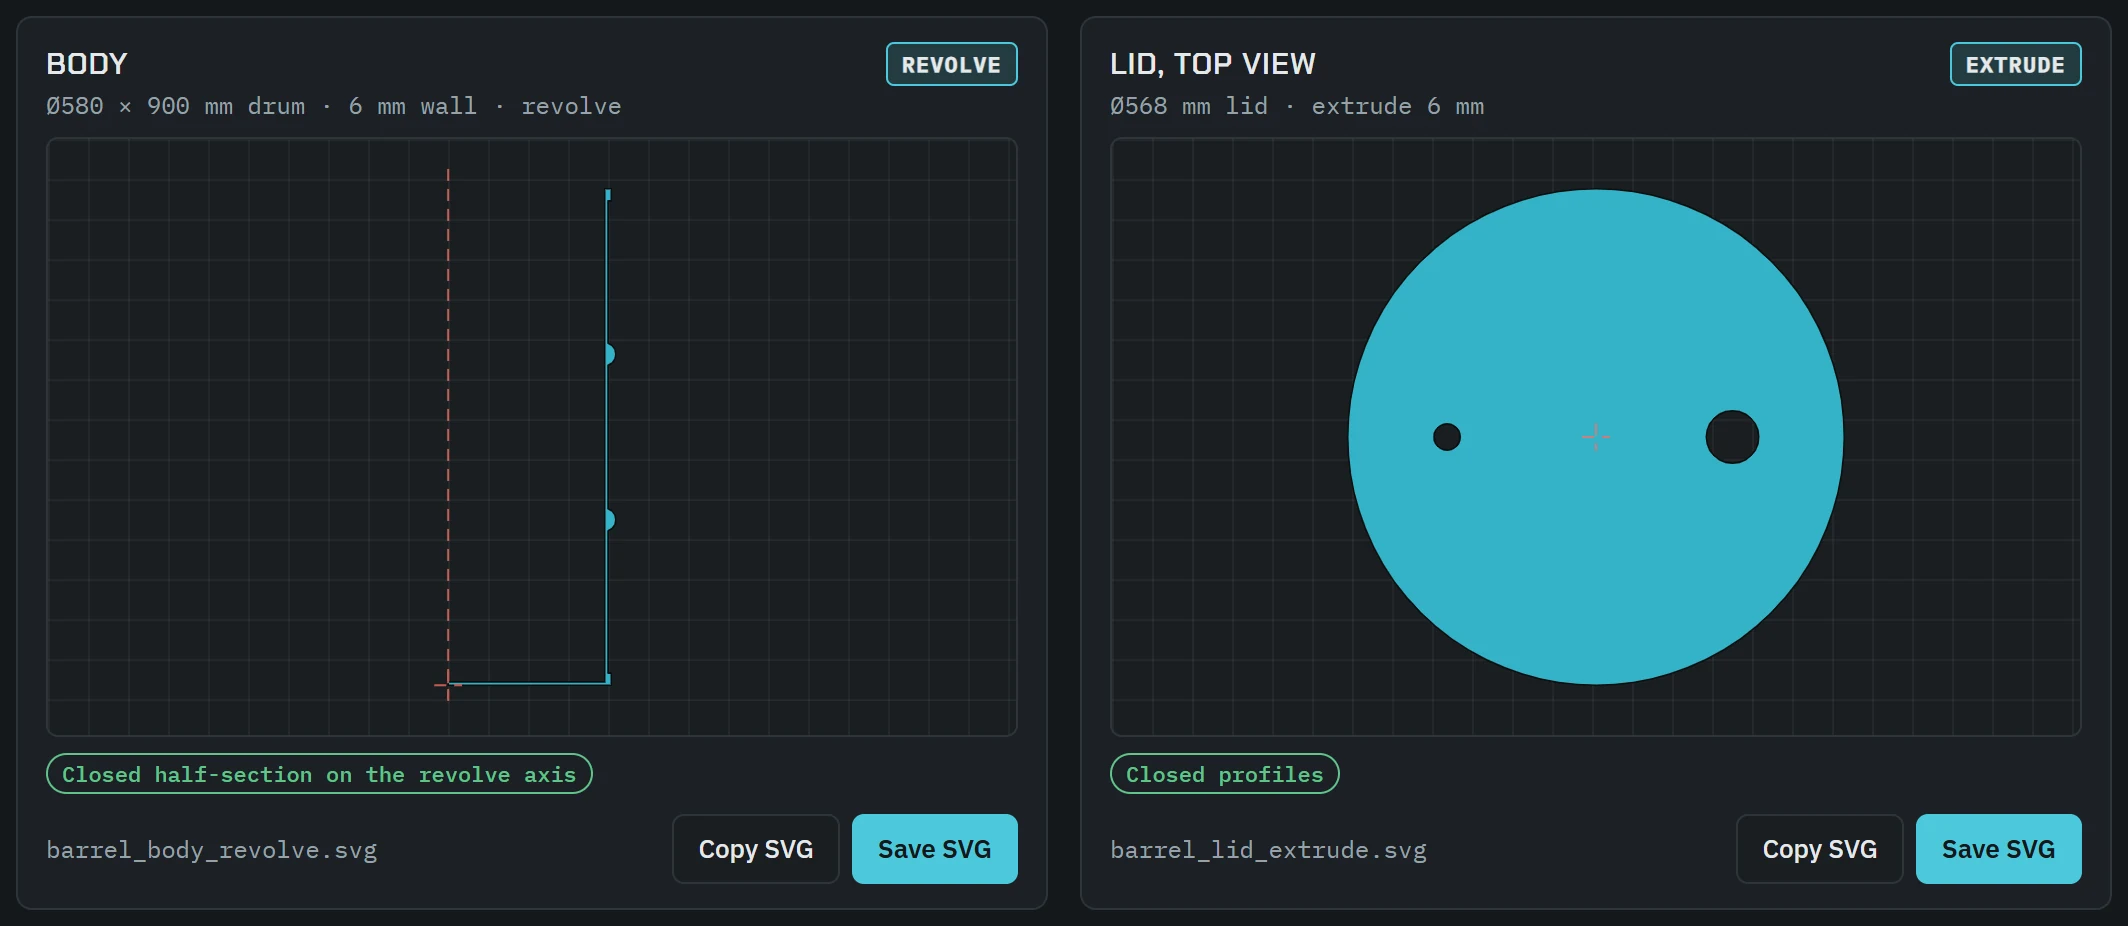
Objects made of several parts, all shown together and all on the same world origin, so they line up on import.
| Object | Parts |
|---|---|
| Barrel / drum / canister | Body (revolve); Lid, top view (extrude) |
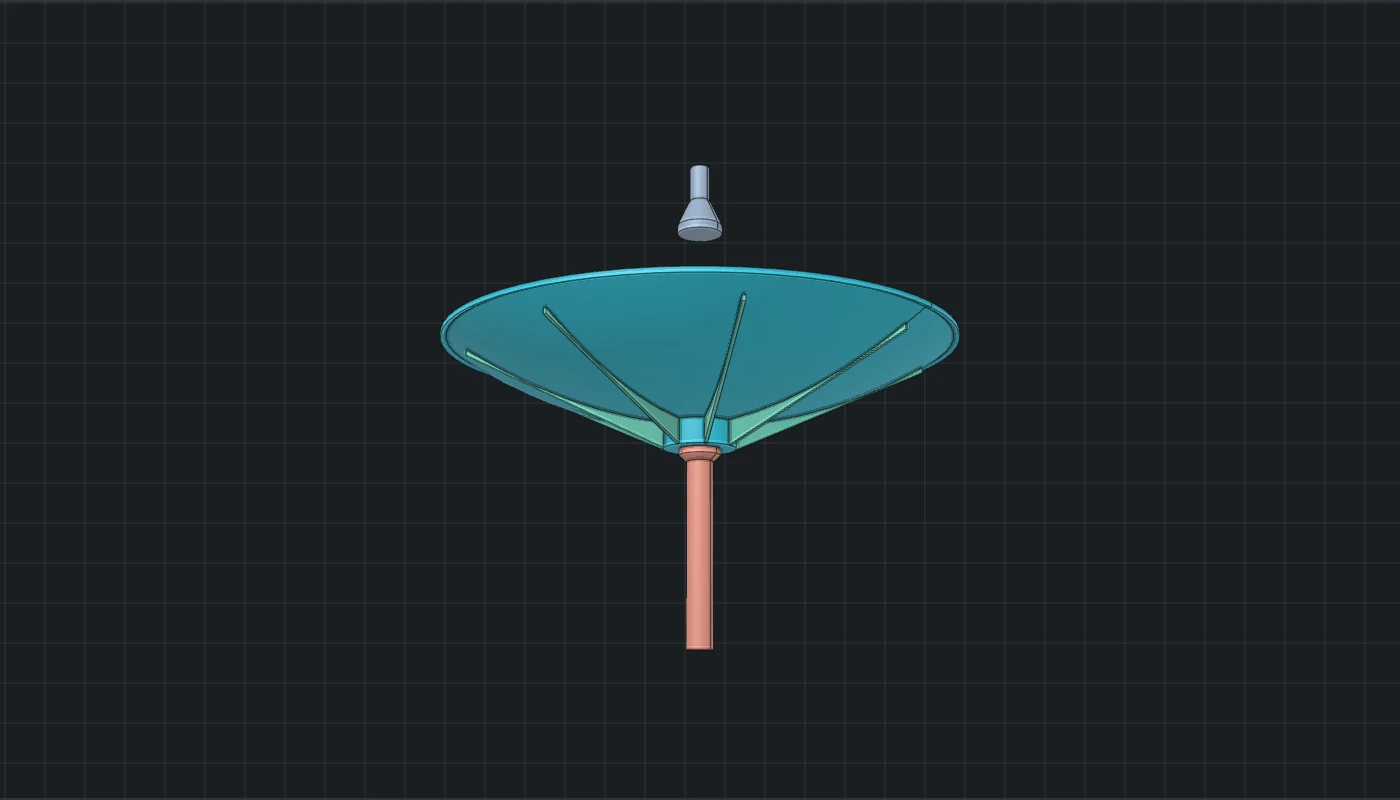
| Satellite dish | Dish (revolve); Feed horn (revolve); Back rib (extrude, then pattern); Mast and collar (revolve) |
| AC unit | Front panel with fan guards (extrude); Side panel with louvers (extrude); Top panel (extrude); Fan rotor (extrude) |
Presets (8): Oil drum, Wooden cask, Sci-fi canister, Satellite dish, Deep-space dish, AC condenser, Twin-fan rooftop unit, Tall wall unit.
Fasteners
Bolts, screws and rivets as three parts: Side profile (revolve), Head, top view (extrude) and Drive recess (extrude-cut). Nuts and washers come the same way: the side profile is a ring section to revolve, the top view has the bore as a hole, and for a castle nut the third part is its slots to cut.

- Head type, in three groups:
- Bolts, screws and rivets: Hex bolt, Socket cap, Pan head, Countersunk, Button head, Dome rivet, Flat rivet.
- More heads: 12-point bolt, Cheese head, Thumb screw (knurled), Tech bolt (hex on a collar), Quarter-turn fastener, Structural stud.
- Nuts and washers: Hex nut, Castle nut, Dome nut, Flat washer, Lock washer.
- Size: shank diameter (a nut's or washer's bore), length under head, head size and height, head chamfer, washer flange (a hex bolt or hex nut with a flange).
- Drive and shank: drive (None, Slot, Cross, Hex socket, Six-lobe, Square, Cross with ticks, Three-wing, Two-pin spanner, Six-lobe with pin (security)), drive size, tip, thread rings, threaded length.
- For a nut or washer, the settings only a bolt has (length, tip, thread rings, drive) hide.
Presets (26): Hex bolt, Flanged hex bolt, Socket cap screw, Pan head screw, Countersunk screw, Six-lobe button screw, Dome rivet, Flat rivet, Giant sci-fi bolt, Hex nut, Flange nut, Castle nut, Dome nut, Flat washer, Lock washer, 12-point bolt, Cheese head screw, Thumb screw, Cross-tick pan screw, Security button screw, Spanner screw, Three-wing screw, Quarter-turn fastener, Tech bolt, Captive panel screw, Structural stud.
Design a fastener on this tab, then switch on Use my fastener design instead of plain holes in another tab. Plain rivet and bolt holes are replaced by your fastener's head, drawn as its own profile. The switch is in Panel lines (Rivets), Doors & windows (Frame), Shapes (access hatch, notched tech frame, tech plate), Objects (AC unit) and Ports (for screws and mounting holes). In solid bodies the heads can stand proud of the surface or sink into it: see Fastener heads above the surface below. Several props can be held together by your fastener too (see Castors and fasteners from another tab).
Ports
Connector and switch openings to cut into a surface. Their sizes are close to the real thing but not taken from datasheets.


- One port type: choose from 59 ports and slots in eight groups (USB and data, Video, Audio and RF, Network, Power, Cards and misc, Switches and controls, Cooling and flanges). Set how many, how many per row, and whether to draw them as a plate with openings.
- I/O panel (mixed ports): a plate of mixed ports in a style: Modern laptop / PC, Retro PC (1990s), Retro-future console, Industrial / rack unit, Audio gear, Network switch, Cyberpunk deck, Dieselpunk switchboard or Completely random. New random panel deals a new layout.
- For both: Scale, Clearance all round, Inner detail (tongue, pins) and Mounting holes.
Ports has no presets, so it has no row of preset thumbnails; your favourites still show there.
Export settings for panels and parts
| Setting | Where | What it does |
|---|---|---|
| World origin at | All tabs but Fasteners | Where 0,0 sits on the drawing: Centre, Bottom-left or Bottom centre. |
| Revolve axis along | Objects, Fasteners | Y or X. |
| Don't mirror Y | All tabs | Switch it on if SVG imports arrive upside down. |
| Stand upright like a wall (STEP, DXF, Solid) | Panel lines, Shapes, Ports | Stands the sheet up instead of laying it on the ground. |
| Solid thickness | Panel lines, Doors & windows, Shapes, Ports | How thick the solid body is. Starts at 20 mm for panels and shapes, 60 mm for doors, 2 mm for port plates. |
| Stepped panels, in solids | Panel lines | 0 to 100%. The panels stand at three heights (at 100%, half the thickness apart), the same for the same design every time. The plate inside a hatch, frame or label sits a little lower than its panel. |
| Bevelled panel edges, in solids | Panel lines | 0 to 30 mm. Bevels the top edge of every panel. A panel with a corner too tight for the bevel stays square, and the message after the build says how many did. |
| Fastener heads above the surface, in solids (negative sinks them in) | Panel lines, Doors & windows, Shapes, Ports | -50 to 50 mm. Shows when Use my fastener design is on. Raises the fastener heads above the surface, or sinks them below it; 0 is level. |
In small windows these settings fold away behind the Settings button in the export bar.
Props
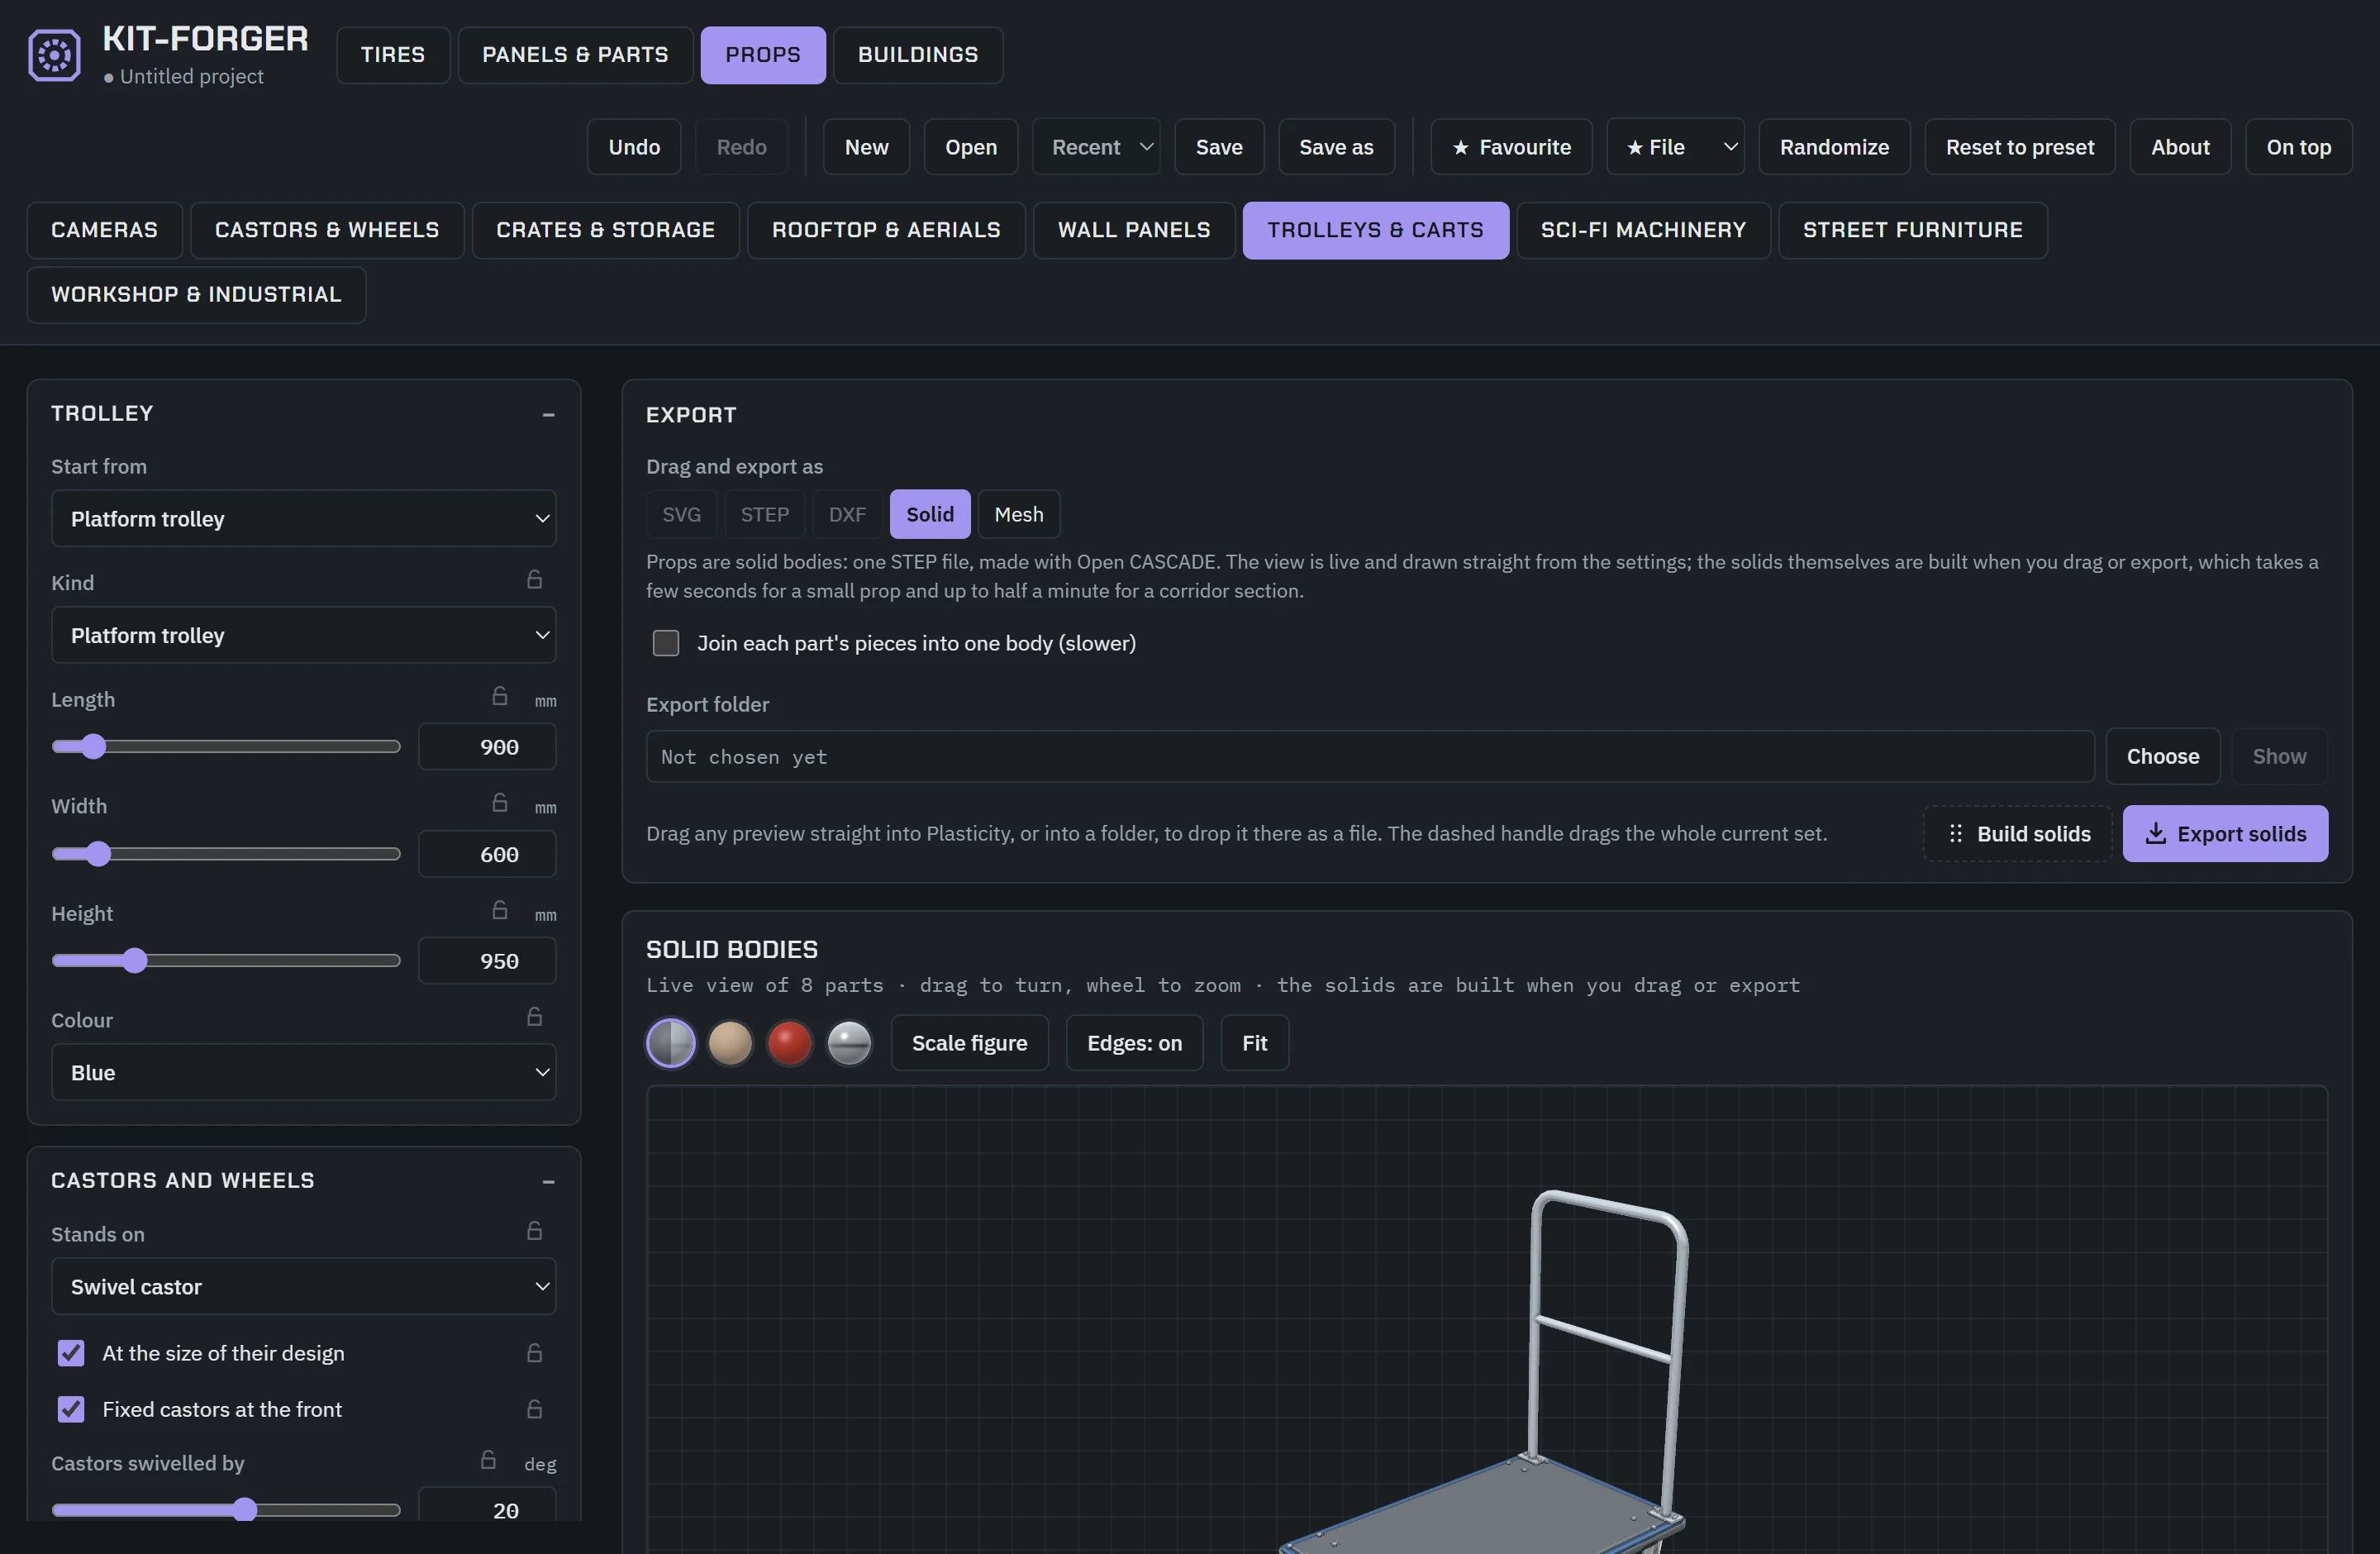
Click Props in the header. Props are things a flat drawing cannot carry, so they come as solid bodies or as a mesh. Eight tabs appear under the header: Cameras, Castors & wheels, Crates & storage, Rooftop & aerials, Wall panels, Trolleys & carts, Sci-fi machinery and Street furniture.
How Props work
- Solid or Mesh. Under Drag and export as, SVG, STEP and DXF are greyed out. Tires and Panels & parts keep the format you chose there.
- The 3D view is live. It follows every slider as you move it, with nothing to build. It is a picture drawn from the settings: round shapes look stepped in it and are true circles in the file.
- In the Solid format, the real solids are built when you drag or export. The dashed handle reads Build solids. Click it and wait; while the kernel works, the message names the part it is on. When the handle reads Drag 8 solids (or another number), drag it into Plasticity. Most props take from under a second to about 15 seconds. After a build the view shows the real solids, as they export, until you change a setting. In the Mesh format there is nothing to build: see Meshes.
- The parts list. Under the thumbnails, each part of the prop is listed with how many pieces it has. Each part is a body of its own in the file and has its own small drag handle, to take that part alone. The dashed handle takes them all, as one file.

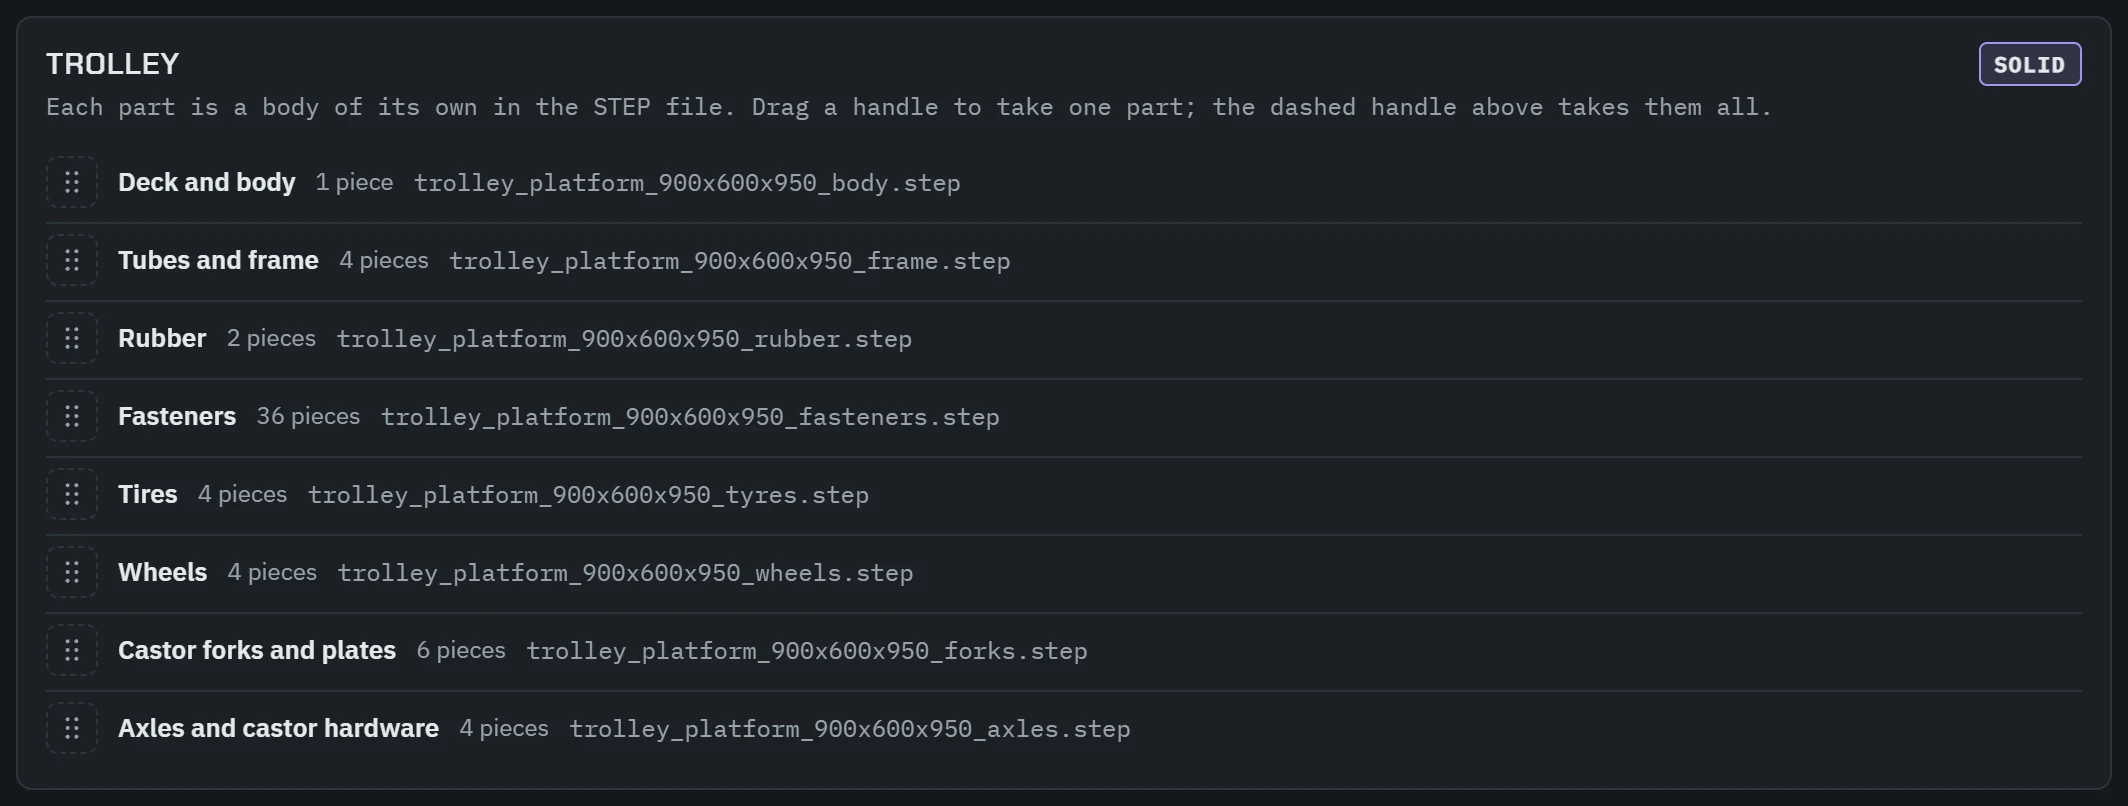
The ticks under the 3D view hide and show parts in the view. Your choices stay while you move sliders. The thumbnails, favourites, random mode, locks, undo and project files work as in the other modes. Each group of controls ends with its own Randomize button.
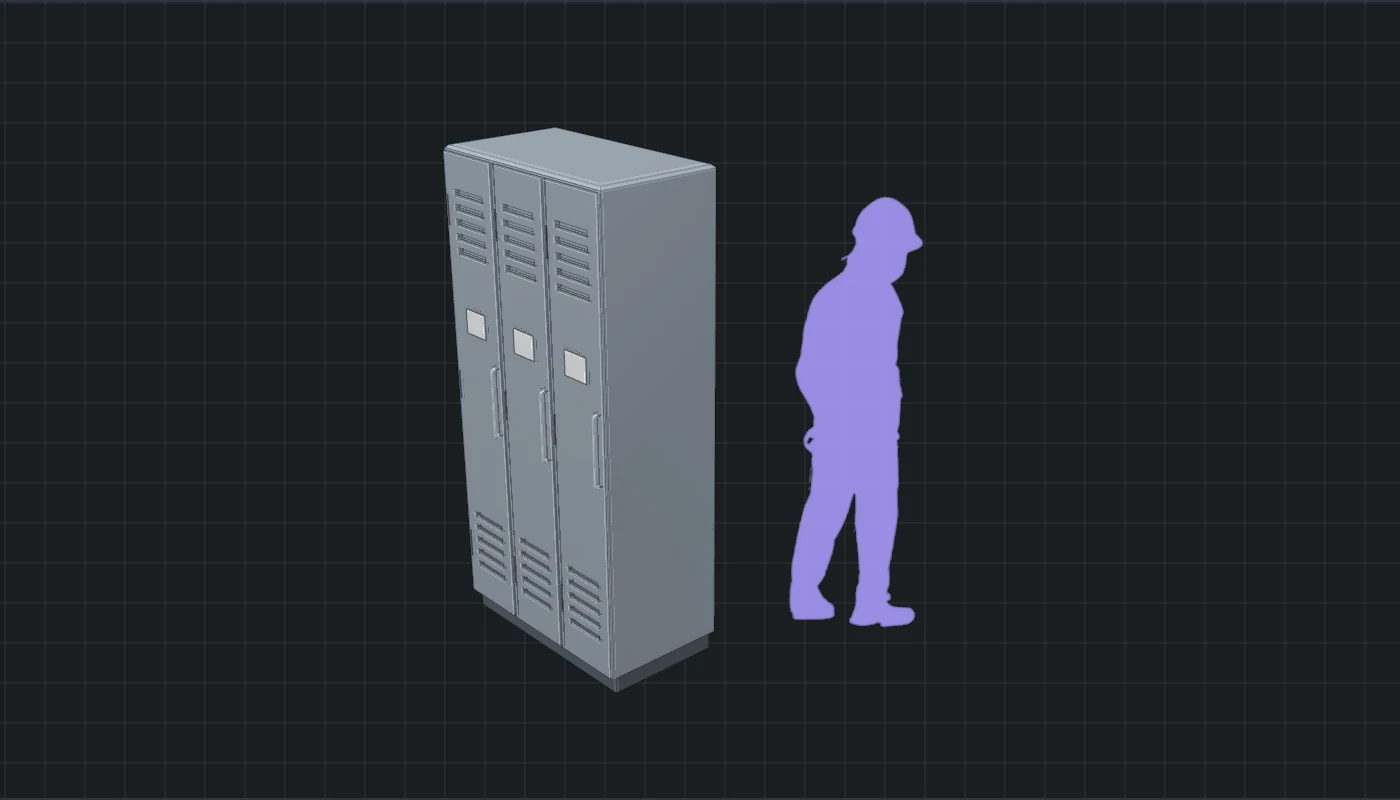
Above the 3D view, Scale figure stands a cut-out worker, 1.75 m tall, beside whatever is on show, and Edges: on switches the lines in the view (see The 3D view).
Where props stand
World coordinates in millimetres, Z up.
- A camera's mounting plate lies on the plane it screws to: a wall is the plane Y = 0 with the room on the +Y side, a ceiling the plane Z = 0, and a pole stands on the ground at the origin.
- A castor stands with its tire on the ground (Z = 0) and its swivel axis on Z.
- A machine wheel turns about the X axis through the origin, like a tire from the Tires tab.
- Every other prop stands on the ground (Z = 0).
Castors and fasteners from another tab
Some props are built from what you have made in other tabs. A trolley stands on a castor, and a trolley, a machine or a piece of street furniture can be held together by a fastener. You choose them from a list:
- Stands on (Trolleys & carts, under Castors and wheels): As the Castors & wheels tab is now, then that tab's own designs, then your starred castors under Favourites.
- Held together by (under Fasteners): No fasteners, As the Fasteners tab is now (the Fasteners tool in Panels & parts), its 26 designs, and your starred fasteners. Fastener size makes them larger or smaller. On Wall panels the same list is The bolts are, under Bolts.
Choose As the Castors & wheels tab is now, change the castor in that tab, and come back: the trolley stands on the new castor. A favourite you choose stays with the prop, in the project and in a favourite of the prop, even on a computer that does not have it starred. A fastener's drive is a real recess in its head, in the view, the solid and the mesh.

Cameras
Security cameras and sci-fi sensors, on a wall, under a ceiling or on a pole.

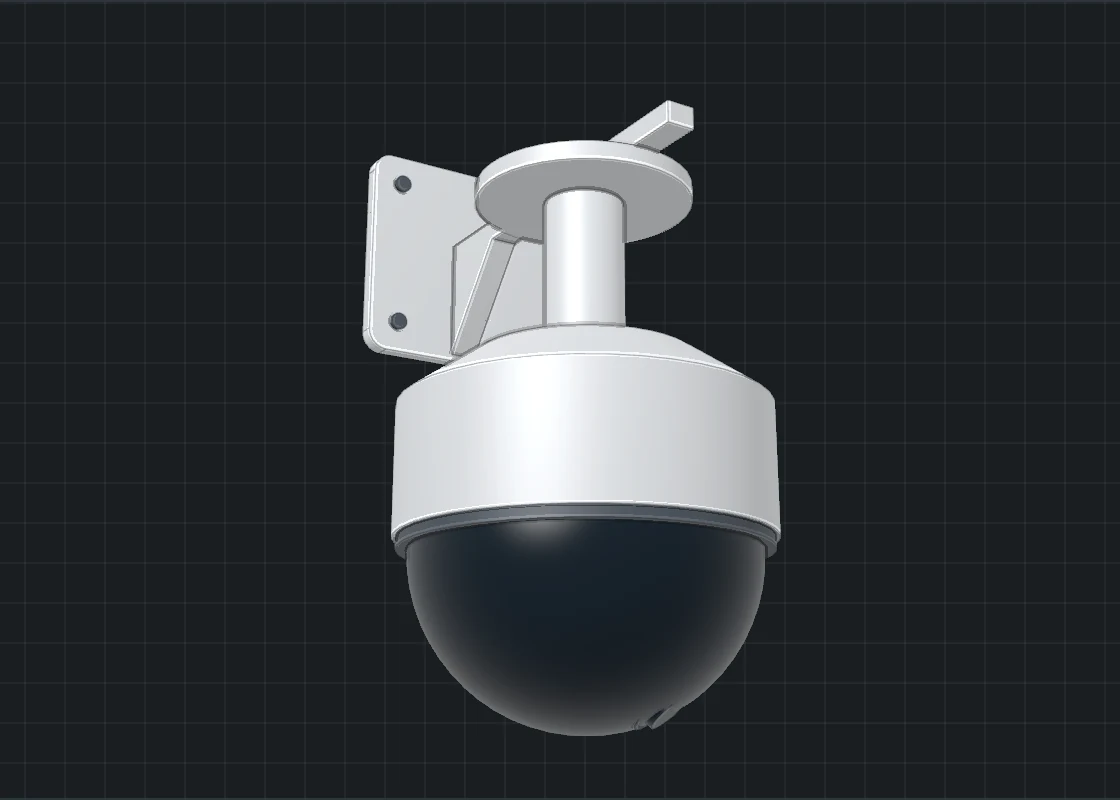
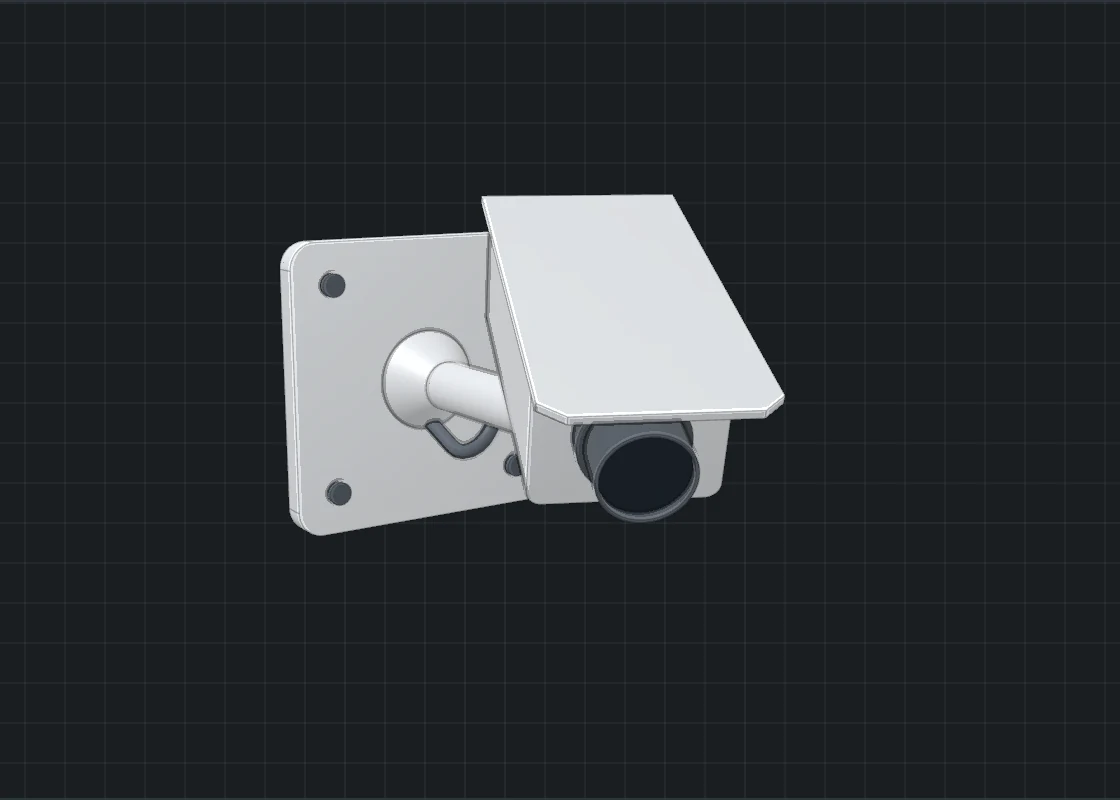

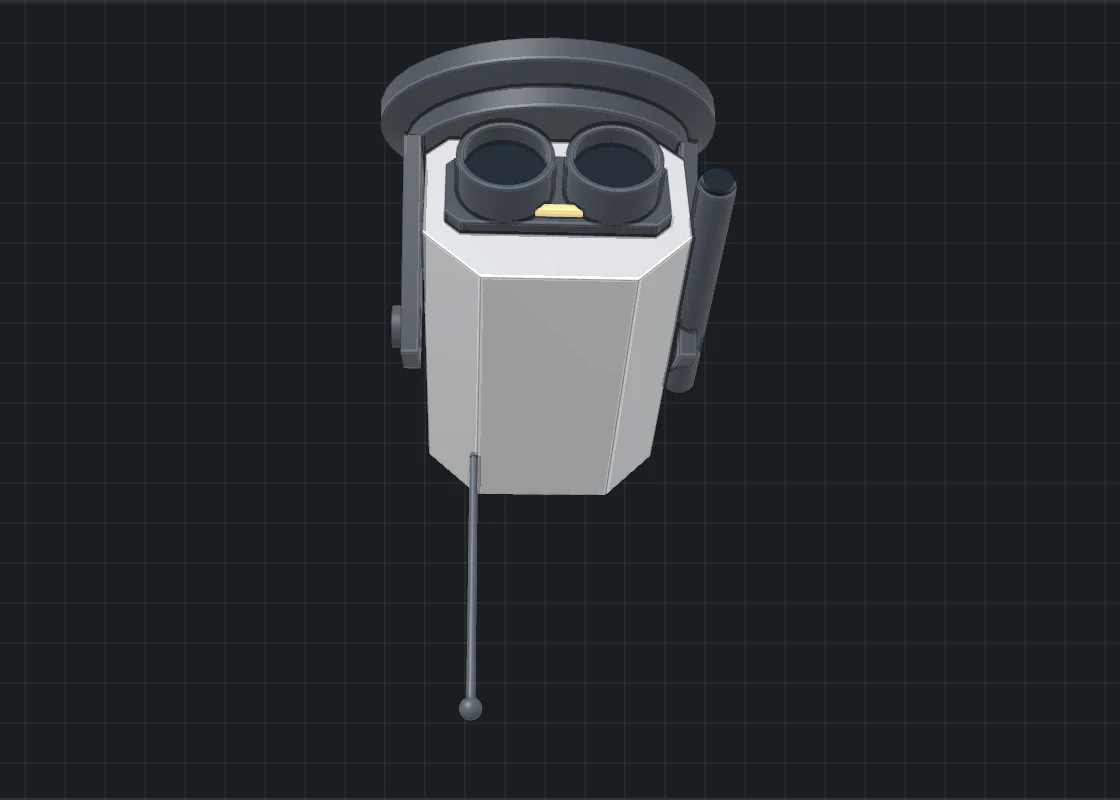
- Kind: Bullet, Box with a sun shield, Dome, Turret (eyeball), PTZ (speed dome), Several on a pole, and three made-up ones: Eye pod, Scanner cluster and Sentry head.
- Mounted: On a wall, Under a ceiling, or On a pole (bullet and box). Domes, turrets, PTZ and eye pods hang; on a wall they hang from a bracket. The sentry stands on a wall mount.
- Pan and Tilt down turn the head about its knuckle while the plate stays put. Size and Arm or stem length.
- Details: Lens size, Sun hood, Lights round the lens (0 to 24), Cable (on the scanner: aerials), a round or square Mounting plate, Cameras on the pole (1 to 4) and Pole height.
A camera gives up to four bodies, Housing, Dark parts, Lenses and glass and Lights, so each can take its own material. Glass domes are true thin shells, and lenses and balls are true spheres in the file.
Presets (13): Bullet on a wall, Box camera with shield, Ceiling dome, Turret, PTZ on a wall bracket, Hanging PTZ, Ceiling bullet, Pole with three, Gate pair, Eye pod, Scanner cluster, Sentry head, Sentry on a stand.
Castors & wheels
Four kinds of castor and nine machine wheels. For a wheel with a tire, such as a bicycle or a trolley wheel, use the Tires tab: its Bicycles and Carts and trolleys presets.



- Kind: castors (Swivel castor, Fixed castor, Castor on a stem, Twin-wheel castor) and machine wheels (Rail wheel, V-belt pulley, Rope sheave, Road wheel (tracked vehicle), Spoked wheel, Hand wheel (valve), Roller, Gear, Chain sprocket).
- Wheel: diameter, width, bore and hub; Between hub and rim: Solid, Round holes or Spokes, with Holes or spokes for how many.
- Rim and tire, as the kind has them: tire thickness and Tread (Flat, Rounded, or V groove (runs on a track)), flange height and A flange on both sides, belt grooves (1 to 8), dish, teeth, and Hub boss on one face.
- Castor: Trail (wheel behind the swivel), Swivelled by (the wheel and fork turn about the kingpin; the plate stays), Plate or stem size and Brake pedal.
The bodies are Tire, Wheel, Fork and plate, Axle and fasteners, Painted parts, or Teeth and hub, as the kind has them.
Presets (16): Swivel castor, Braked castor, Fixed castor, Stem castor, Chair castor, Track castor, Rail wheel, Crane wheel, V-belt pulley, Rope sheave, Tank road wheel, Spoked idler, Valve hand wheel, Conveyor roller, Spur gear, Chain sprocket.
Crates & storage
Twelve kinds of thing to fill a room or a yard with.

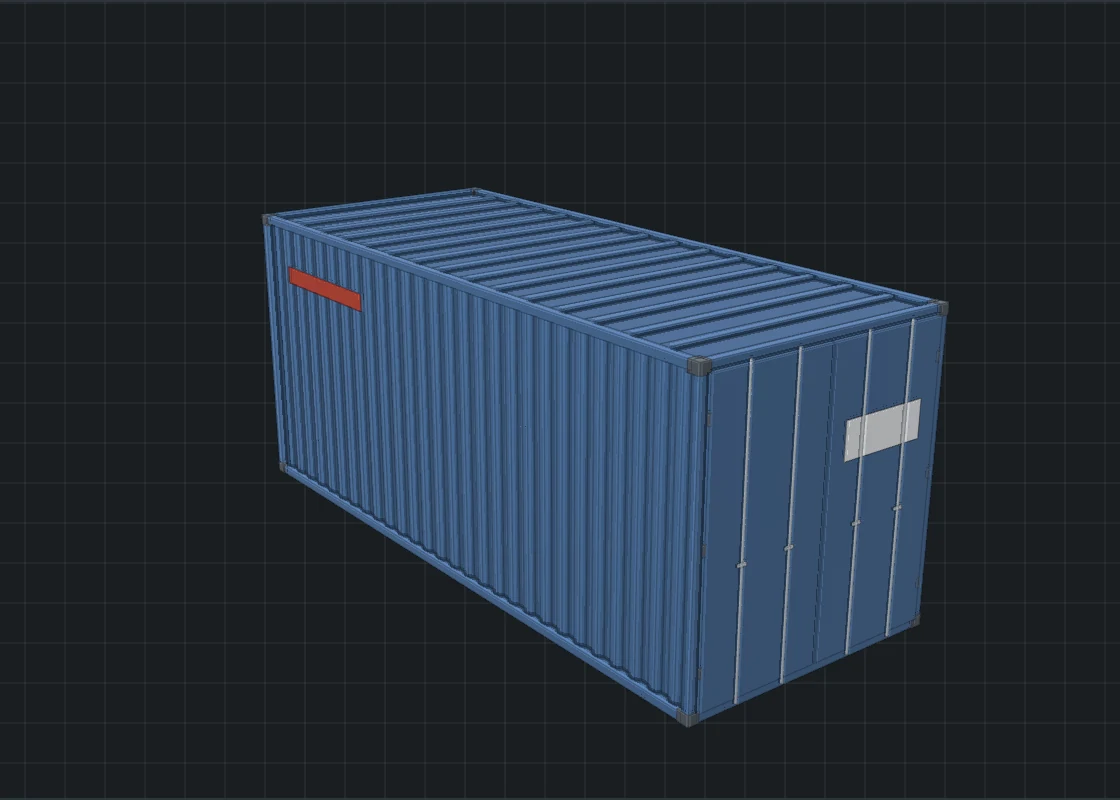

- Kind: Cargo crate, Shipping container, Drum, Tank on saddles, Lockers, Hard case, Energy cell (sci-fi), Pallet, Storage rack, Skip, Gas bottles, Jerrycan.
- Width (the diameter of a round one), Depth, Height, and Colour: Grey, White, Yellow, Orange, Green, Blue, Red or Dark.
- Details, as the kind has them: edges and frame, ribs, hoops, slats or boards, Slats (Upright, Level, Crossed braces or None), rounded corners, doors, shelves, bottles or cartons across, a lid, handles, corner caps, feet or wheels, Loaded (with a Load seed), labels and marks, and lights.
The 20 ft and 40 ft shipping containers are their real sizes. With a lid and wheels a skip is a wheeled bin.
Presets (29): Cargo crate, Braced crate, Ammunition box, Sci-fi supply crate, Shipping container, 20 ft, Shipping container, 40 ft, Site store, Oil drum, Chemical drum, Sci-fi canister, Fuel tank, Pressure vessel, Lockers, Tool cabinet, Server cabinet, Hard case, Rifle case, Medical case, Energy cell, Reactor rod, Pallet, Loaded pallet, Storage rack, Empty shelving, Skip, Wheeled bin, Gas bottles, Oxygen bottle, Jerrycan.
Rooftop & aerials
What stands on a roof: plant, vents, tanks, aerials and masts, and signs.

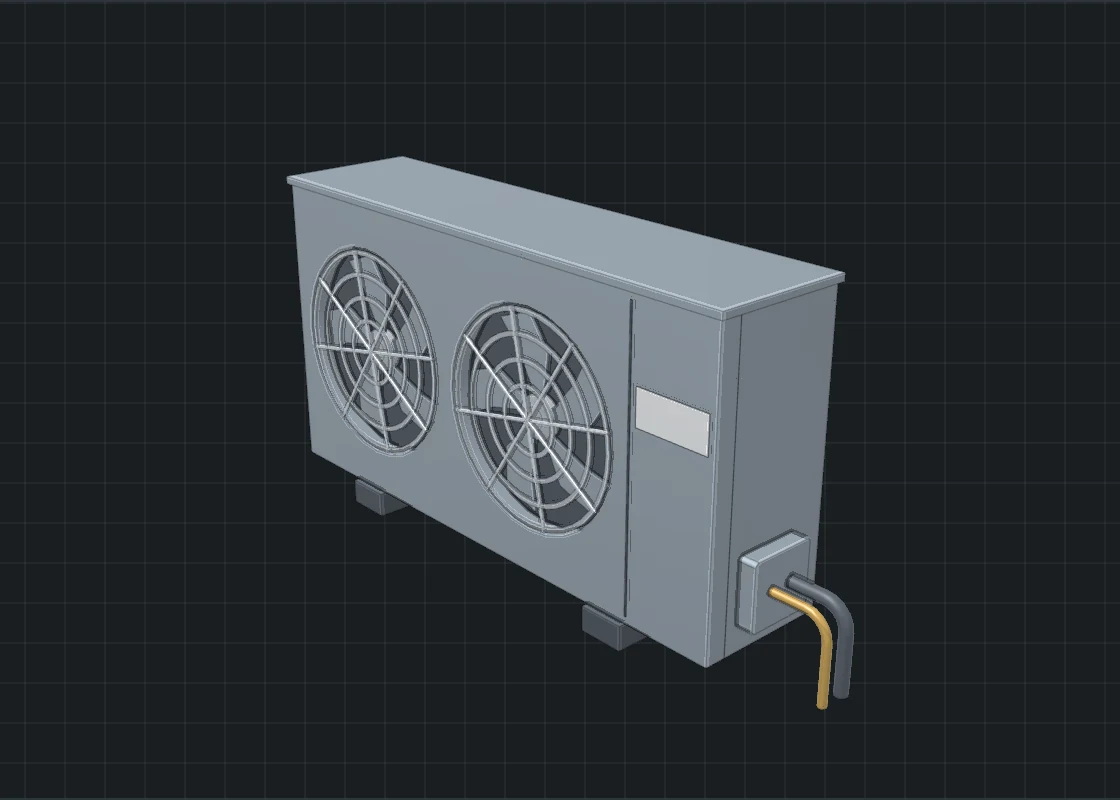
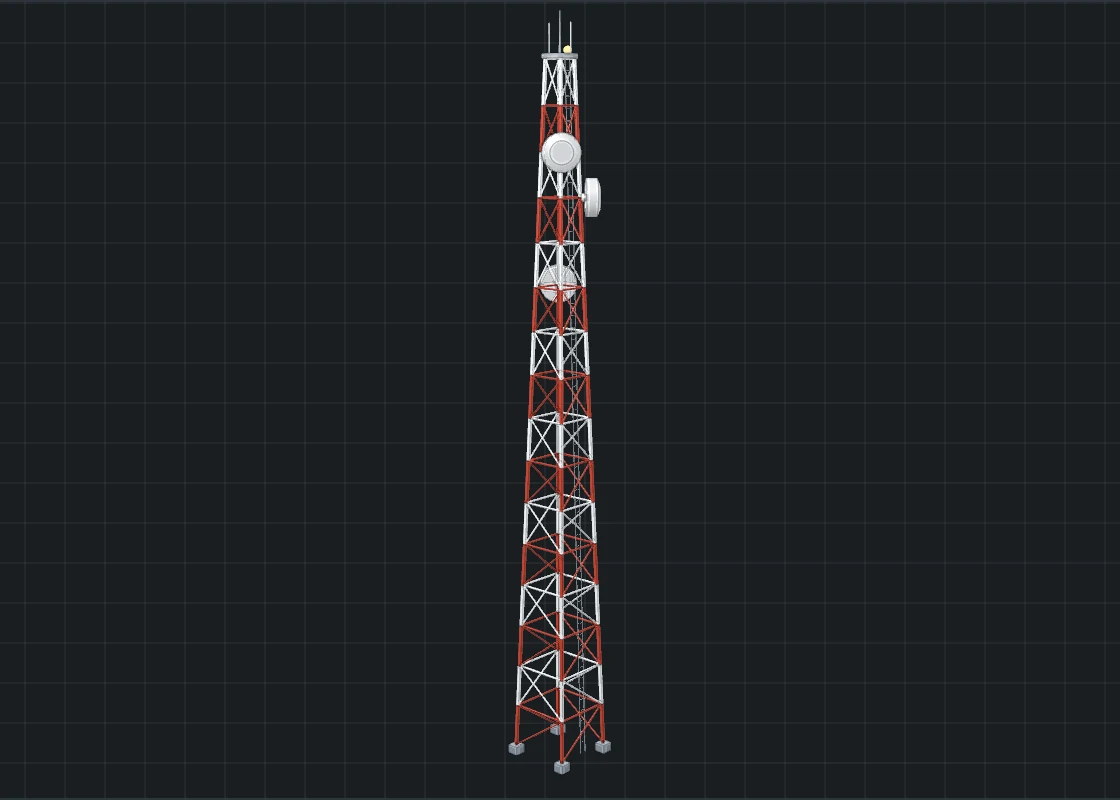
- Kind: Air-conditioning condenser, Rooftop air handler, Cooling tower, Roof vent, Duct run, Flue stack, Water tower, Solar panels, TV aerial, Satellite dish, Lattice mast, Mobile phone mast, Radome, Comms spire (sci-fi), Rooftop sign.
- The controls take the right name for the kind on show: the same slider is Fans for a condenser, Hoops for a water tower, Elements for an aerial, Sections for a mast.
- Tilt for a dish or solar panels; Vent (Mushroom cowl, Turbine, Louvred box or Gooseneck); Made of (Wooden staves or Steel) for a water tower; Legs (Four or Three) for a mast; Colour.
- A rooftop sign can have neon letters; Neon seed gives other made-up letters.
Presets (35): Split-system condenser, Twin-fan condenser, Condenser bank, Rooftop unit, Large air handler, Cooling tower, Squat cooling tower, Mushroom vent, Turbine vent, Louvred vent box, Gooseneck vent, Duct run, Long duct, Flue, Twin flues, Boiler stacks, Water tower, Steel roof tank, Solar array, Solar row, TV aerial, Long-range aerial, Satellite dish, Uplink dish, Lattice mast, Radio tower, Three-legged mast, Mobile phone mast, Rooftop cell site, Radome, Golf-ball radar, Comms spire, Sensor mast, Rooftop sign, Neon hoarding.
Wall panels
A tile of wall with real depth, in three levels: a back plate, a face with pockets cut right through it, and plates standing proud of the face. In the pockets are vents, pipes, cables, lights, fans and small blocks.
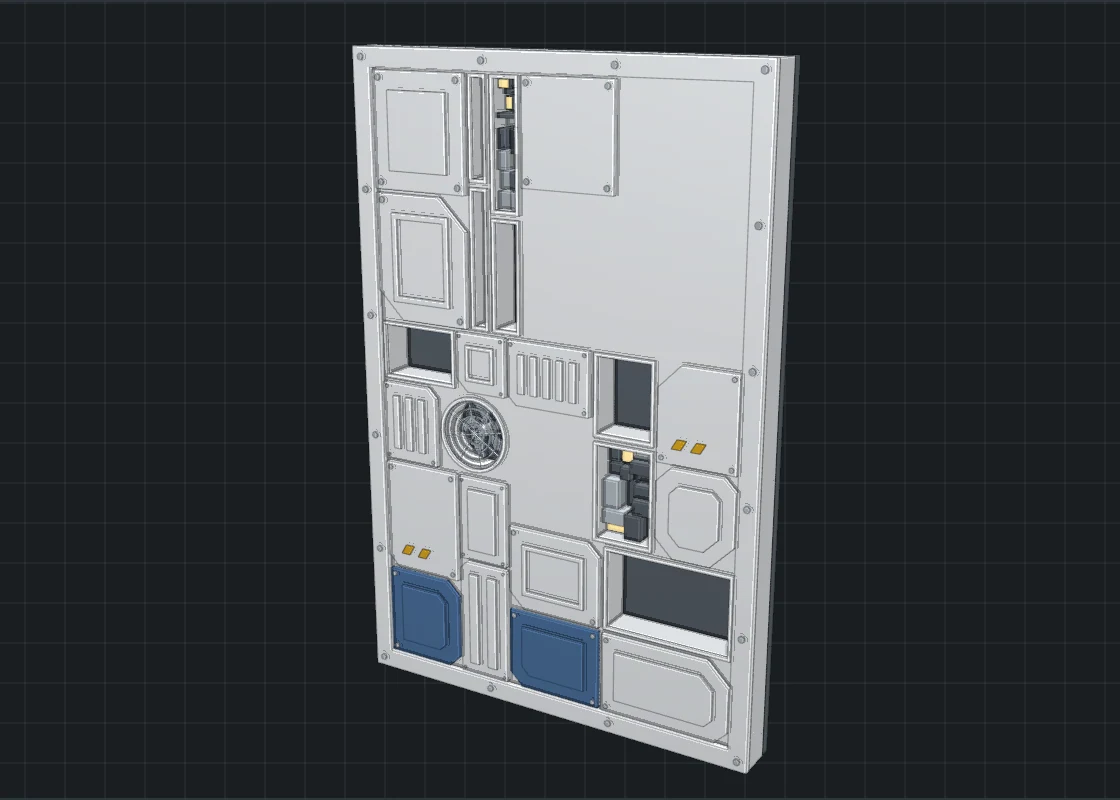
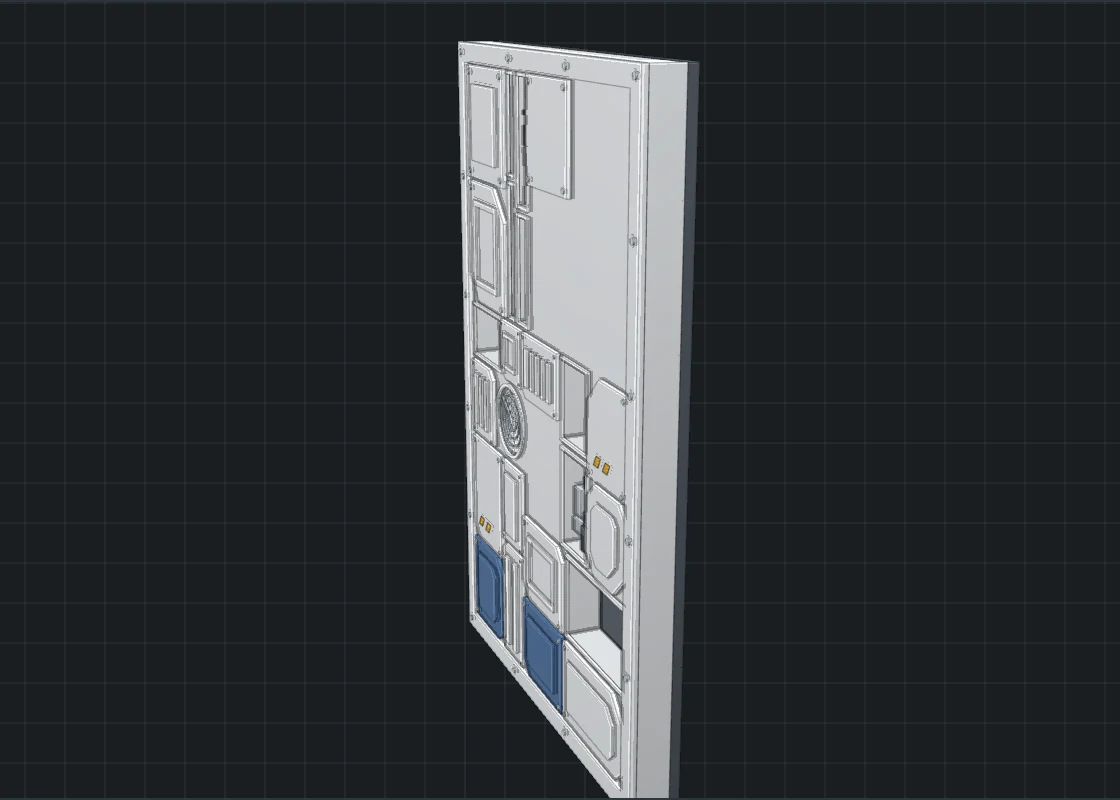
- Kind: Plating with pockets, Rows of pockets, Channels of pipes, A hatch, A console, Louvres.
- Layout seed gives another panel of the same kind. Width, Height, Colour, and Colour of some plates (and of a hatch).
- Depth: How deep the pockets are (the thickness of the face) and How far the plates stand out.
- Layout: size of a plate or pocket, the gap between plates, how many of the cells are pockets, cut corners, raised details, A rim round the panel, Bolts (and The bolts are: plain studs or any fastener), lights, and warning stripes and labels.
Switch off A rim round the panel and the plates stop half a gap short of the edge, so panels laid side by side tile.
Presets (14): Plated bulkhead, Service panel, Heavy plating, Coffered wall, Vent bank, Light wall, Pipe channels, Cable runs, Access hatch, Warning hatch, Control console, Wall terminal, Louvre panel, Radiator.
Trolleys & carts
Trolleys, carts and wagons that stand on a castor or wheel you choose and are held together by a fastener you choose (see Castors and fasteners from another tab).

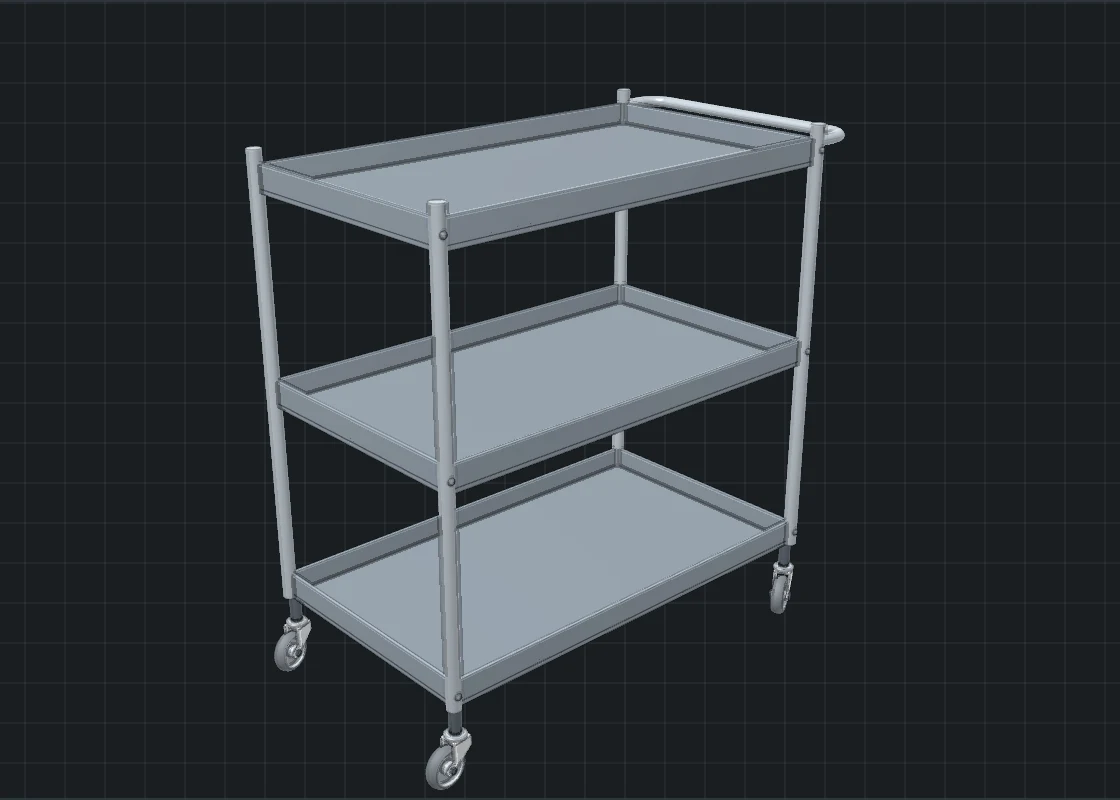
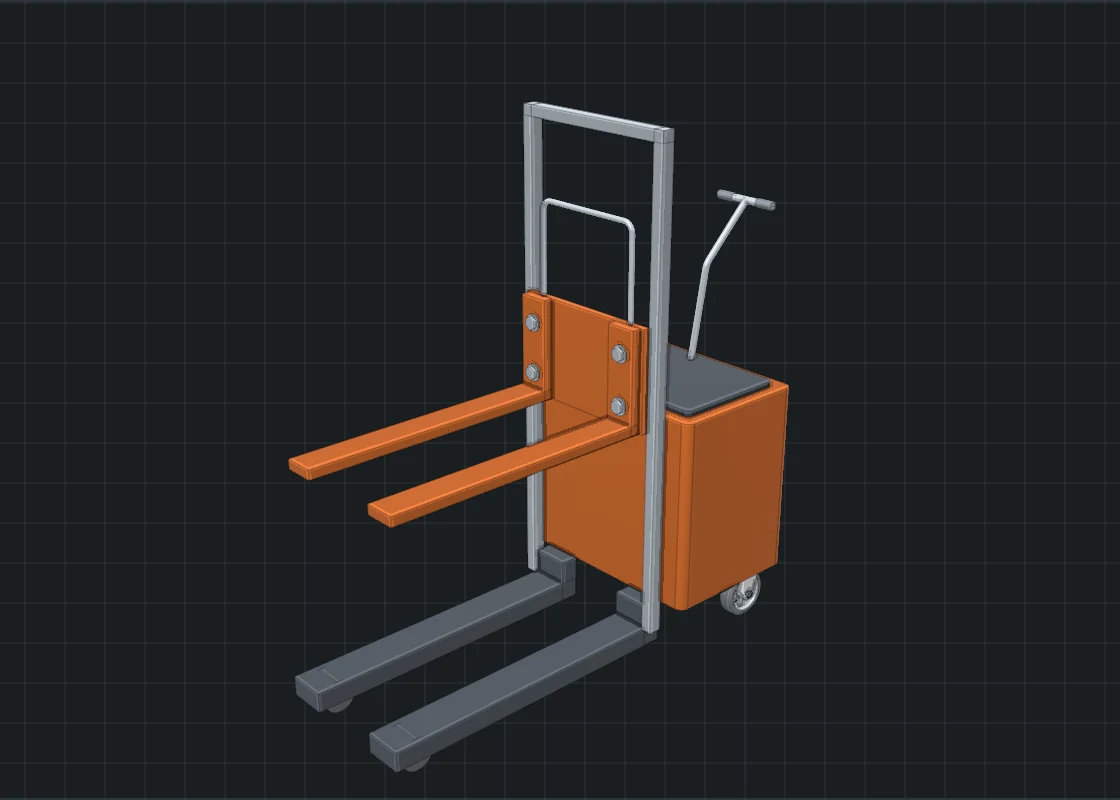
- Kind: Platform trolley, Shelf trolley, Roll cage, Tool cart, Dolly, Sack truck, Wagon on axles, Cargo sled (sci-fi), Pallet stacker.
- Length, Width, Height and Colour (Grey, White, Yellow, Orange, Green, Blue, Red, Dark or Wood).
- Castors and wheels: Stands on; At the size of their design, or off and Wheel diameter to scale the whole castor; Fixed castors at the front; Castors swivelled by; and Rail wheels stand on a length of track.
- Details, as the kind has them: deck thickness, tube diameter, shelves, tray lip, wire spacing, Handle (At one end, At both ends or None), On the deck (Nothing, End boards, Stakes along the sides, A box or A tub), an open frame, a rubber mat or pads, a bumper, a gate across the front, Forks raised by (the pallet stacker) and lights.
A rail wheel, road wheel or spoked wheel cannot stand on a plate, so a trolley on one goes onto axles. Pulleys, gears, the hand wheel and the roller are not in the list: they cannot carry a trolley.
Presets (18): Platform trolley, Two-handle platform, Shelf trolley, Service cart, Roll cage, Laundry cage, Tool cart, Workshop cabinet, Furniture dolly, Machine skate, Sack truck, Flat wagon, Mine tub, Yard wagon, Cargo sled, Pallet stacker, Cargo lifter, Reactor cart.
Sci-fi machinery
Reactors, generators, consoles, terminals, pods, pylons and banks of energy cells.

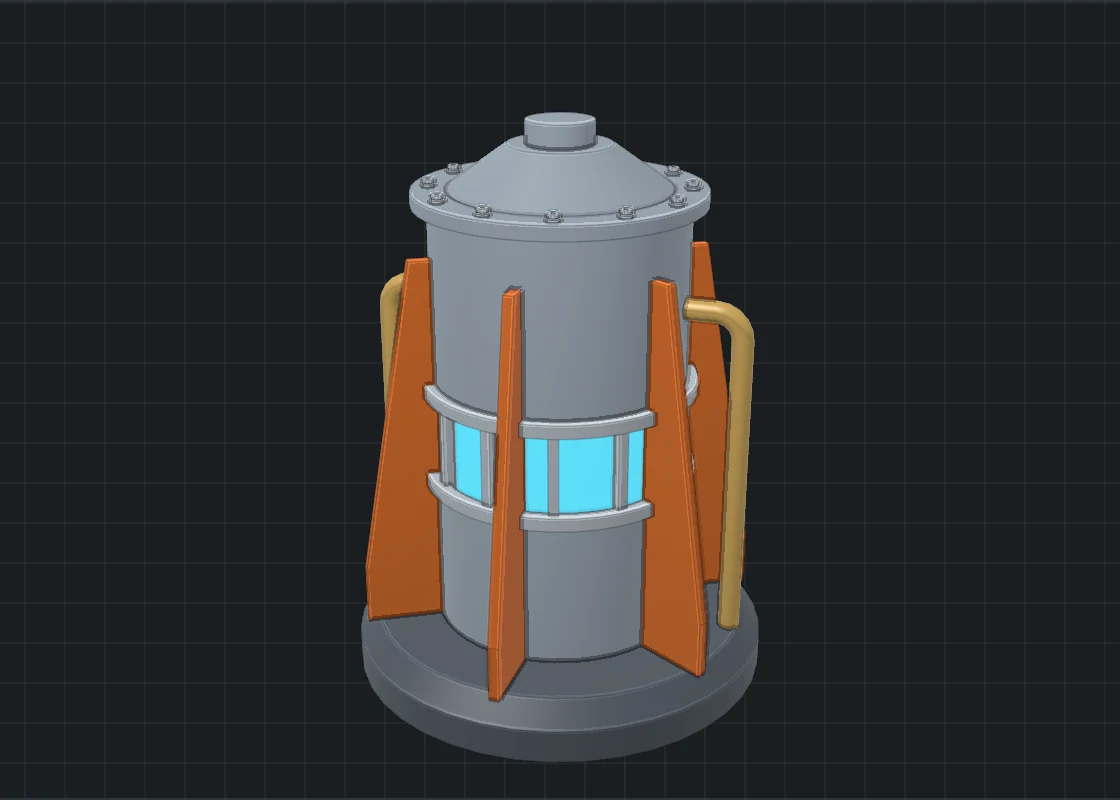
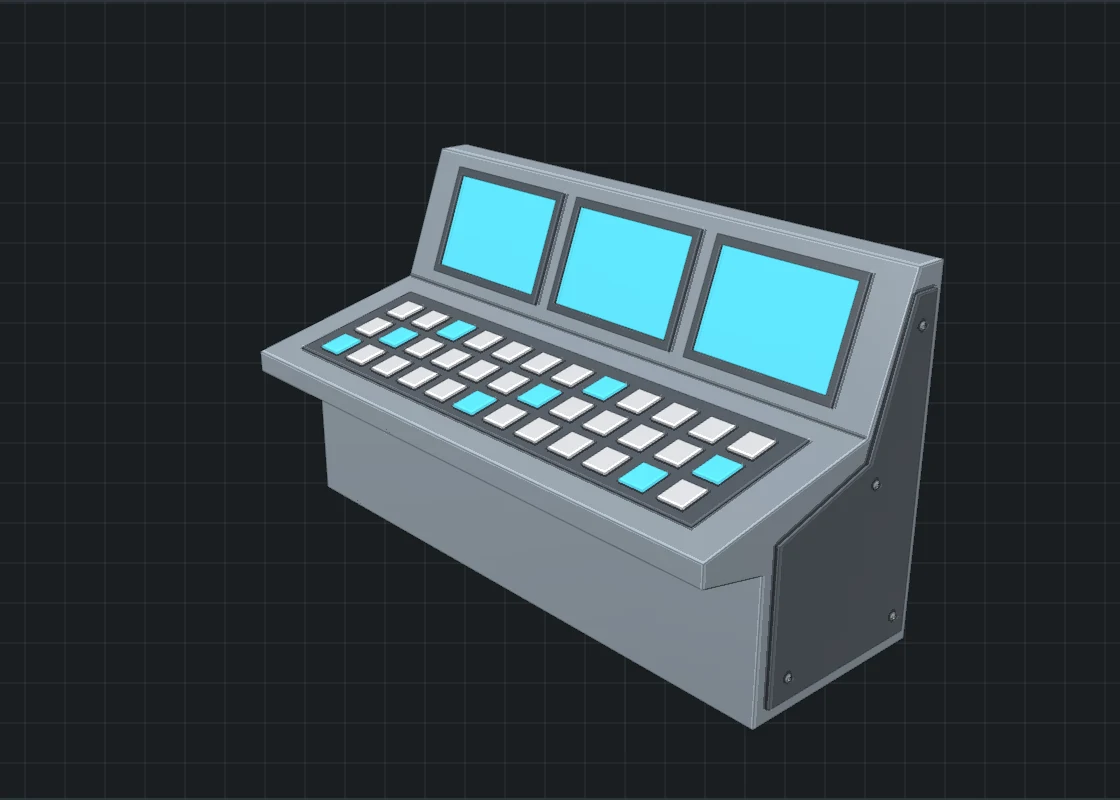
- Kind: Reactor, Generator on a skid, Control console, Standing terminal, Stasis pod, Power pylon, Bank of energy cells.
- How many is the slider that matters most, and it is named for the kind on show: buttresses on a reactor, cooling fins on a generator, screens on a console, hoops on a pod, insulators on a pylon, cells across a bank.
- Width, Depth, Height, Colour and Second colour; Tilted up by for a stasis pod, from lying flat to standing on end.
- Lights on and Light: Warm, Cyan or Pink. Off, the screens and windows are dark glass.
- Held together by and Fastener size.
Presets (18): Reactor, Fusion core, Coolant tower, Generator, Turbine set, Control console, Bridge station, Helm, Access terminal, Information post, Stasis pod, Upright pod, Specimen capsule, Power pylon, Field emitter, Cell bank, Battery wall, Charging rack.
Street furniture
Lamps, bollards, benches, bins, barriers, signals, signposts and more, for a street or a plaza.


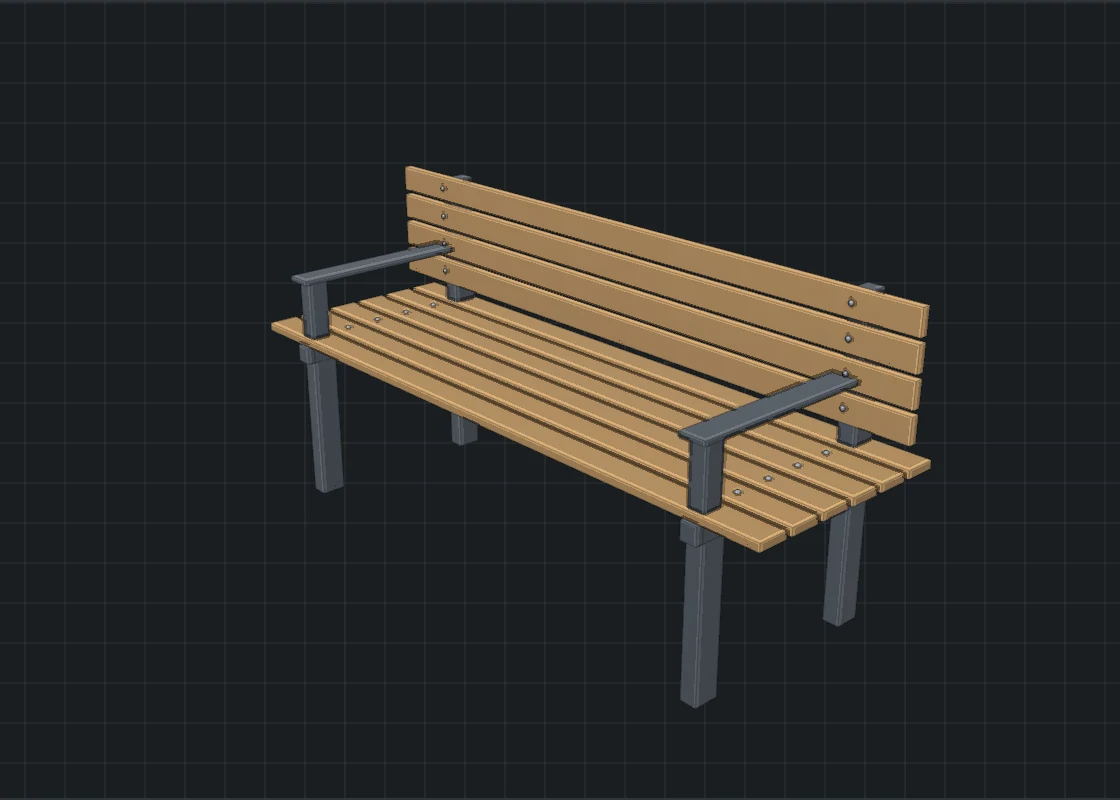
- Kind: Street lamp, Lantern on a post, Bollard, Bench, Litter bin, Crowd barrier, Concrete barrier, Traffic cone, Traffic signal, Signpost, Street cabinet, Railings, Hydrant, Cycle hoops, Planter.
- The controls are named for the kind on show: Width is the length of a bench, the diameter of a bollard or the size of a signpost's plate; How many counts arms, slats, bands, bars, lamps, plates, doors or hoops; and one tick box is the kind's extra, such as a back on a bench, a hood on a bin or a shrub in a planter.
- Colour and Second colour; Lights on and Light (Warm, Cyan or Pink); Held together by and Fastener size.
The plates of a signpost are blank on purpose, with a rim in the second colour, so you can put your own signs on them.
Presets (33): Street lamp, Motorway lamp, Plaza light, Lantern on a post, Park lantern, Bollard, Chain bollard, Lit bollard, Park bench, Backless bench, Long bench, Litter bin, Open bin, Crowd barrier, Site barrier, Concrete barrier, Capped barrier, Traffic cone, Small cone, Traffic signal, Crossing signal, Signpost, Sign cluster, Street cabinet, Substation kiosk, Railings, Plain railings, Hydrant, Yellow hydrant, Cycle hoops, Barred hoops, Planter, Long planter.
- Solid builds run while the window waits: from under a second to about 15 seconds for most props.
- Crates, lockers, cases and containers are solid inside: they do not open. Nor does a stasis pod's canopy.
- Signs are blank and there is no lettering anywhere. A console's keys are plain blocks and its screens are blank. A traffic signal's lamps are all there at once.
- A wall panel is flat, and its pockets are rectangles (or circles, for a fan).
- Gear teeth are straight-sided: fine to look at, not to mesh. Sprocket teeth are a simple round-seat shape.
- The cameras and machines are generic, not copies of real models.
Buildings
Click Buildings in the header. Five tabs appear under it: Corridor kit, Level designer, Blocks & megastructures, Terraces and Weatherboard houses. They work like Props: Solid or Mesh, a live 3D view, and a list of parts (see How Props work).
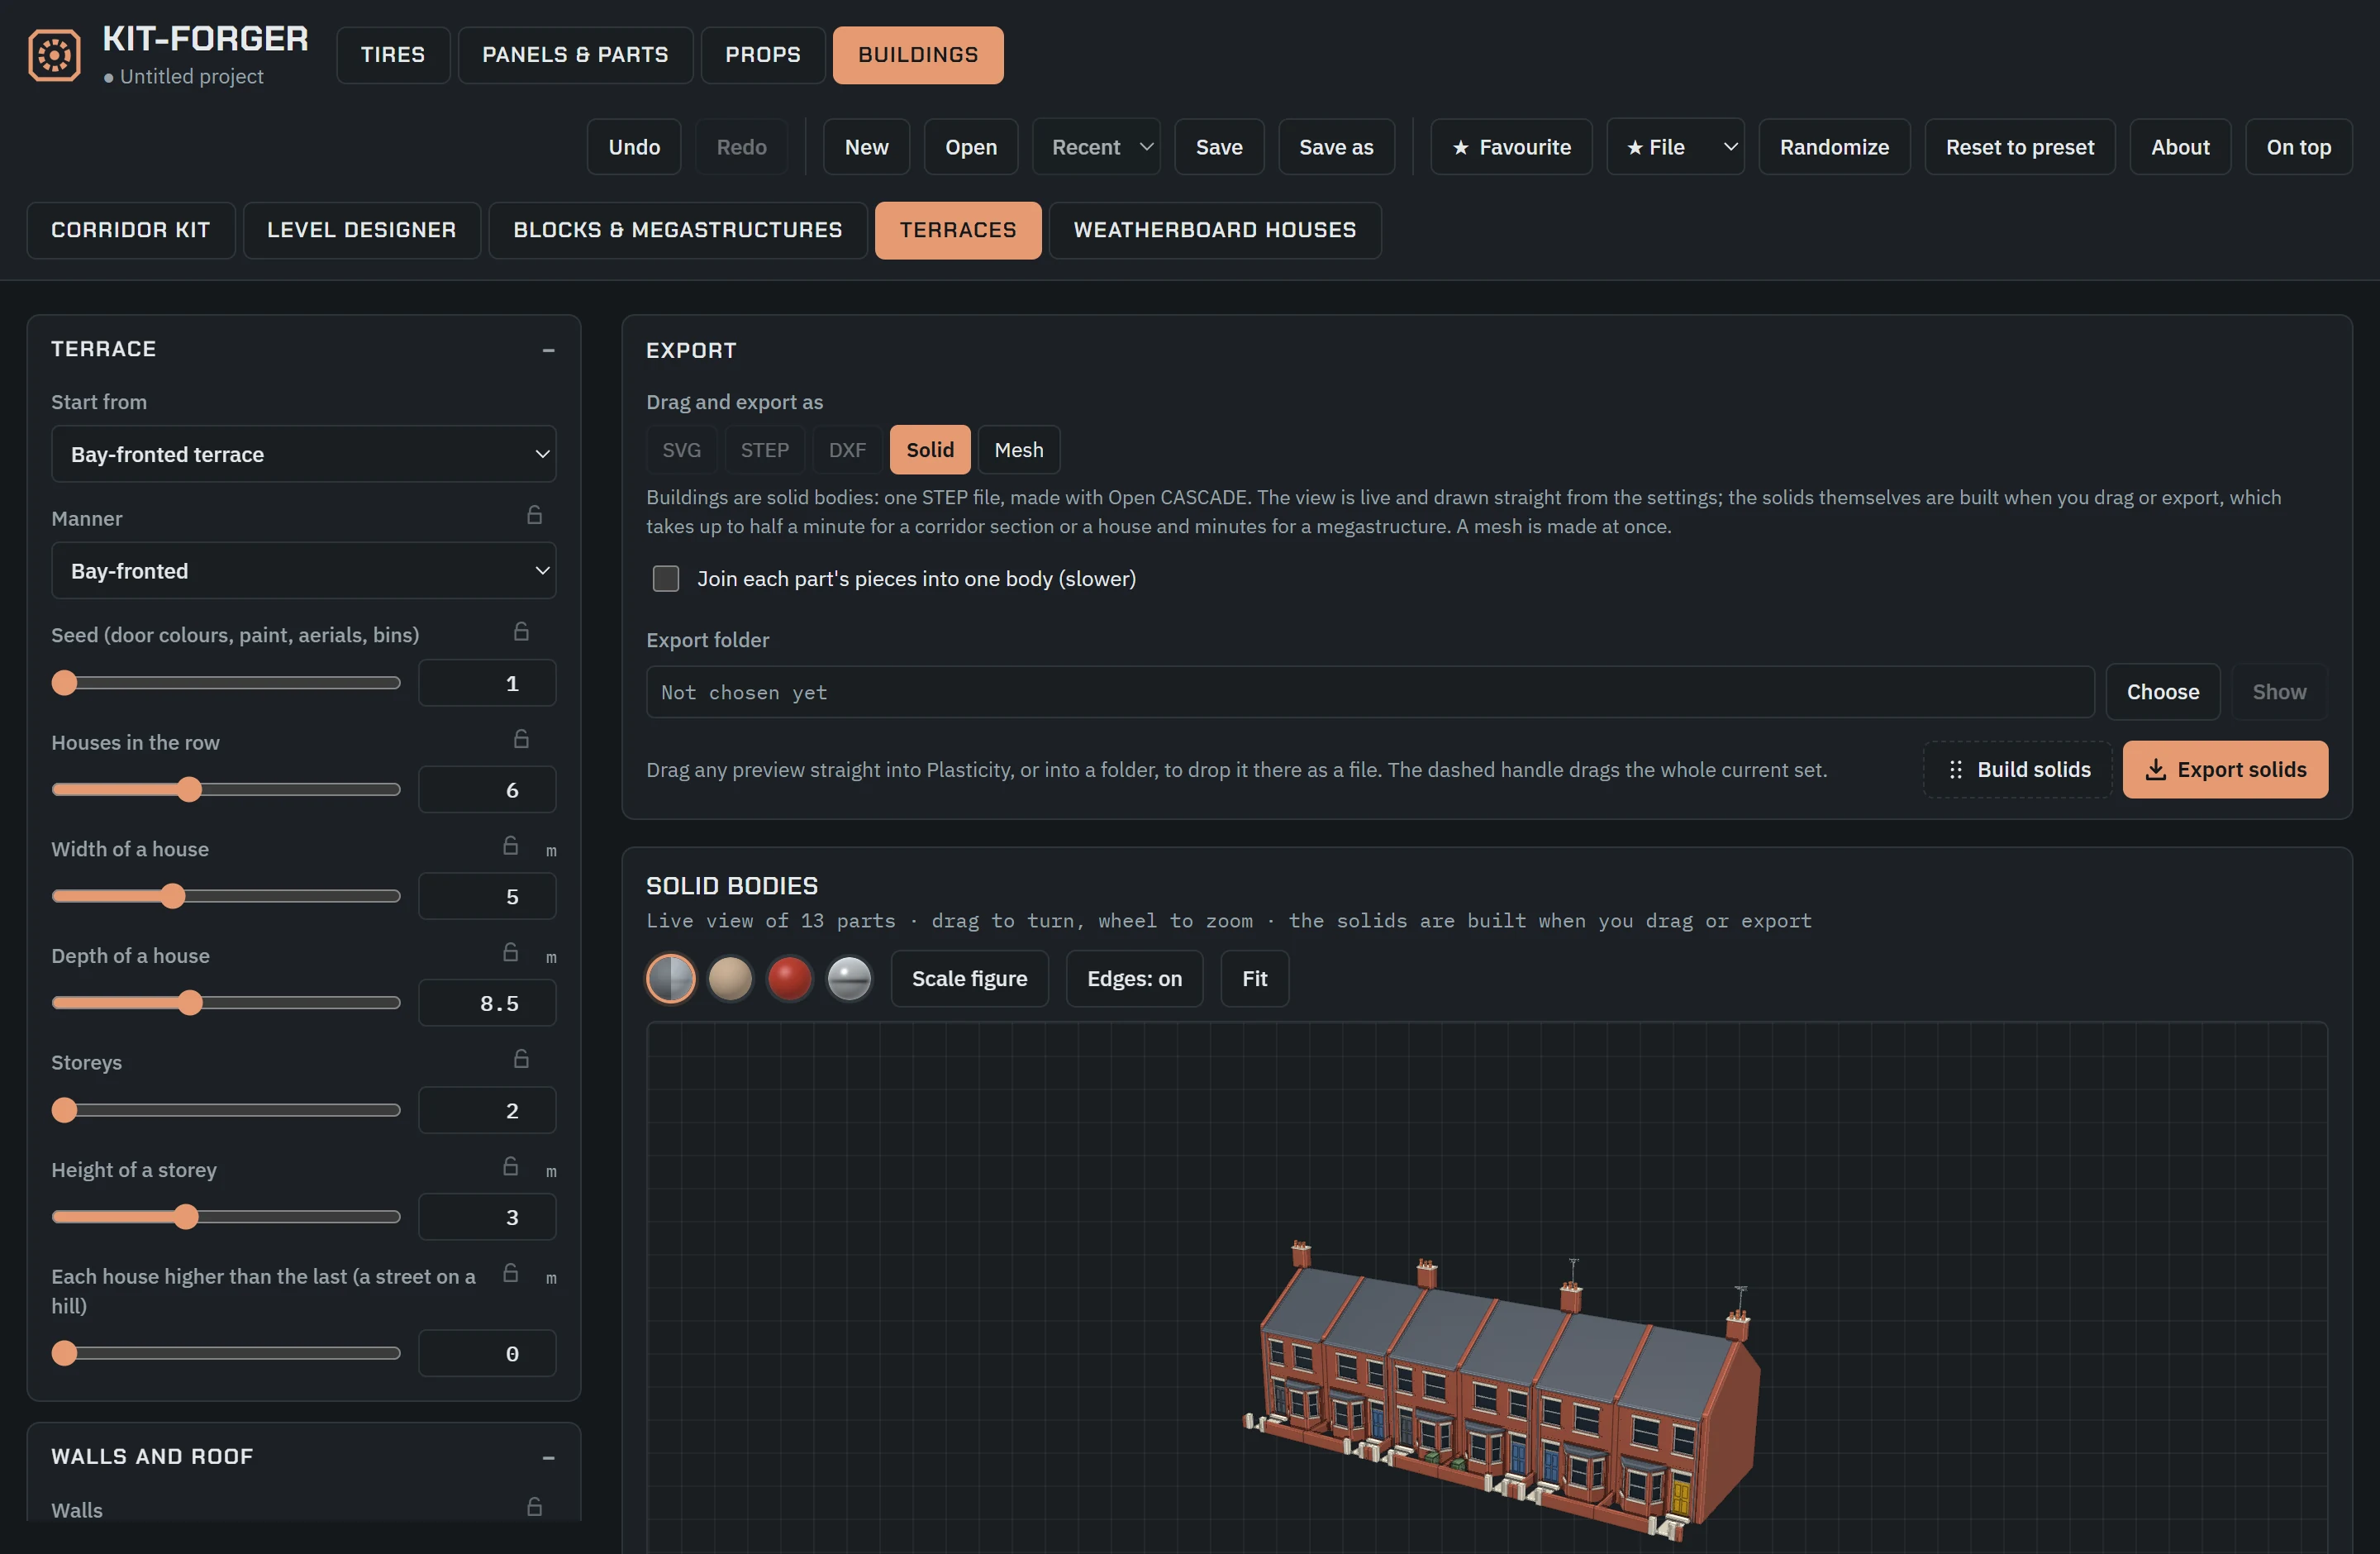
The corridor kit and the level designer are sized in millimetres; blocks, terraces and houses in metres. Everything stands on the ground (Z = 0), Z up.
A building is many parts. As solids, a terrace takes the kernel 14 to 40 seconds and a house 11 to 20; a megastructure takes minutes, and the largest makes a STEP file of about 150 MB. As a mesh the largest takes about two seconds. Setting Windows lit to 0 makes a megastructure lighter.
Corridor kit
The corridor kit is a set of pieces that fit together. Every piece is made from the same section settings, so the pieces meet end to end, and changing a setting changes every piece with it. It is not only sci-fi: Stone vault, Mine drift, Office hallway, Colonnade, Brick sewer and Concrete underpass are presets too.
The pieces
Choose one under Piece of the kit:
| Piece | What it is |
|---|---|
| Straight | A straight piece of Length. Pieces in a row makes a run of up to eight. |
| Bend to the left, Bend to the right | A bend by Turn, at Radius (to the middle of the floor). |
| Ring segment (floor outside) | Curves upward with the floor on the outside, as in a wheel-shaped space station. The key sizes say how many segments close the ring. |
| Hump (floor inside) | Curves downward. |
| Ramp or stairs | Climbs by Rise over its length (negative: down). Steps puts level treads on it. It starts and ends on the kit's outline, lifted by the rise. |
| Junction room | A room with openings: Opening on the left, Opening on the right, Opening at the back. |
| Whole ring (space station) | The ring segment, with its turn set to divide the circle evenly, copied round the ring, plus a hub on the axis with a docking collar at each end and Spokes to the hub. Hub size sets the hub. |
An end piece is any piece with Door at the start set to Solid wall (an end piece).
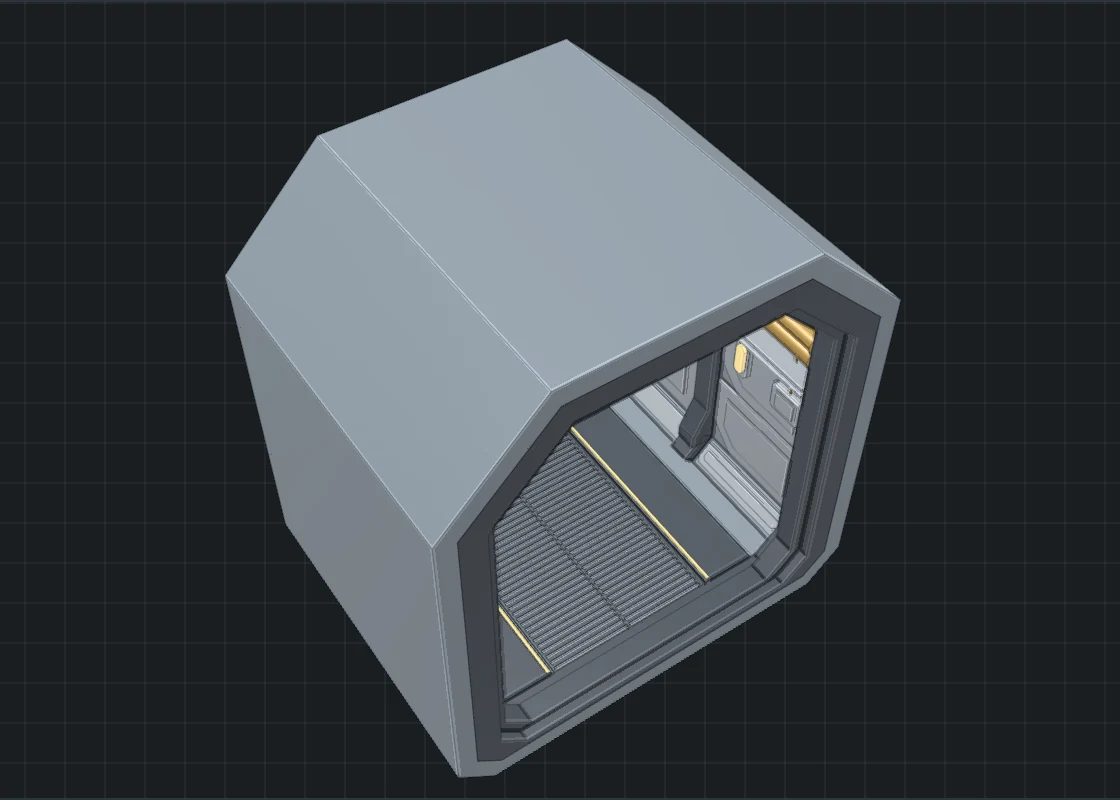
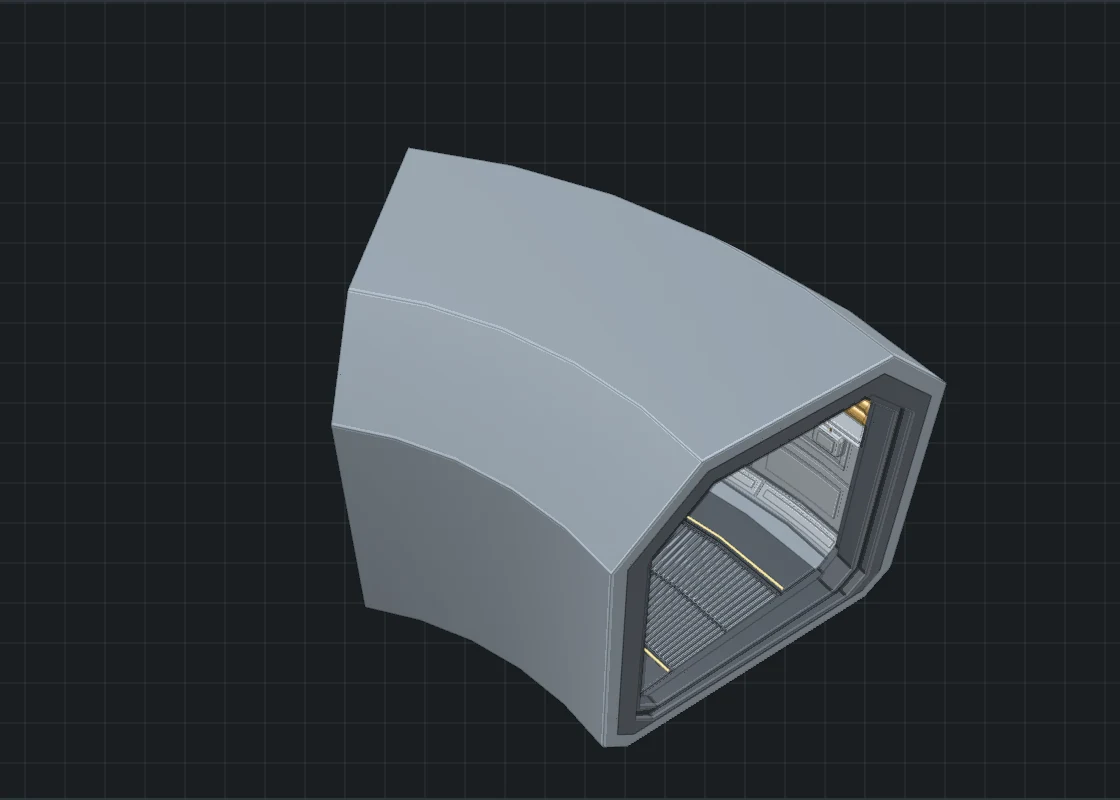
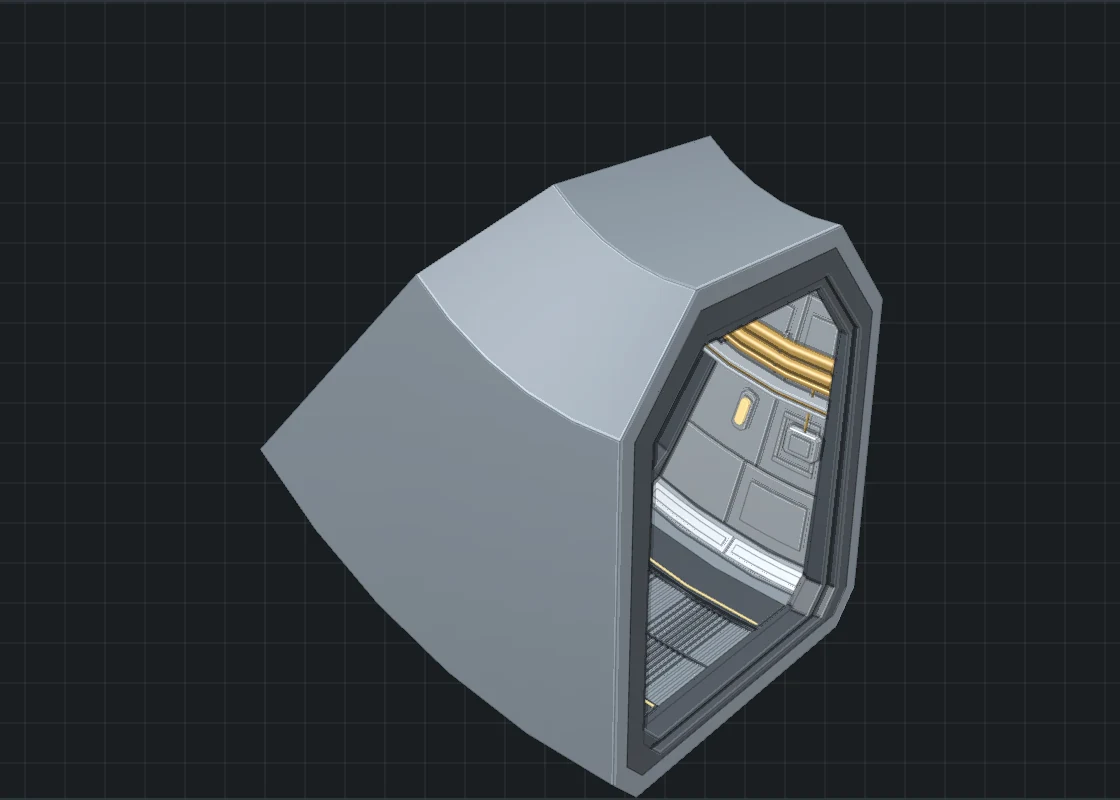

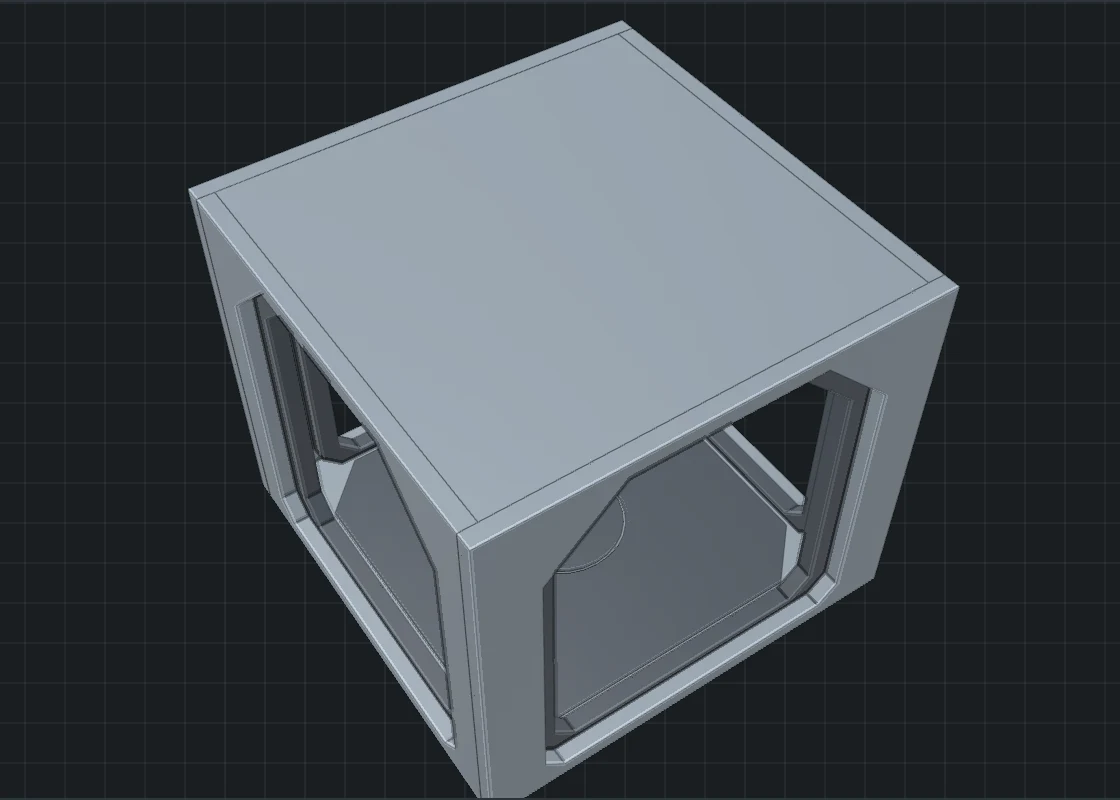
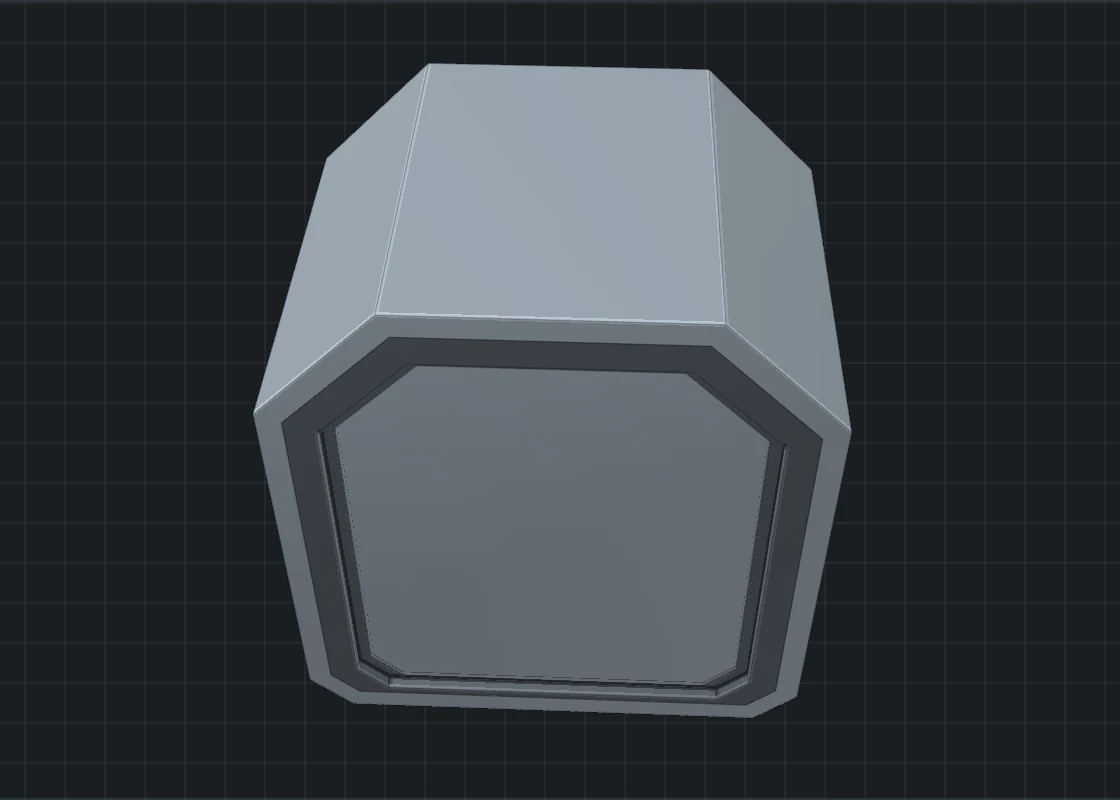
All six from the same settings, the Service corridor preset, with only Piece of the kit changed (and Steps and Door at the start where the caption says).

Putting pieces together
A corridor piece starts at Y = 0 and leaves along +Y, with its floor at Z = 0 and its middle on X = 0. Every piece starts and ends on the same outline, so the next piece goes on where the last one ends. Move a straight piece along Y by its length; turn the piece that follows a bend by the bend's angle. The side openings of a junction room take pieces turned a quarter turn, which you turn in your CAD program. Or let the Level designer join them for you.
Windows
The Windows group cuts a band of windows through the hull between the ribs, with a pane of glass in each opening and a frame round it on the inside.
- Windows in: None, Both walls, The left wall, The right wall, The floor (a station ring looks out through it), or The ceiling.
- Height of the window, Sill above the floor, and Panes between ribs (1 to 4). The windows follow the ribs, and bend with a bent piece.
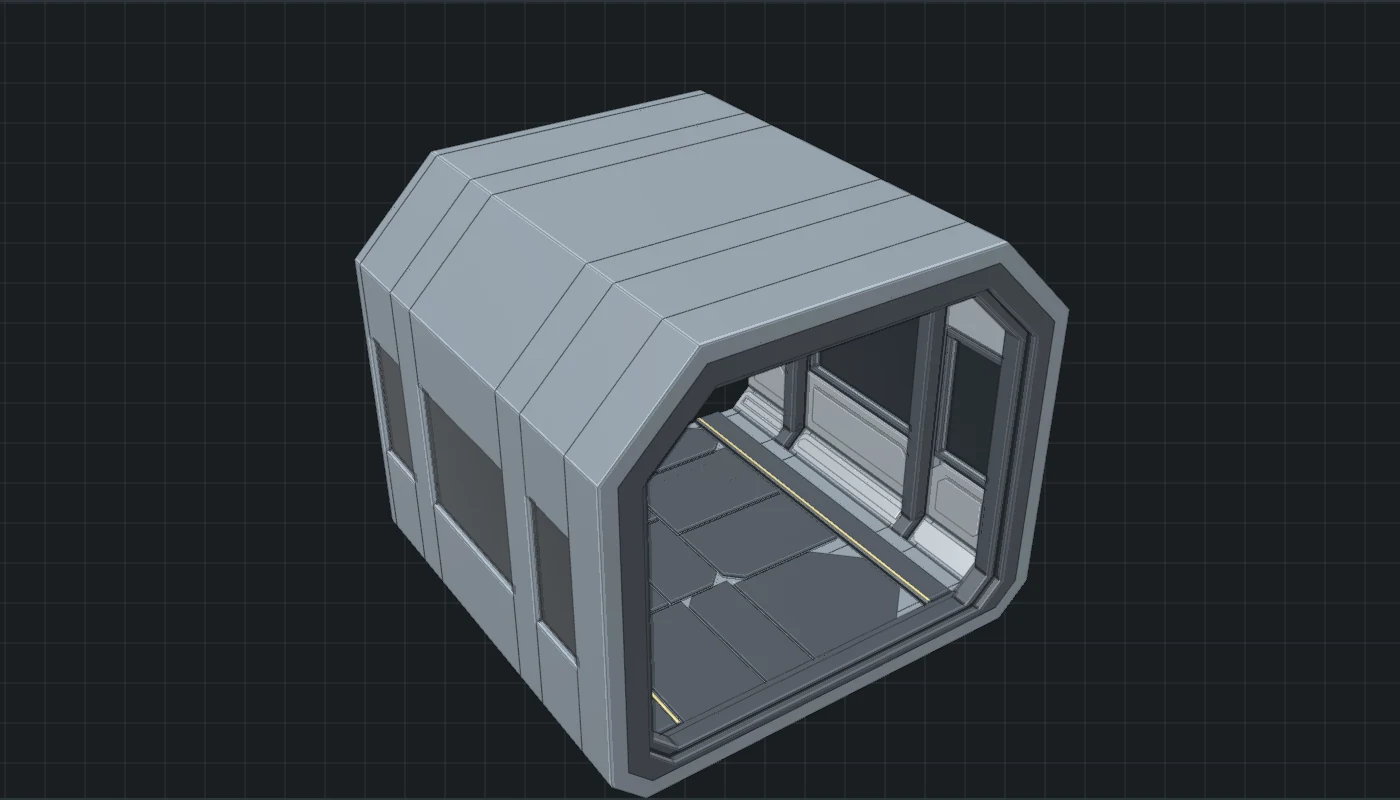
Export every piece of the kit
- Under Export, switch on Export every piece of the kit, made from these settings. The export button now reads Export the kit.
- Click it. Kit-Forger writes eight files into one folder, named after the section, for example
corridor_kit_chamfer_2400x2600: straight, both bends, ring segment, hump, ramp, junction room and an end piece.
As solids a whole kit takes a few minutes, and the window waits meanwhile; a message says which piece it is on. As a mesh it takes about two seconds. Each file is named after its piece, for example corridor_left_45deg_r4000_chamfer_2400x2600.step.
The whole ring in a file
The 3D view always shows the whole ring. The file holds one segment, the hub and the spokes, and the message after the build says how to copy the segment round. Switch on Whole ring in the file (large); off: one segment to copy round to write every segment; a dressed ring then makes a file of tens of megabytes.
Settings
- Section (shared by every piece): Cross-section (Square, Cut corners, Hexagon, Arched or Tapered walls), Inside width, Inside height, Top corners, Bottom corners, Hull thickness, and Both sides alike (off, each wall gets its own layout). Layout seed and New random layout deal a new arrangement of the dressing.
- Plating: Plates, Long strips, Staggered rows or None, with plate size, height, gap, cut corners and raised details.
- Ribs and frame: Ribs (None, Straight, Buttress, Gussets, Arched, Notched or Round columns), how many per piece, their width and depth; Frame at the start (None, Plain ring, Stepped ring or Bolted ring), its width and depth.
- Floor and ceiling: Floor (Plain, Grating, Plates or Planks), walkway width, kerb height and Light strips on the kerbs; Ceiling (Plain, Beams, Light troughs, Beams and light troughs, or Round duct), beam depth and light troughs per row.
- Pipes and fittings: on both walls or one; up to six pipes, Cable tray, Hand rail, boxes with conduit, vents, wall lamps and Light strips on the upper slopes.
- Door: Door at the start (None, Square opening, Cut top corners, Eight-sided, Arched, or Solid wall (an end piece)); Leaves meet straight down the middle, in a zigzag, on a diagonal, in a step, or as one leaf; opening width and height, wall thickness, and Open, which slides the leaves aside.
- Windows: see above.
- Export: switches for each part (Hull, Plating and ribs, Floor, Ceiling, Frame, Pipes and fittings, Lights, Door) to leave it out of the view and the file, and Join each part's pieces into one body (slower). Joined, the pieces of a part that touch become one body (a plate and the detail on it); off, every piece is a solid of its own, which builds faster.
A corridor piece gives the bodies Hull, Plating, Ribs, Frame, Floor, Ceiling, Pipes and rails, Fittings and Lights, and Door wall and Door leaves when it has a door. A junction room gives Hull, Frames, Floor, Ceiling, Lights and Corner posts. The whole ring adds Hub, Spokes and Docking lights.
Presets (26): Service corridor, Hex tunnel, Clean lab, Arched hall, Cargo spine, Maintenance crawl, Airlock, Blast door, Station ring, Corner bend, Crossroads, T-junction, Corner room, Dead end, Ramp, Stairs, Space station, Observation gallery, Skylit hall, Station with a view, Colonnade, Brick sewer, Concrete underpass, Stone vault, Mine drift, Office hallway.
Level designer
A level is corridor pieces joined end to end, with junctions, ramps, stairs and doors, all made from the one kit, with props stood in it. It is made from the Corridor kit tab as that tab is set: change the cross-section there (to Hexagon, say), come back, and the whole level is hexagonal and still fits together.
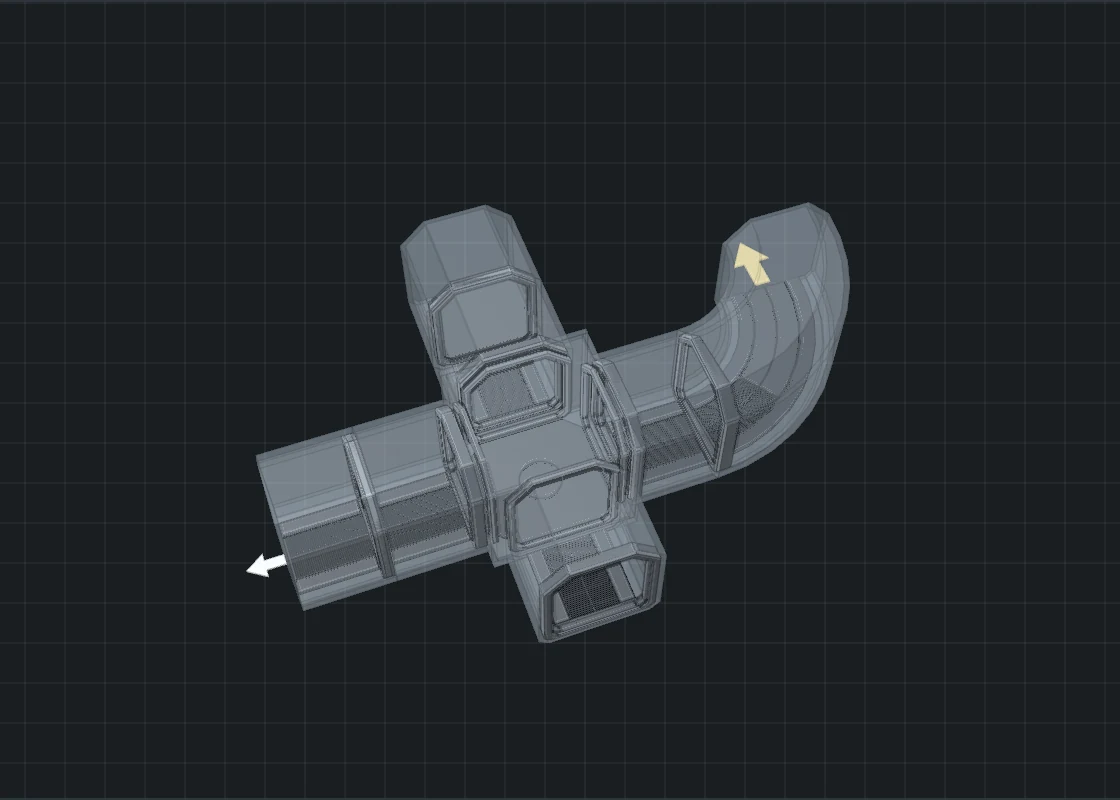
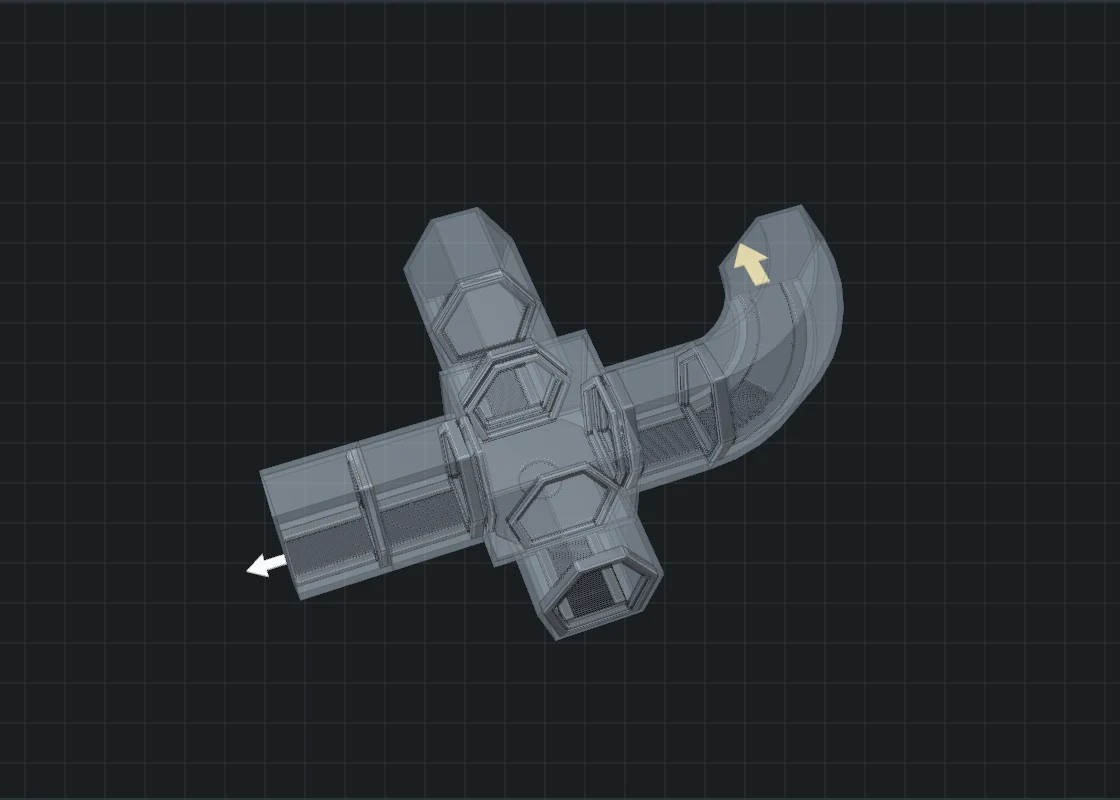
Building a level
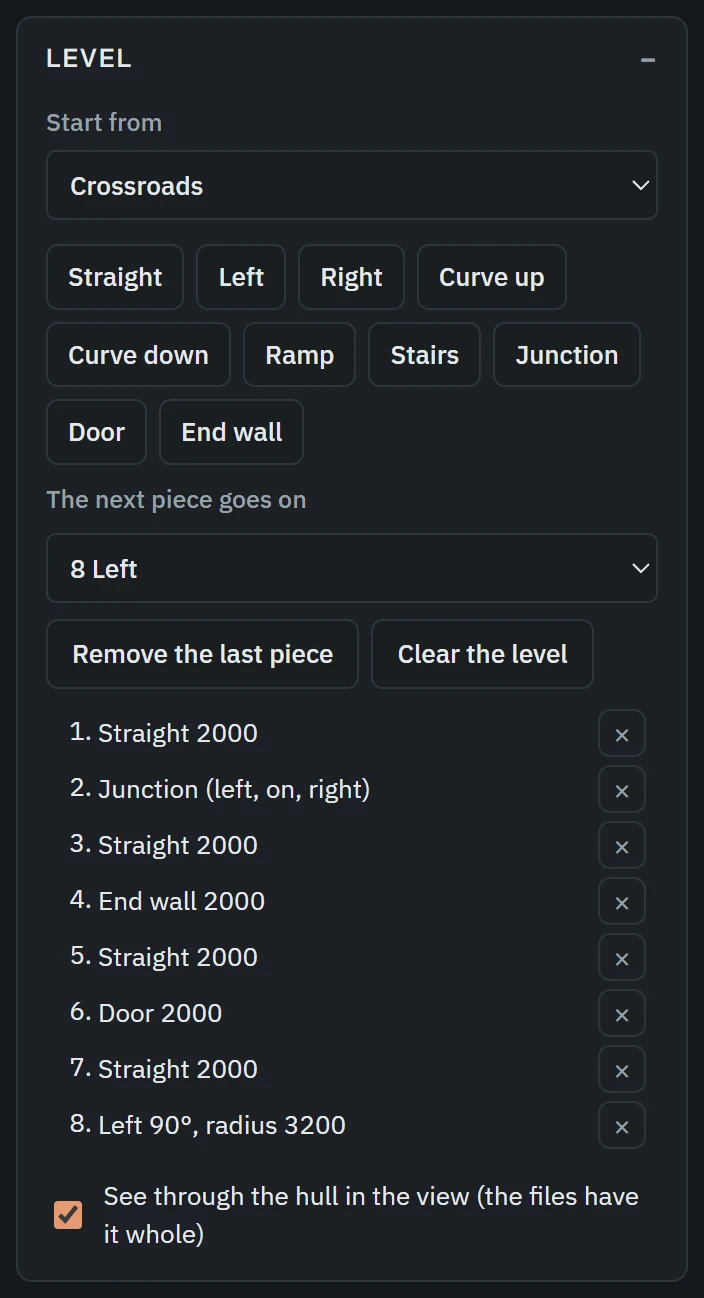
- Press a piece button: Straight, Left, Right, Curve up, Curve down, Ramp, Stairs, Junction, Door or End wall. Each press joins that piece on where the lit arrow is, and the arrow moves to the new piece's far end.
- A junction has three ways on. The next piece goes on chooses which open end the next piece joins.
- The sliders under The next piece set the size of what you add next: length, turn, radius of a turn, and rise of a ramp or stairs; and which ways a junction opens. A piece keeps the sizes it was added with.
- The list shows every piece in order. The cross beside one removes it and everything joined on after it. Remove the last piece and Clear the level do what they say, and Undo works.
Props in the level
- Open Props in the level. Choose a prop (crates, cameras, castors, trolleys, machines and street furniture are all in the list) and the piece it goes in.
- The sliders say where it goes: Along the piece, Across (-100 is against the left wall, 100 against the right), Turned, and Raised. A wall camera goes on the nearer wall and a ceiling camera under the ceiling by themselves.
- Press Add the prop. Scatter crates and drums stands a prop or two in every piece; press it again for others. The cross beside a prop removes it; Remove every prop clears them all.
A prop added as its tab has it follows that tab: change the design there and the prop in the level changes. See through the hull in the view (the files have it whole) lets you see the props inside. Under Export, Dress every piece in full (plating, ceiling, pipes, lights: slower) adds the kit's dressing to every piece; it is off to begin with so the view stays quick. The whole level exports as one set, each piece in its place.
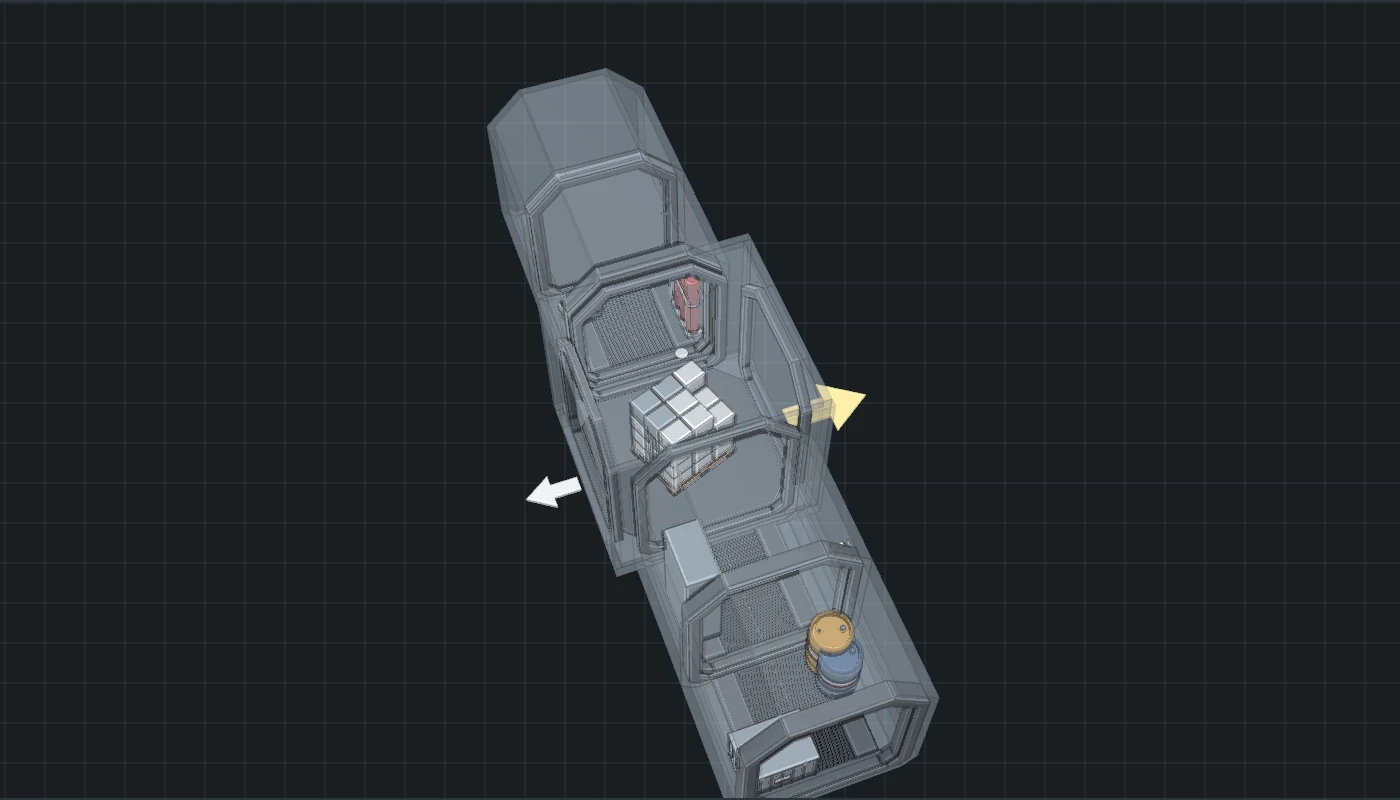
Presets (11): A short run, Empty level, A dressed run, Dog-leg, Square loop, Crossroads, Up and over, Stair tower, S-bend, Arc of a station, Three rooms.
Blocks & megastructures
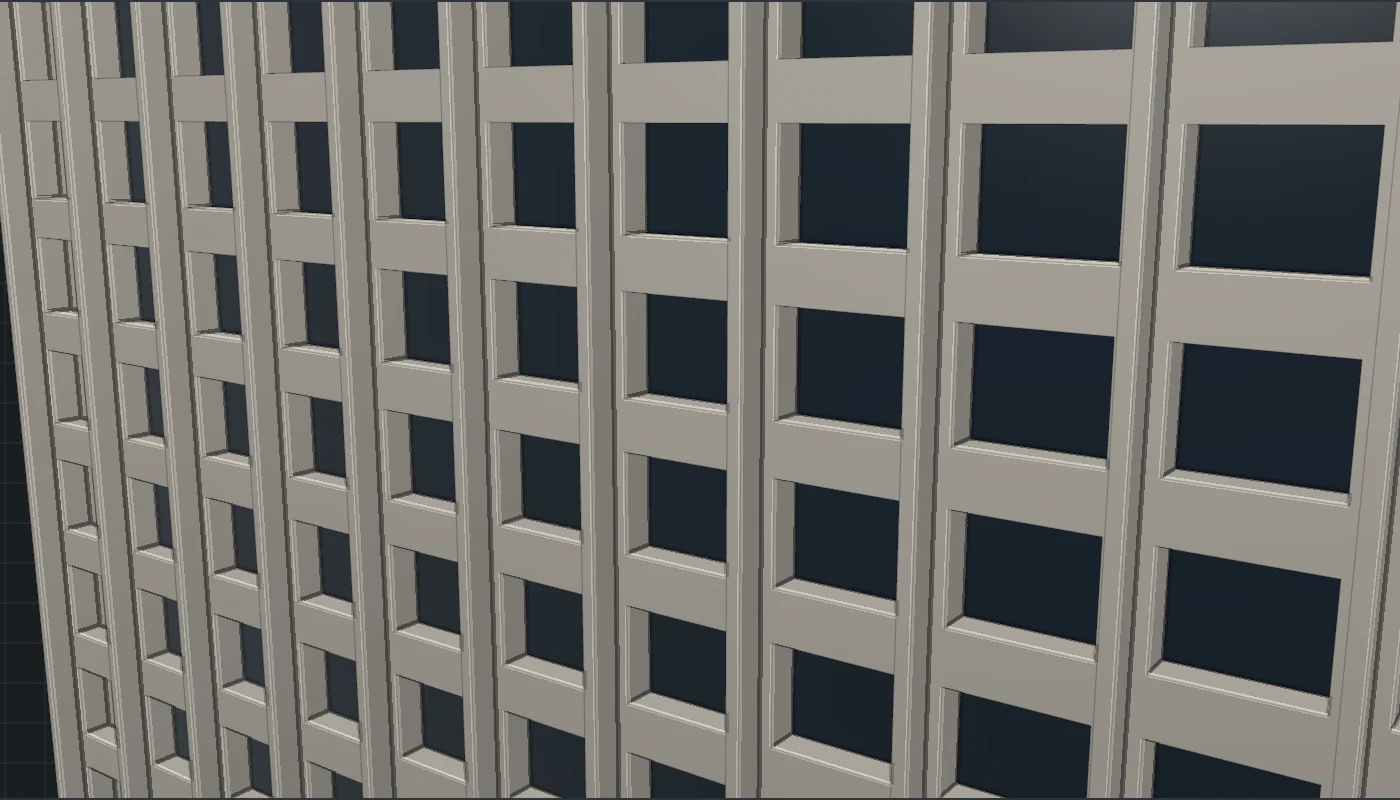
Large buildings from a few numbers and a seed. Every window is a hole right through the wall with the glass set behind it, so a window is as deep as the wall is thick.


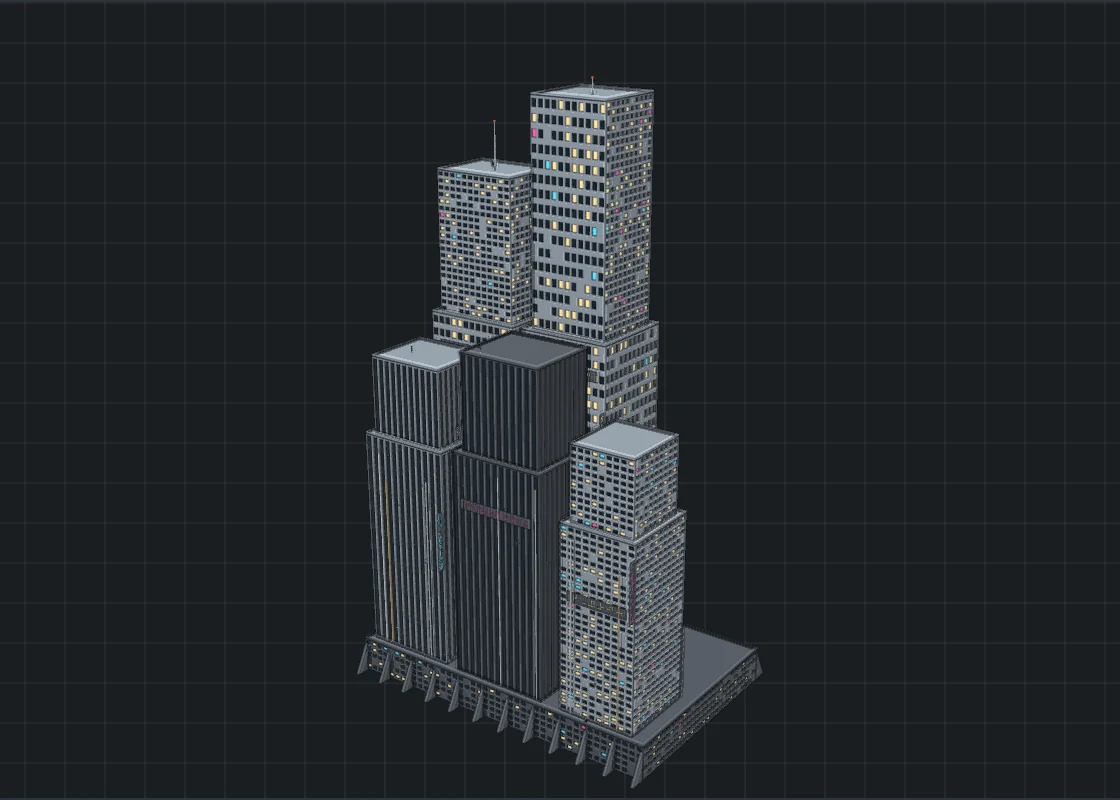
- Manner: Brutalist, Sci-fi or Cyberpunk megastructure, each with two forms under Form: a slab on a podium or top-heavy on piers; one shaft in tiers or twin shafts and bridges; a megablock of towers on a podium or an arcology with sloping sides.
- Seed gives another building of the same kind. Across, Deep and High in metres, and Walls, its colour.
- Windows: Height of a storey, Width of a bay, How deep the windows sit (the thickness of the wall) and Windows lit.
- Details: tiers or towers, dressing (pipes, signs, boxes and bridges on a megablock), Things on the roofs (designs from the Rooftop & aerials tab, kept clear of each other) and Neon (Mixed, Warm, Pink or Cyan).
Presets (12): Brutalist slab, Council tower, Civic centre, Ministry, Sci-fi spire, Colony tower, Twin spires, Megablock, Neon district block, Megatower, Arcology, Corporate pyramid.
Terraces
A row of terrace houses. The doors and windows are cut through the wall, with glass set back in them, sashes, sills and lintels, and a panelled door with a light over it.

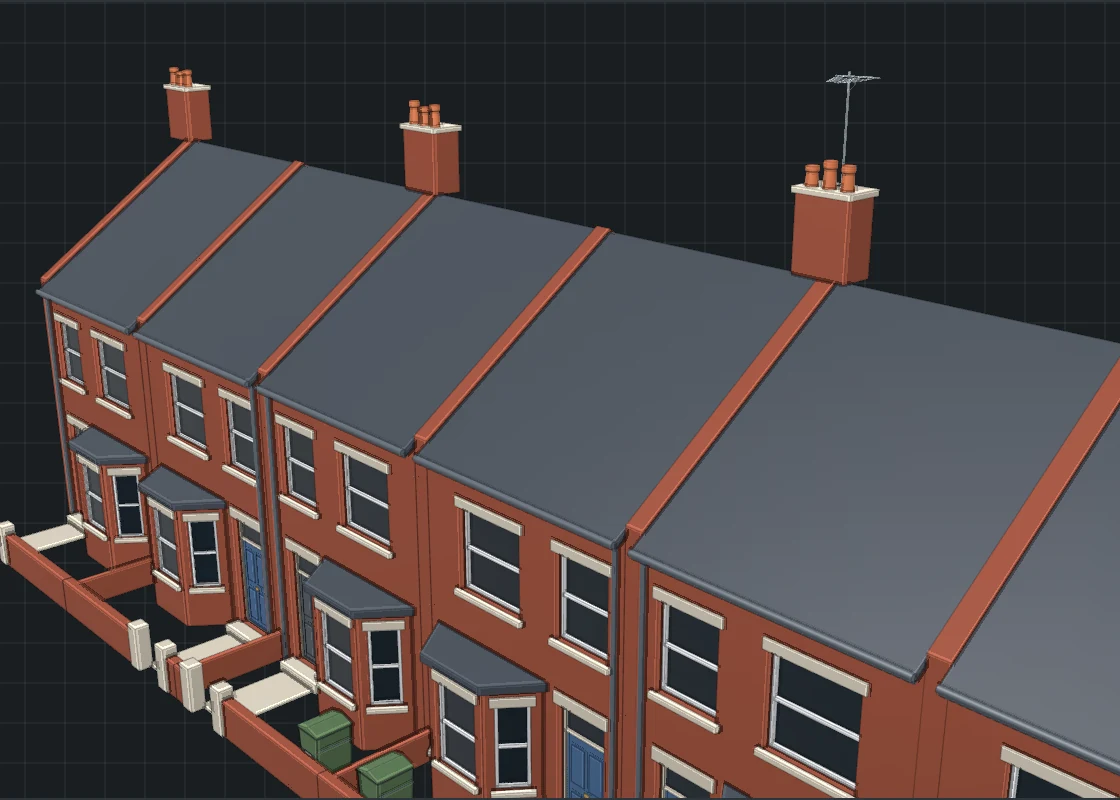
- Manner: Bay-fronted; Flat-fronted, behind a parapet; or Cottages.
- Houses in the row (1 to 14), Width of a house, Depth of a house, Storeys (2 to 4), Height of a storey, and Each house higher than the last (a street on a hill).
- Walls (Red brick, Yellow stock brick, Grey render, White render or Sooty brick), Houses painted, Pitch of the roof, Bay window (On the ground floor, Through two storeys or None), Doors in pairs (every other house the other way round), chimney stacks, TV aerials, roof lights, and Front garden.
- Seed changes the door colours, which houses are painted, the aerials and the bins.
Presets (8): Bay-fronted terrace, Two-storey bays, Painted seaside row, Terrace on a hill, Town houses, Stucco crescent houses, Workers' cottages, Mill town row.
Weatherboard houses
A single-storey timber house: boards that lap one over the next, an iron roof, a verandah with a rail and steps, up on stumps.
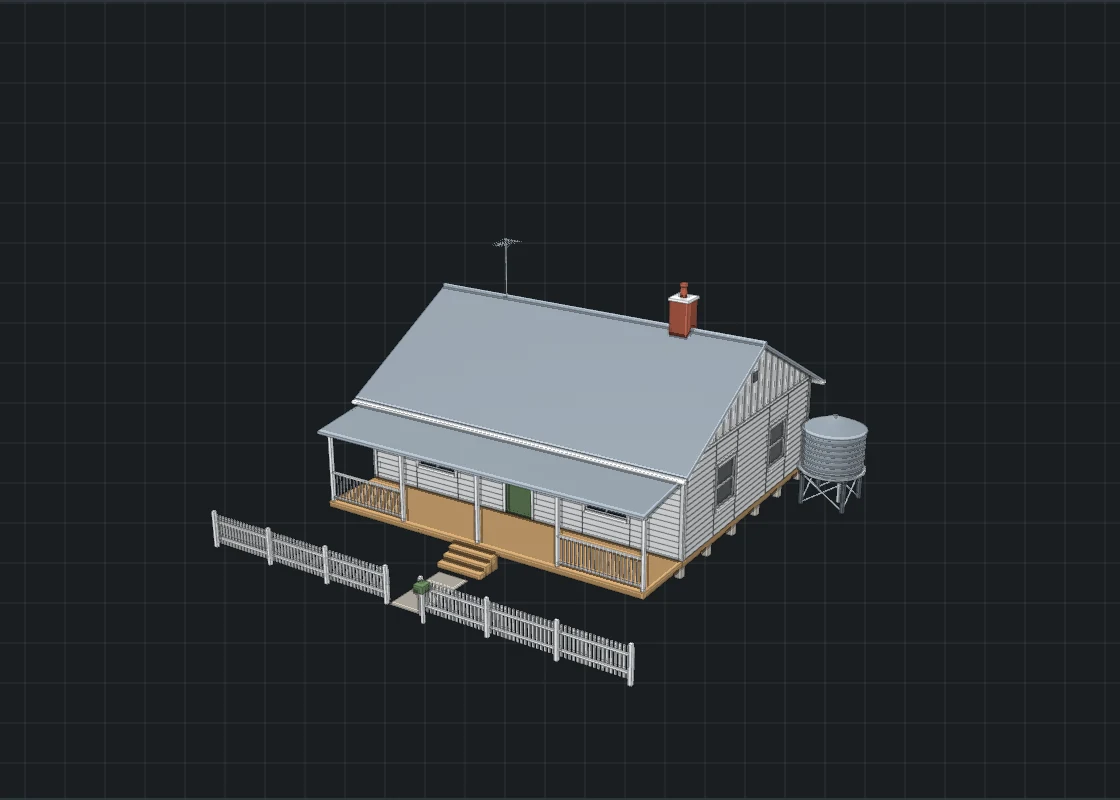

- Plan: Cottage: the ridge along the street; Gable to the street; or An L: a front room standing forward.
- Across, Deep, Height of the walls, Floor above the ground (on stumps) (the steps grow to match) and Pitch of the roof.
- Width of a board that shows, and the colours of the Weatherboards, the Trim and the Roof (Grey iron, Red iron, Green iron, Dark iron, Slate or Tiles).
- Around the house: Verandah (0: none), a rail round the verandah, chimney, water tank, air-conditioning unit, TV aerial, and picket fence and letterbox. Seed changes the colour of the door.
Presets (8): Weatherboard cottage, House on tall stumps, Gable-front house, Narrow workers' house, L-shaped house, Farmhouse, Beach shack, Grey house, dark trim.
- A dressed corridor piece is a STEP file of 4 to 10 MB and takes 10 to 30 seconds to build; a whole kit a few minutes.
- On a bent corridor piece the plates have square corners, the grating is rails and bars, and boxes, vents and lamps are straight things set on a curved wall. On a ramp they lean with the slope. Pipes run through ribs without holes. Stairs have no balusters. A window is a plain rectangle, and a junction room has none.
- On the whole ring, the spokes meet the hull from outside: there is no opening from a spoke into the ring or the hub.
- In the level designer nothing stops pieces running into each other, or two props standing in one place. A piece's sizes and a prop's place cannot be changed after it is added: remove it and add it again. Random mode does nothing there yet, and the whole ring is not a level piece (a ring segment, Curve up, is).
- Blocks have flat walls square to each other (but for an arcology's slopes): no round towers, doors or balconies yet. What stands on a roof is placed by the seed.
- Terraces are a straight row; terrace and house roofs are plain gables. A weatherboard house has one storey.
Formats
Choose the format under Drag and export as. It applies to dragging, to the save buttons on the cards and to exporting, and Kit-Forger remembers it.
All five are standard formats that other programs read too. What this page says about importing is about Plasticity; other programs read the same files in their own way. In Props and Buildings only Solid and Mesh are offered.
You may need to play with some of the import settings to get STEP and DXF to appear correctly.
| Format | What you get | Use it when |
|---|---|---|
| SVG | Flat 2D files, one per profile. Plasticity lays every SVG on the ground plane and takes one file per drop. | You want one profile fast, or a profile that belongs on the ground anyway (a cross-section, a panel sheet). |
| STEP | 3D curves, each profile standing in its own plane. A whole set is one file. Imports in Plasticity Indie and Studio. | You want a whole set at once, or profiles that stand upright: side profiles, rim discs, doors, fastener and object parts. |
| DXF | 3D curves like STEP. | You work in another CAD program that prefers DXF. DXF is there mainly for other CAD programs: Plasticity imports it in the Studio edition only, so with Plasticity Indie use STEP. |
| Solid | Finished solid bodies in a STEP file, built by Open CASCADE on request. | You want bodies, not curves, for CAD. See Solid bodies. |
| Mesh | A mesh with quads, UVs and a material on every part, as OBJ + MTL, glTF (.glb) or STL. Made at once, with nothing to build. | You work in Blender, a game engine or another 3D program, or want to print. See Meshes. |
Why STEP exists
An SVG cannot say which plane it stands in, so Plasticity lays every SVG flat on the ground. That is fine for a cross-section, but a side profile or a door is meant to stand upright. A STEP file carries real 3D positions, so each profile arrives where it belongs, and a whole set travels as one file, which matters because Plasticity takes one file per drop.
STEP and DXF also carry names. In Plasticity's outliner each profile from a STEP or DXF file, and each solid body, keeps the name Kit-Forger gave it. The curves of an SVG arrive simply numbered (Curve 436, Curve 437 and so on).
Where things stand in STEP and DXF
| Design | Placement |
|---|---|
| Tire cross-section, rim section | On the ground, with the axle through the origin. |
| Side profile, rim disc, rim face | Upright across the axle, on the wheel's centre plane, so an extrude along the axle lines up with the revolved parts. |
| Tread tile and strip | Flat, lifted to the crown. |
| Wire spokes | Every spoke's centre line where it runs in the wheel, from the hub flange to the hoop. |
| Brake disc, chain sprocket, cassette | Upright across the axle, where they sit on the hub. |
| Doors & windows | Upright, as drawn. With the origin at the bottom centre, the floor line is on the ground. |
| Fasteners | Side profile upright on its axis, the head under it, the drive recess on top of the head. |
| Barrel | Body upright on its axis, lid at the top. |
| Satellite dish | Every part upright in one plane, sharing the dish axis. |
| AC unit | Front, side and top panels on the faces of a box standing on the ground; the rotor behind the first fan guard. |
| Panel sheets, shapes, port plates | Flat on the ground, or upright with Stand upright like a wall. |
Don't mirror Y has no effect on STEP and DXF.
The AC unit's Fan rotor as STEP curves arrives in Plasticity as its hub circle only. Drag the rotor as SVG instead.
Solid bodies
In the Solid format Kit-Forger revolves and extrudes the profiles itself and hands you finished bodies in a STEP file. It does this with Open CASCADE, a CAD kernel that ships with Kit-Forger. This chapter is about Tires and Panels & parts; Props and Buildings work a little differently (see How Props work). For a mesh instead of solids, see Meshes.
Build and drag
- Under Drag and export as, choose Solid. A Solid bodies card appears under the export bar.
- Click Build solids on that card, or click the dashed handle. A message says the bodies are being built.
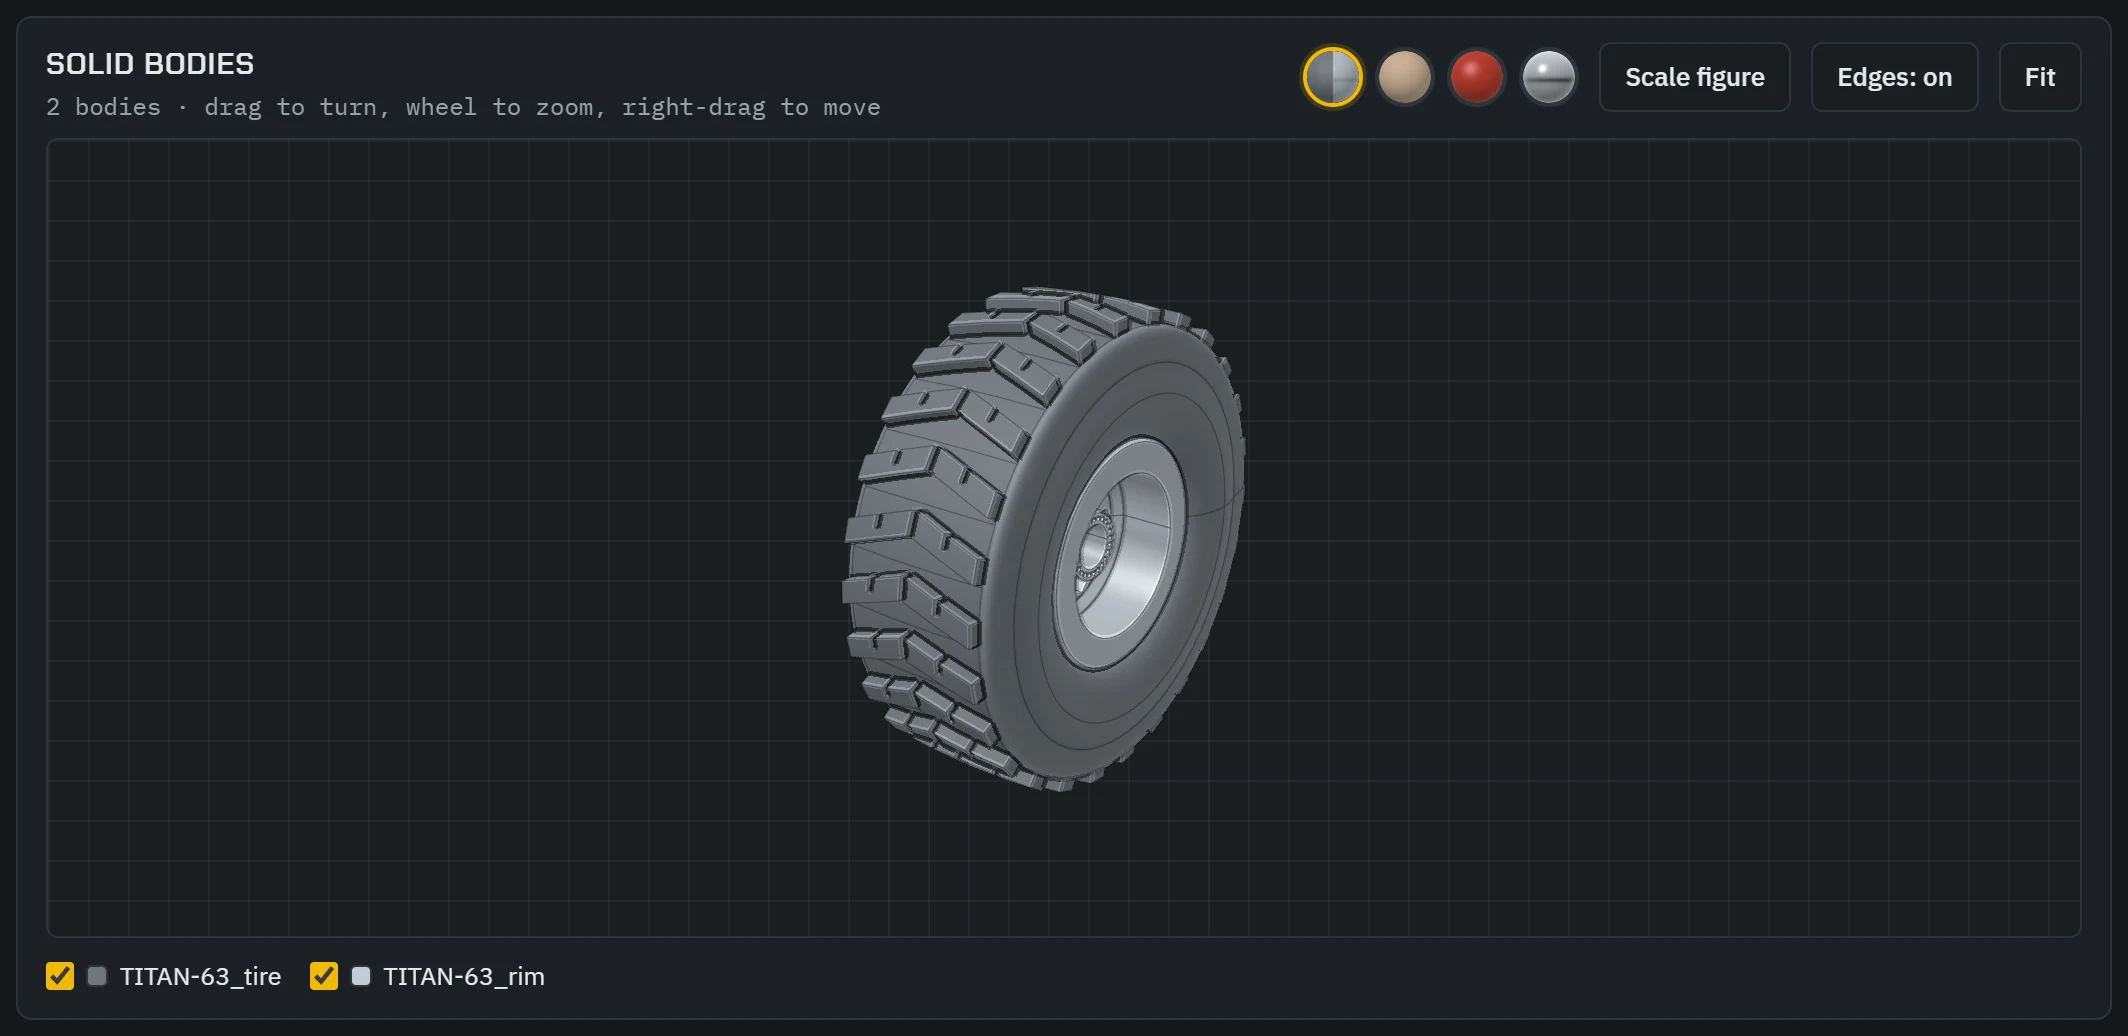
- When they are ready the handle reads Drag 2 solids (or another number) and the bodies appear in the 3D view.
- Drag the handle into Plasticity for all the bodies in one file, or drag a single preview card for just that card's body. You can also export them to the folder.
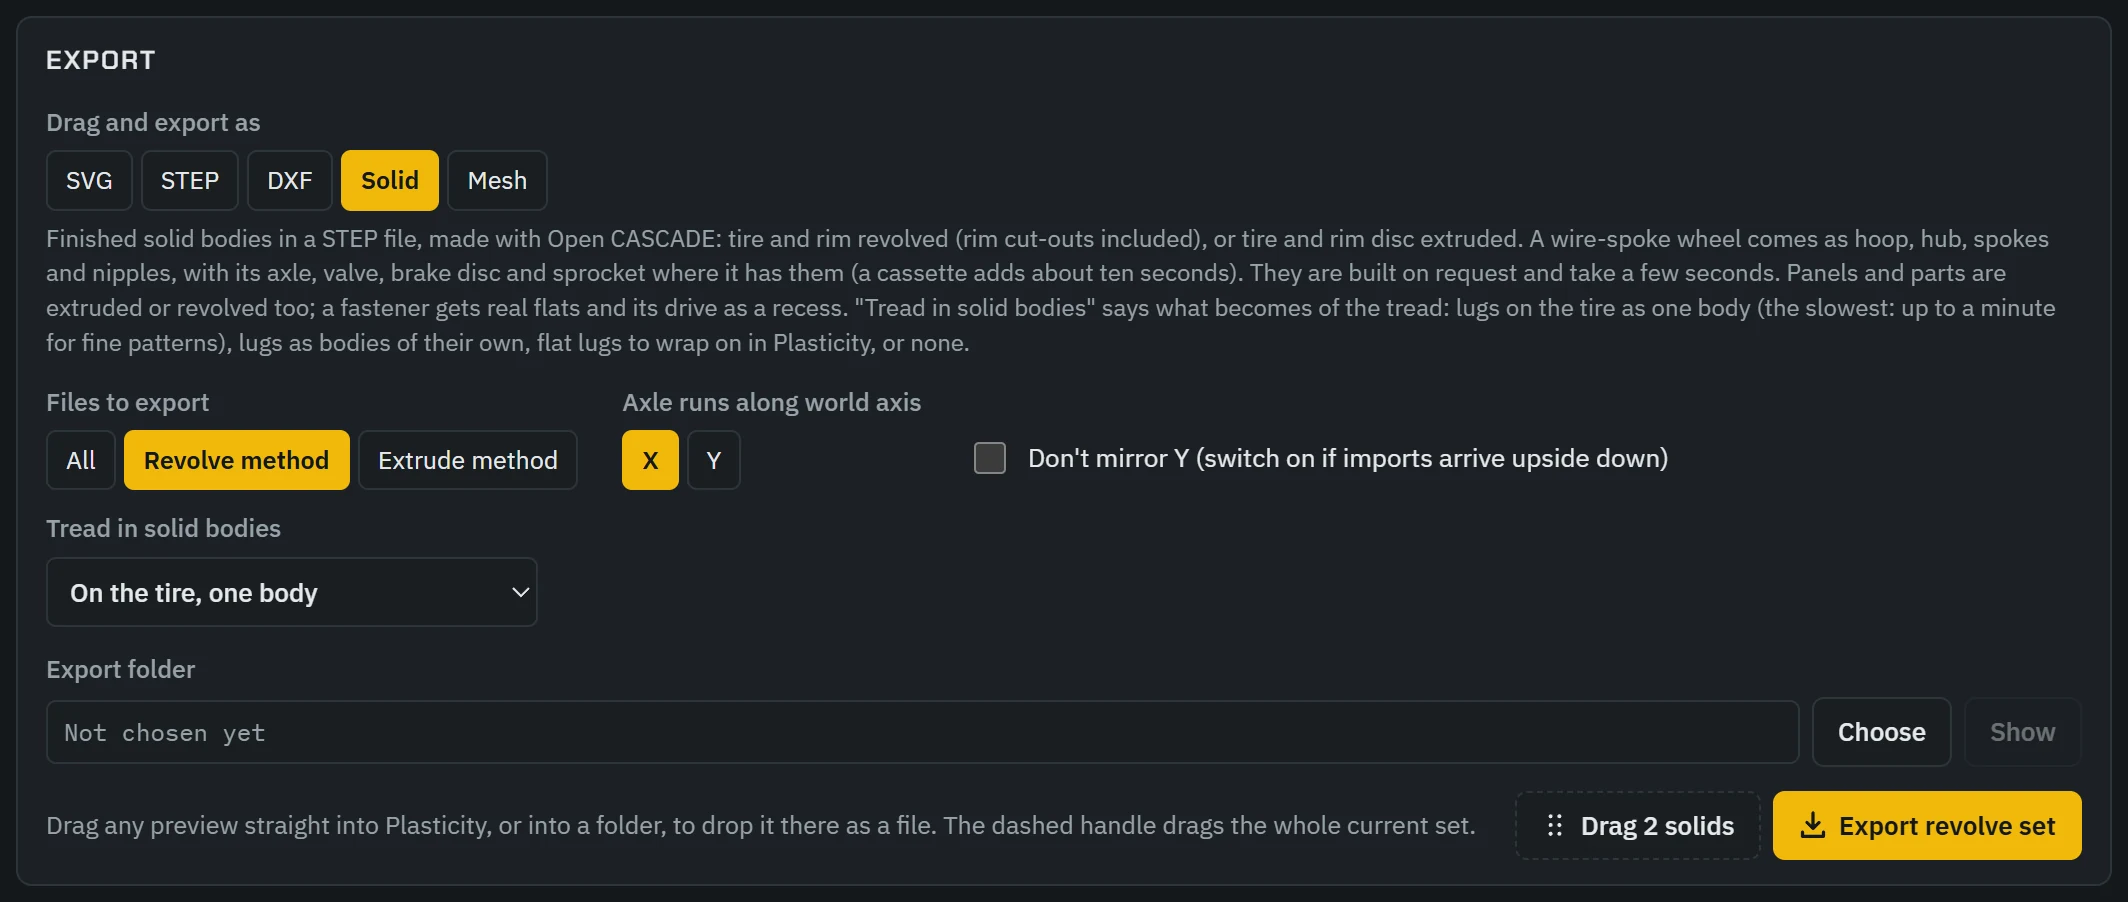
Solids are built only when you ask, because a build takes seconds. Change any setting and the handle goes back to Build solids.
Kit-Forger does not respond until a build is done. It is not hung: the message names each body as the kernel starts on it, and the window redraws between bodies. Most tires take 3 to 15 seconds; fine tread patterns can take up to a minute, and a cassette adds about ten seconds. A full panel sheet or a vent plate takes about 5 seconds; bevelled panel edges add about a third of a second per panel. The first build after starting Kit-Forger takes a few seconds longer while the kernel loads.
Which bodies a tire gives
| Files to export | Bodies |
|---|---|
| Revolve method | The tire (the cross-section revolved, with the tread as chosen below) and the rim (the rim section revolved, with the rim face cut-outs cut through it). |
| Extrude method | The side profile extruded by the section width, and the rim disc extruded by the bead seat width, both centred on the wheel. |
| All | All of the above. The extruded tire and rim disc stand in the same place as the revolved ones, so the 3D view starts with them switched off. |
| A wire-spoke wheel | In place of the rim: the hoop, the hub, the spokes and the nipples, and the axle, valve, brake disc and sprocket or cassette where the wheel has them. These come with every choice of Files to export. |
The bodies are named after the design, for example TITAN-63_tire and TITAN-63_rim, or for a bicycle wheel GRAVEL-700_hub, GRAVEL-700_spokes, GRAVEL-700_cassette. They keep these names in Plasticity's outliner. _spokes holds one solid per spoke, and _nipples one per nipple.
Tread in solid bodies
The export setting Tread in solid bodies decides what becomes of the tread:
| Choice | What you get |
|---|---|
| On the tire, one body | The lugs are part of the tire. The default, and the slowest to build. |
| Lugs on the crown, separate bodies | The plain tire, plus the tread standing on its crown as separate lugs. For when you want to change lugs, or fillet the tire first and join them yourself. |
| Flat lugs, to wrap in Plasticity | The plain tire, plus the lugs as flat blocks lying at crown height, one wrap long and as thick as the tread depth. For a wrapping workflow of your own. |
| Leave it out | The plain tire, no tread. |
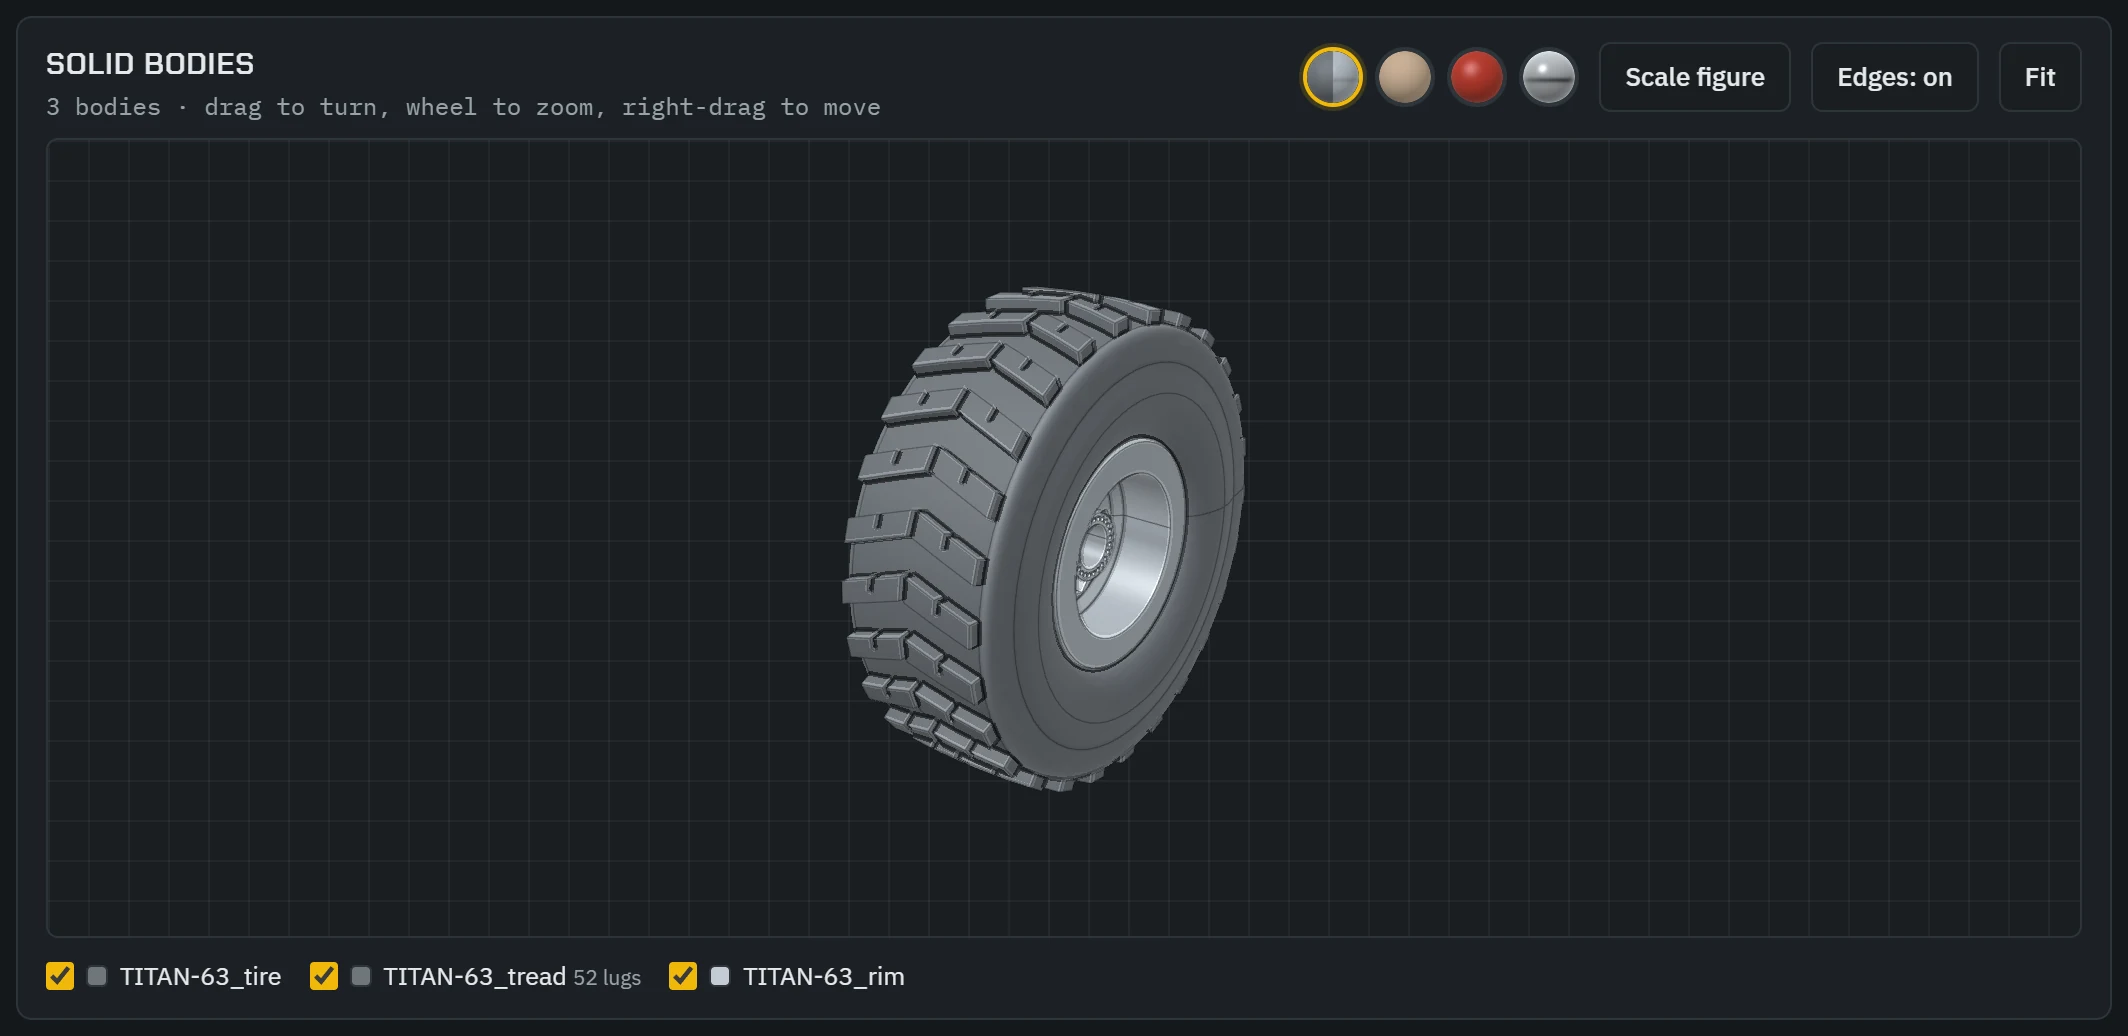
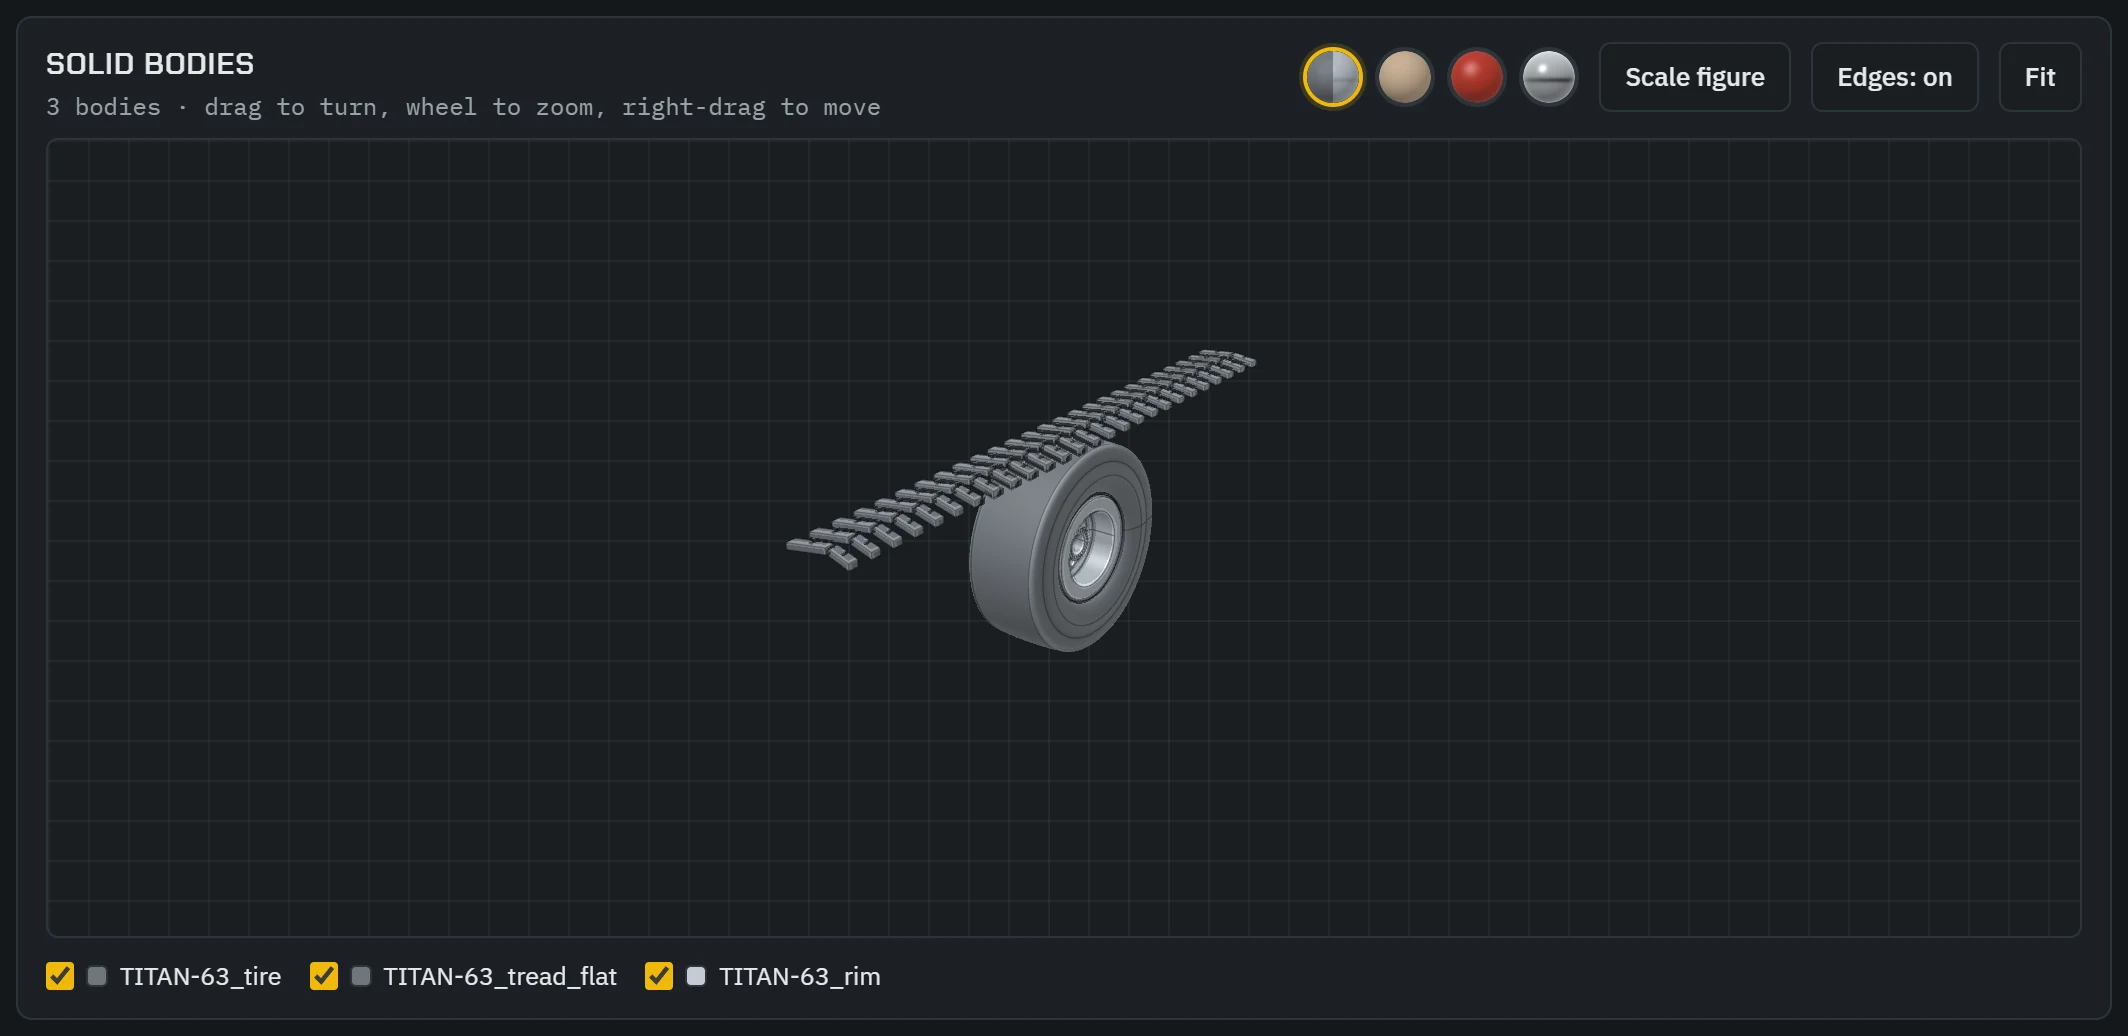
- A continuous pattern (Street ribs) gives each rib as one ring all the way round.
- Very fine treads: a tread with more than 400 lugs is not built whole, because it would take minutes. You get the tire and the lugs of one pitch, and the line under the format choice tells you how many copies to make around the axle in Plasticity (a radial array).
- If the kernel cannot build exactly what you chose, it builds the next best thing (separate lugs instead of one body, flat lugs instead of lugs on the crown) and the line under the format choice says so.
- Lug sides are parallel to the lug's centre line, not radial, as if each lug were pushed straight down onto the tire. On a tire with few, long pitches the ends of a long lug lean by a few degrees.
- On the one-body tire the tread has an edge at every pitch, because the tire is built one pitch at a time and stitched together. The sidewalls, shoulders and beads are whole.
- Most solid files are small, but a very fine tread can make a STEP file of up to about 30 MB. A file that complex takes a while to import in any CAD program.
Bodies from Panels & parts
| Tab | Bodies |
|---|---|
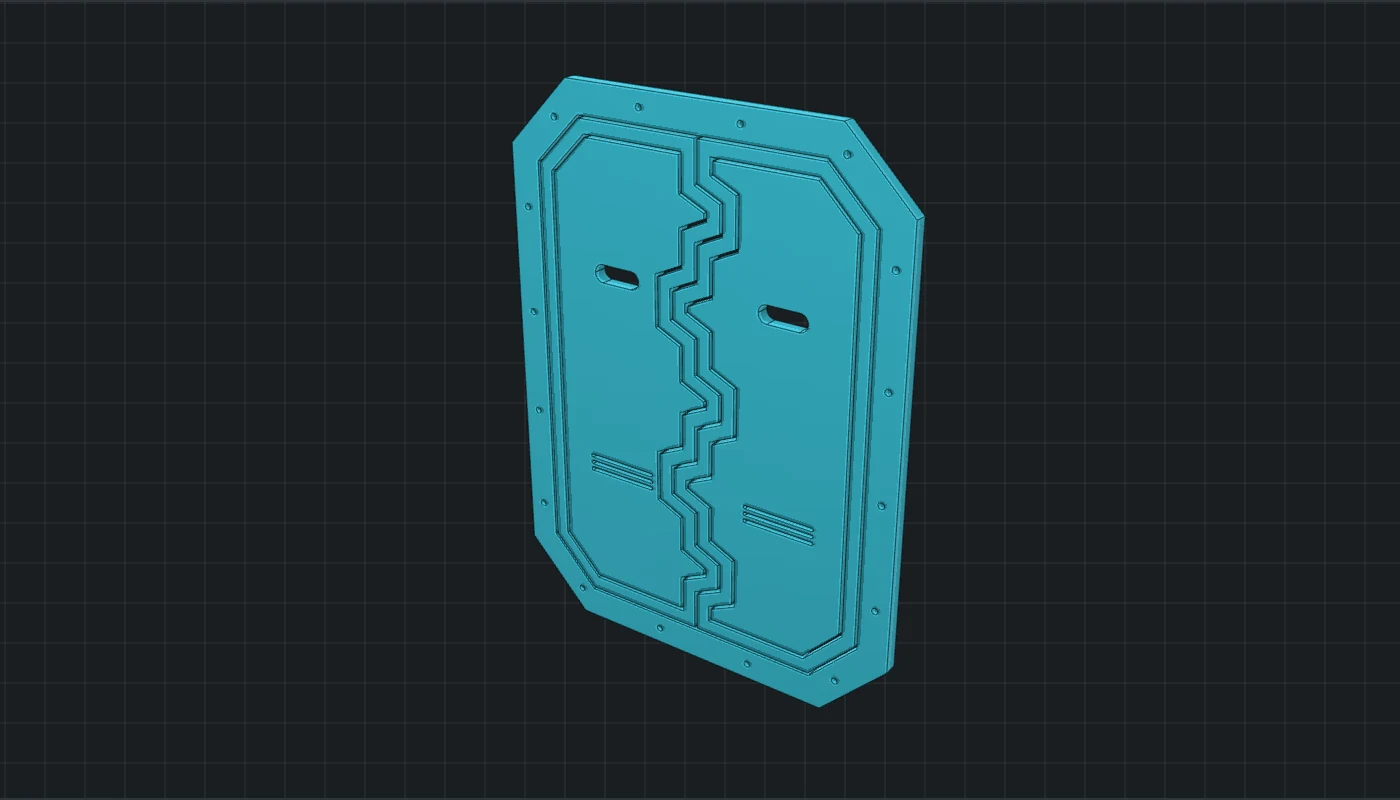
| Panel lines, Doors & windows, Shapes, Ports | Each profile extruded by Solid thickness, out of the plane it stands in. On Panel lines, Stepped panels and Bevelled panel edges shape the panels (see Export settings for panels and parts). |
| Objects: barrel | The body revolved; the lid extruded to the wall thickness. |
| Objects: satellite dish | Dish, feed horn and mast revolved; the back rib extruded and repeated around the axis. |
| Objects: AC unit | Thin sheet panels on a box, and the fan rotor as a flat blank. It is not a closed box. |
| Fasteners | Built the way a fastener is made: turned round, then cut down to its flats. A hex head has six flats with the chamfer showing as arcs on each, and the drive is a recess in the top of the head. A nut keeps its bore, a castle nut has its slots, a lock washer its split. |
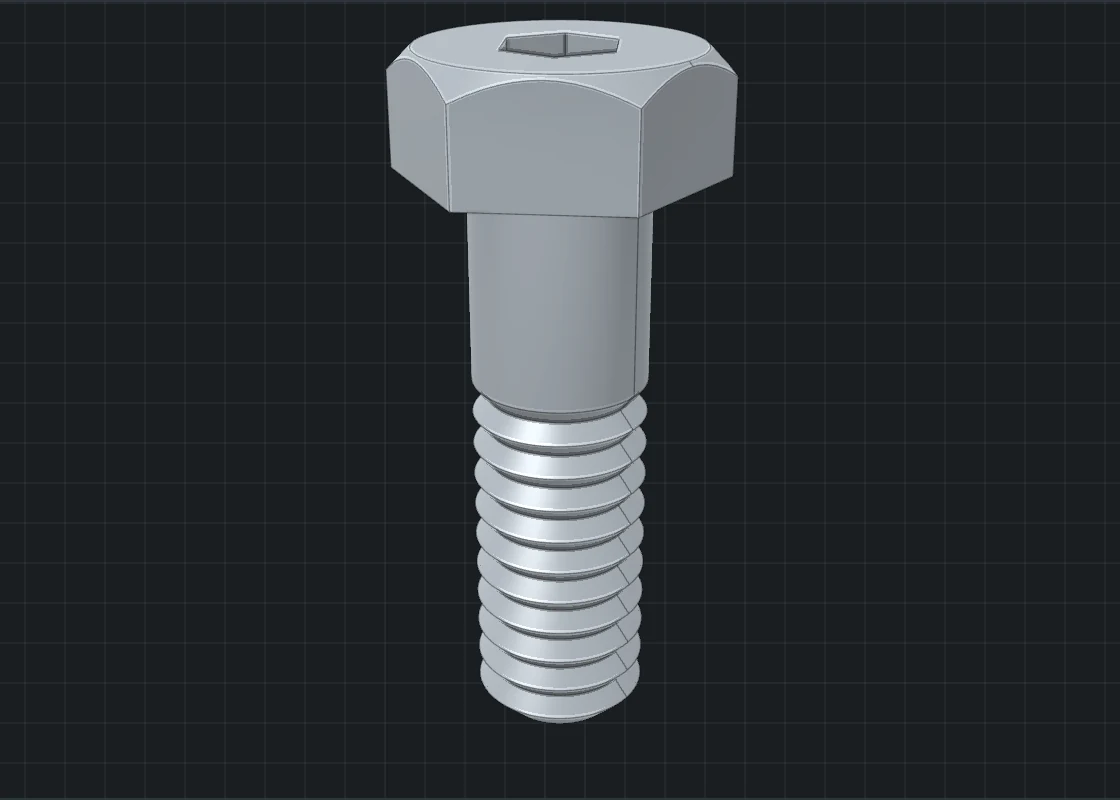
Fasteners on a sheet. With Use my fastener design switched on, the fastener heads on a panel sheet, door, shape or port plate are a body of their own, named after the sheet with _fasteners at the end, and flanges or collars another (_washers). So you can move, hide or recolour all the fasteners at once. Each head sits in the clearance hole the drawing gave it; Fastener heads above the surface raises or sinks them.
Previews without a solid
Some files have no body of their own: for example the tread tile and strip when the tread is left out. After a build, the line under the format choice names them. Dragging such a preview gives you its curves in STEP.
The 3D view
In Tires and Panels & parts the 3D view shows in the Solid and Mesh formats; in Props and Buildings it is always there.
- Drag in the view to turn it, use the mouse wheel to zoom, right-drag to move. Fit, or a double-click, shows everything again.
- The ticks under the view switch bodies on and off.
- The view shows the last build. It does not follow the sliders: when you change a setting it dims and offers to build again. (Props and Buildings are the exception: there the view is live. In the Mesh format it shows the mesh itself.)
- Scale figure stands a cut-out of a worker in a hard hat, 1.75 m tall, beside whatever is on show. It is in the view only, never in a file, and it takes the colour of the mode. Press it again to send it away.
- Edges: on draws the edges on the shaded bodies. Press it for Edges: off (shading alone), and again for Wireframe (the lines alone, in each part's colour, seen through). In the Mesh format the wireframe is the faces of the mesh you export. Kit-Forger remembers both buttons.
- Nothing can be dragged out of the 3D view itself; use the dashed handle or the preview cards.
- If your computer cannot draw 3D (no WebGL), the card says so. The solids are built all the same.
Matcaps
The four round buttons above the view choose how the bodies are shaded. Ridges are picked out a little lighter and grooves a little darker in all of them, so a tread reads at a glance. Kit-Forger remembers your choice.
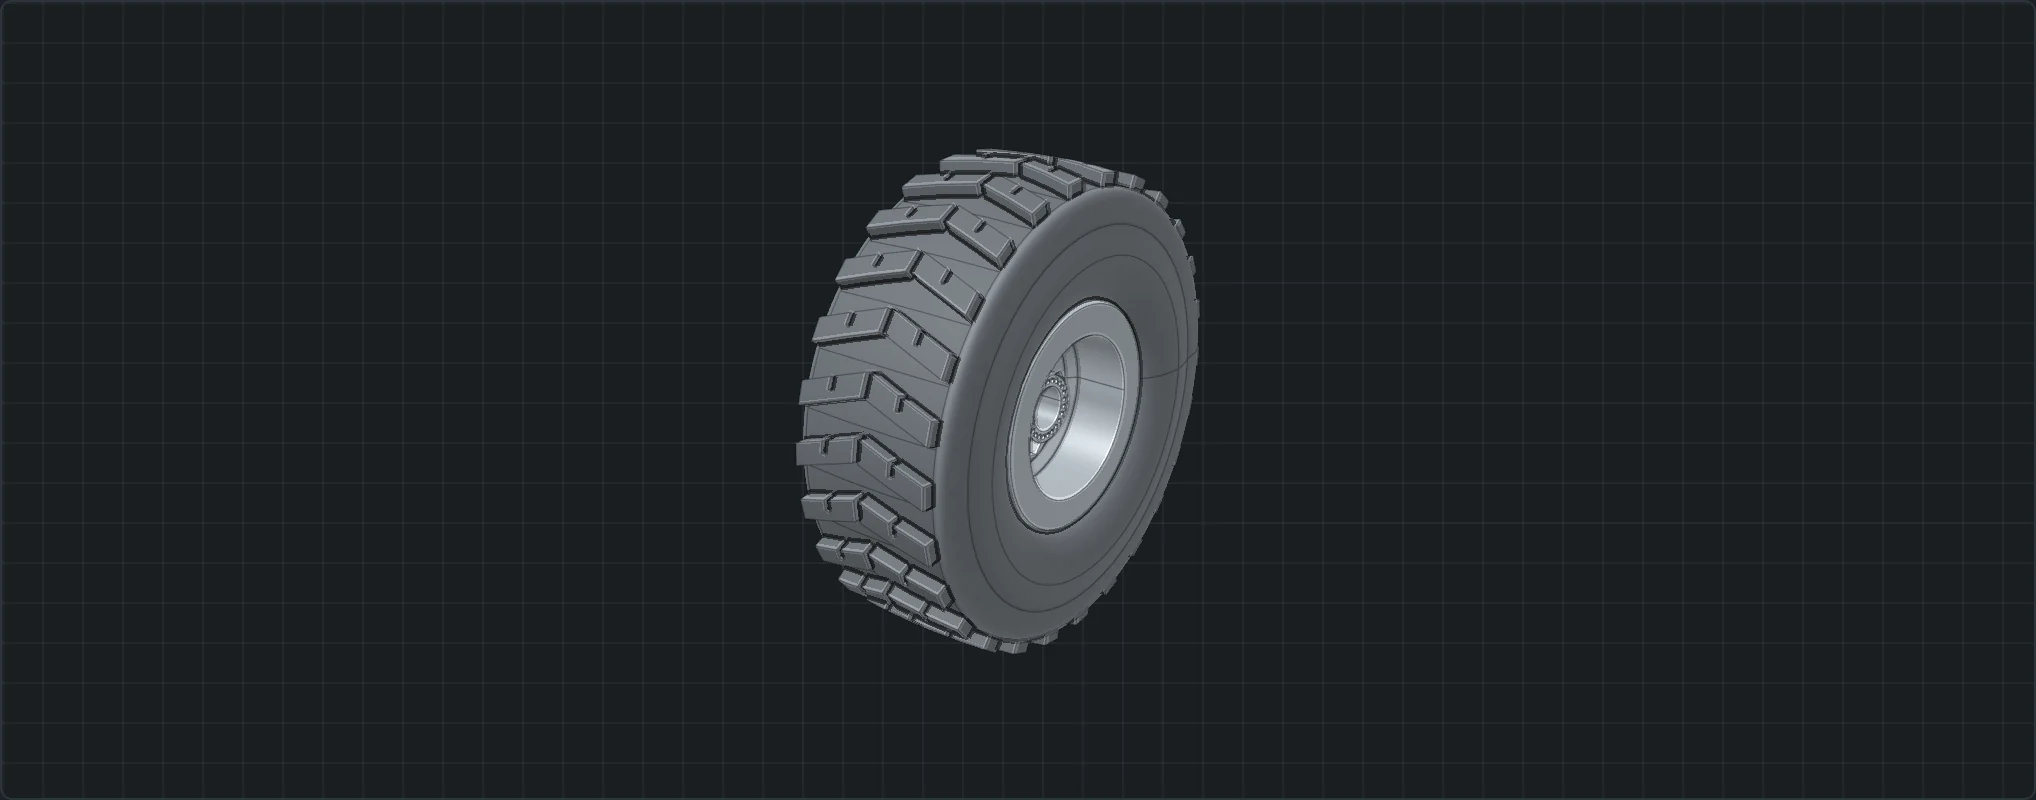


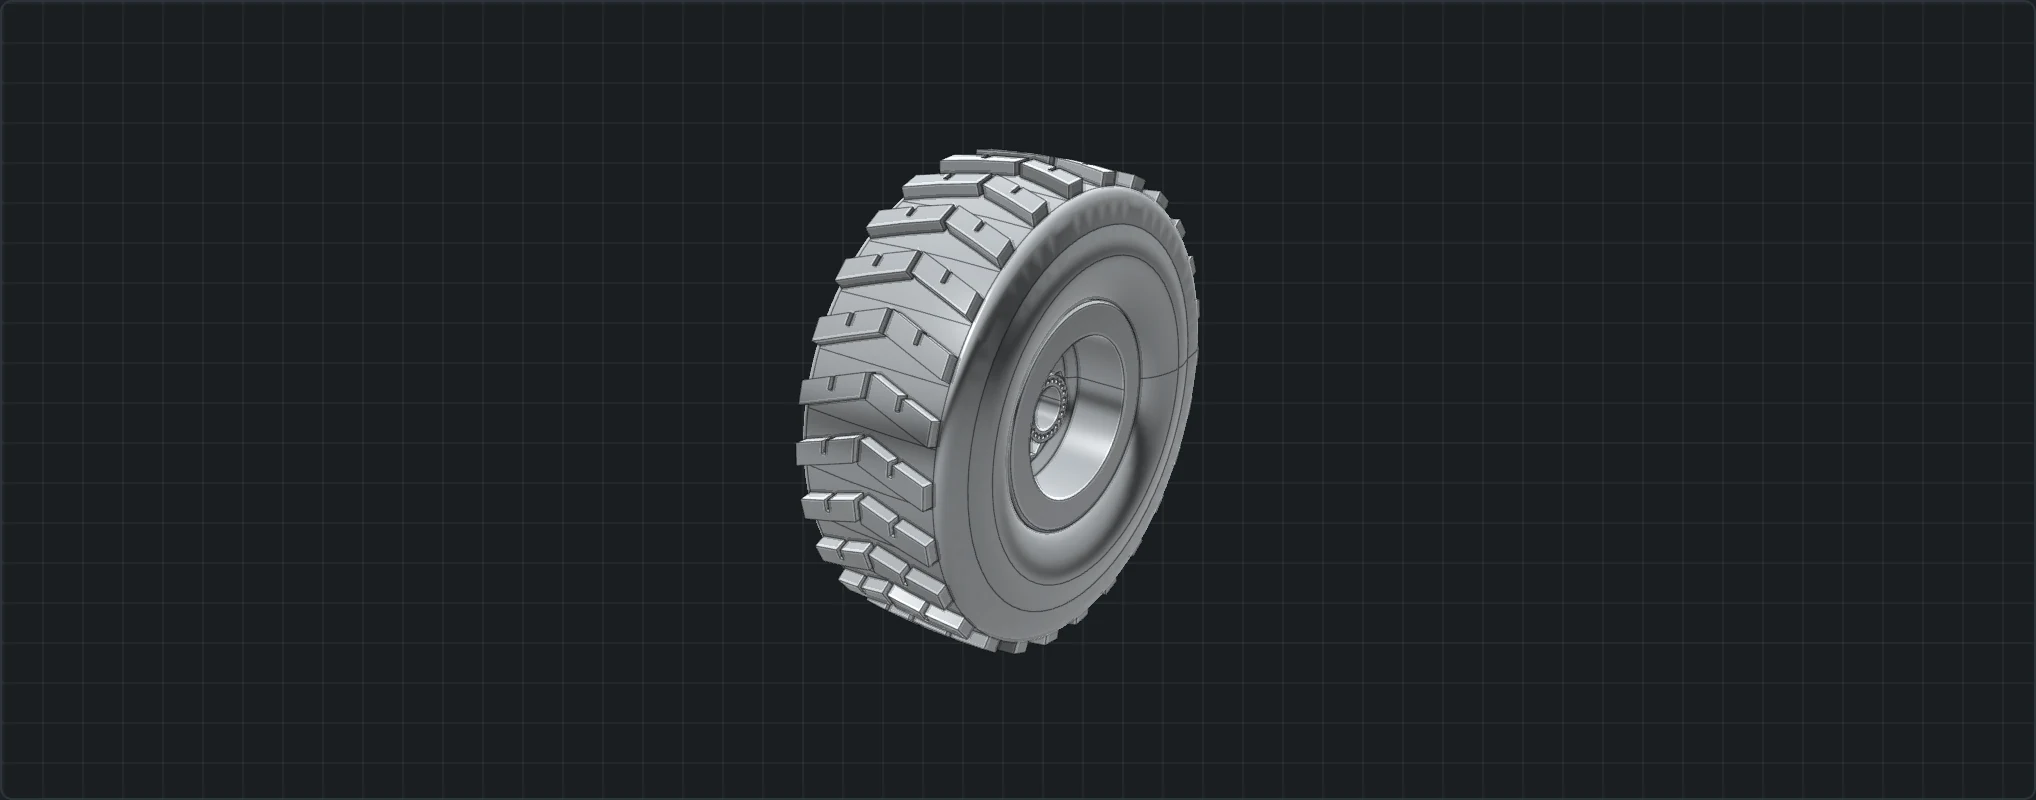
Memory
The CAD kernel needs a lot of memory while it builds. In our measurements Kit-Forger used up to about 900 MB during solid builds, and went back to about 350 MB after switching to another format. Kit-Forger lets the kernel go whenever you leave the Solid format; the bodies already built are kept.
Meshes
In the Mesh format everything leaves Kit-Forger as a mesh, for Blender, game engines and other 3D programs: a tire with its tread and rim, a sheet of panels, a fastener, a prop, a building. A mesh is made straight from the settings, without the CAD kernel, so it is there at once: there is nothing to build and nothing to wait for.
Export a mesh
- Under Drag and export as, choose Mesh. The mesh settings appear, and the 3D view shows the mesh itself, with a count of its faces above it.
- Choose the settings below.
- Click the export button, or drag the dashed handle out. A part's own handle (in Props and Buildings) or a preview card's Save Mesh button gives that part alone.

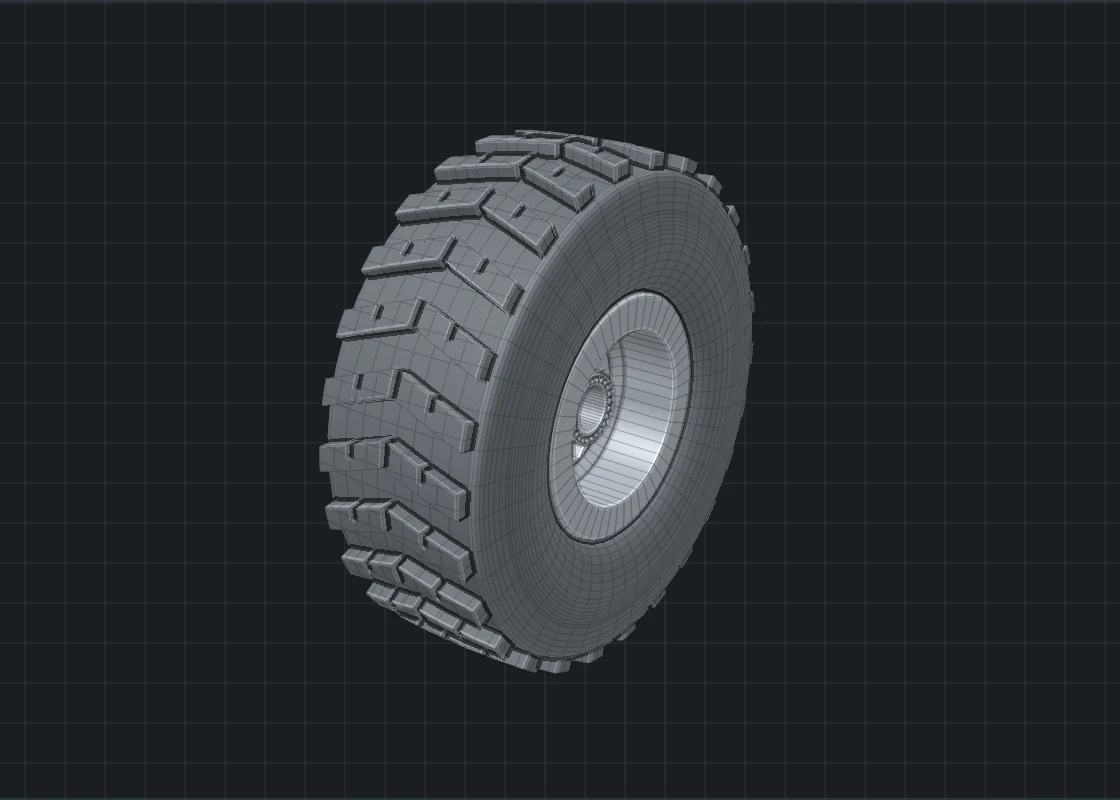
The settings
| Setting | Choices |
|---|---|
| Mesh file | OBJ + MTL: the quads and flat faces as they are, UVs, and a named material for each part, in two files (the .obj and its .mtl belong together). glTF .glb: one file with full materials (colour, metal, roughness, glow, glass); glTF holds triangles only, so the quads arrive as triangles, and it is always in metres. STL: the shape only, as triangles, with no UVs or materials, for 3D printing. |
| One unit in the file is | A metre (for Blender and game engines), a centimetre or a millimetre. |
| Roundness | Low (fewest faces), Medium or High (smoothest). A rod has 24, 48 or 96 sides. |
| UVs | Packed: every island inside the UV square with none over another, all at one scale, for painting, baking and a texture of its own. Real size: every island at its true size, 1 m to the square, for textures that repeat. |
What a mesh is made of
- Quads along every side. A straight side is a strip of quads; a turned surface (a pipe, a bend, a wheel) is a grid of quads.
- One face for a flat end, with as many corners as it needs. A flat face with holes in it is divided into as few hole-free faces as it takes.
- Triangles only where a round shape closes in a point, such as the pole of a ball or a dome.
- Every piece is a closed skin, with no open edges. Pieces that touch stay separate pieces.
- Normals are smooth round a curve and sharp at a corner.
- A material for each part, named for what it is: panel, dark, glow, glass, white, red, rubber, metal, brass, and the colours and building materials of Props and Buildings.
In Tires the Tread in solid bodies setting still chooses what becomes of the tread: joined to the tire, as lugs of their own, as flat lugs to wrap on, or none. A whole-set export leaves out the extruded tire and the rim disc, because they are a second way to the same parts; their own Save Mesh buttons still give them.
What a mesh leaves out
A few fine cuts are not in the mesh, and the line under the format choice names the ones the current design has:
- rivet holes that bite into the edge of a panel;
- slots and splits that cross an outline: a castle nut's slots, a lock washer's split, the slot of a quarter-turn fastener;
- the valve's hole in a wire wheel's hoop and the spoke holes in its hub (the valve and the spokes stand in place all the same).
A mesh is also made a little differently from the solid in places: a lug's sides point at the axle, and a hexagon head has a plain eased top edge. Where parts meet they overlap (plating on a hull, a pipe through a rib), as the solids do before they are joined. For rendering that is fine; for 3D printing, use the solids.
Working faster
The row of thumbnails

- One click loads a preset (in Shapes, a shape type). It keeps your export settings and locks, and counts as one undo step. In Props the thumbnails are small pictures of each preset, drawn one after the other when you first open a tab.
- Your favourites for the current mode or tab come first in the row.
- The mouse wheel scrolls the row sideways.
Randomize and locks
- Randomize all (Tires) or Randomize (the other modes) in the header makes a new random design.
- Each group of controls ends with its own button, such as Randomize tread pattern, which changes only that group.
- The padlock beside a value locks it: randomizing keeps it. Click it again to unlock.
Some settings are never randomized, for example the size of a panel sheet or door, and the export settings.
Undo
Undo and Redo in the header, or Ctrl+Z and Ctrl+Shift+Z (or Ctrl+Y) when you are not typing in a field. Up to 150 steps.
Favourites
- Click ★ Favourite in the header. The current design joins the front of the row of thumbnails, marked with a star.
- Click it to bring that design back.

- Rename: point at a favourite and click the pencil at its top left, or select it and press F2. Type a name and press Enter; Esc drops what you typed. Names stay unique within a tab: a name already taken gets a number.
- Reorder: press a favourite and drag it sideways; an amber line shows where it will land. From the keyboard: Alt+← or Alt+→.
- Remove: the small cross on the favourite.
- Favourites belong to your computer, not to a project. Each mode and tab has its own. Kit-Forger keeps at most 80.
- A favourite prop or building shows a cube as its thumbnail.
- A starred castor or fastener can be chosen for a trolley and other props, from their Stands on and Held together by lists (see Castors and fasteners from another tab).
Favourites as a file
Open ★ File in the header:
- Save favourites to a file writes all of them (every mode and tab) to one
.kitfavfile. Use it as a backup or to carry them to another computer. - Load favourites from a file adds the ones you do not have yet. It never replaces or doubles what is there: a favourite with the same settings is skipped, and a message says how many were added, already there, or could not be read. To start over from a file, remove the favourites you do not want first.
On top: Kit-Forger as a plug-on
Click On top in the header. Kit-Forger becomes a small panel that stays above other windows, with no title bar and every control in a tight row. Plasticity does not take plug-ins, so think of it as a plug-on: it sits over Plasticity, or any other program, the way a plug-in panel would.

- The header hides at the top edge. Move the pointer to the thin grip at the very top and it slides down.
- Drag the logo area of the header to move the panel; drag its edges to resize it.
- Auto-hide switches the hiding header off and on.
- Full size brings the normal window back; – minimizes, × closes Kit-Forger.
- Make the panel wider than about 640 pixels and the controls move to the left with the previews on the right.
- The panel's place and size are remembered. If you close Kit-Forger as a panel, it opens as a panel next time.
Small windows
- Below about 640 pixels wide the window switches to a compact layout: previews first, then only the key controls. All controls shows the rest; Key controls only hides them again.
- Between about 640 and 900 pixels the controls stay beside one column of previews, and the export settings fold behind Settings.
Projects and export
Project files
- A project (
.kitforge) holds the designs of all four modes, every tab of each, in one file. - New (Ctrl+N), Open (Ctrl+O), Save (Ctrl+S) and Save as (Ctrl+Shift+S). Recent lists the last 8 projects.
- A dot (●) before the project name under the Kit-Forger title means there are unsaved changes. Kit-Forger asks before throwing them away.
- When Kit-Forger starts it brings back your last session, unsaved changes included.
- Open also reads design files saved by the earlier Tire Forge and Panel Forge web pages. Such a file replaces one half of the open project, and you can undo it.
- Double-clicking a
.kitforgefile does not open it; use Open in Kit-Forger.
Favourites are not part of a project; see Favourites.
Export folder
Exports are written straight into a folder you choose. Click Choose in the export bar, or just export: the first time, Kit-Forger asks for the folder. Show opens it.
| What you export | What is written |
|---|---|
| A tire set (Export all files) | A folder named after the tire, for example TITAN-63_profiles (or _revolve_method, _extrude_method), with the files and a README.txt that lists them, the tire's sizes and the steps to build it. |
| Object or fastener parts (Export all parts) | A folder named after the object, for example barrel_parts, with every part. |
| Panel lines, Doors & windows, Shapes, Ports | The one file, straight into the export folder. |
| A prop or building (Export solids or Export mesh) | One file with every part in it, named after the design (for example camera_bullet_wall_180_solids.step), straight into the export folder. |
| The corridor kit (Export the kit) | A folder named after the section, for example corridor_kit_chamfer_2400x2600, with one file per piece. See Corridor kit. |
| Save SVG on a card | That one file. The button names the chosen format. |
- In STEP and DXF a set is written as one combined file; in SVG, as one file per profile. In Solid, as one STEP file holding all the bodies. In Mesh, as one mesh holding every part: an OBJ with its MTL, one .glb, or one STL.
- Files of the same name are replaced.
- Copy SVG on a card copies the SVG text to the clipboard.
Random batch of 12
In Panels & parts, Random batch of 12 in the export bar writes twelve random variants of the current tab into a folder such as doors_random_batch. Each variant comes with a settings.json of its settings. The batch is always SVG, and the design on screen stays as it was.
Troubleshooting
Windows says "Windows protected your PC" when I install
Kit-Forger is not code-signed, so Windows does not recognise its publisher. Click More info, then Run anyway. See Install.
The Mac will not open Kit-Forger the first time
Kit-Forger is not notarized by Apple yet, so macOS blocks the first start. Click Done on the warning, then open System Settings > Privacy & Security, scroll down to the message about Kit-Forger, click Open Anyway and confirm. You only do this once. See Install.
The import arrives upside down
In the export settings, switch on Don't mirror Y (switch on if imports arrive upside down) and drag the file in again. This affects SVG only; STEP and DXF carry true 3D positions and are not mirrored.
The tire's axle points the wrong way
Set Axle runs along world axis to X or Y in the export settings. For objects and fasteners, use Revolve axis along.
A side profile, rim disc or door arrives lying flat
That is SVG: Plasticity lays every SVG on the ground plane, and an SVG has no way to say otherwise. Choose STEP under Drag and export as and drag it again; in STEP each profile stands in its own plane. For panel sheets, shapes and port plates, also switch on Stand upright like a wall.
I dragged the whole set but only one file arrived
Plasticity takes one file per drop. Choose STEP: the dashed handle then drags the whole set as one file. (A folder takes all the SVGs at once.)
A STEP or DXF import does not look right
You may need to play with some of the import settings to get STEP and DXF to appear correctly.
DXF does not import into Plasticity
Plasticity imports DXF in the Studio edition only. With Plasticity Indie, use STEP. DXF is there mainly for other CAD programs.
SVG, STEP and DXF are greyed out
You are in Props or Buildings. Props and buildings need all three dimensions, so they come as Solid or Mesh only. Tires and Panels & parts keep the format you chose there.
A mesh is missing a few holes or slots
A mesh leaves out a few fine cuts: rivet holes that bite into a panel's edge, the slots of a castle nut, the split of a lock washer, the valve hole in a wire wheel's hoop. The line under the format choice names the ones in the current design. The Solid format has them all. See Meshes.
The Wire spokes SVG cannot be built into a wheel
As SVG, the Wire spokes card is a picture of the lacing seen along the axle: spokes that cross in depth cannot be drawn flat. Drag it as STEP for every spoke's centre line in 3D, or choose Solid for finished spokes.
The AC unit's fan rotor arrives as just a circle
As STEP curves, the fan rotor arrives in Plasticity as its hub circle only. Drag the rotor as SVG instead.
Pressing the dashed handle does not start a drag
In the Solid format the first press builds the bodies. Wait until the handle reads Drag 2 solids (or another number), then drag. If you changed a setting since the last build, the handle reads Build solids again.
Kit-Forger stops responding when I build solids
It is building. The window does not respond until the build is done; the message names the part the kernel is on. Most tires take 3 to 15 seconds, fine tread patterns up to a minute, a dressed corridor piece 10 to 30 seconds, a terrace or a house up to 40 seconds, a whole corridor kit or a megastructure a few minutes. The first build in a session takes a little longer.
To build faster:
- Use the Mesh format if a mesh will do: it is made at once, with no build.
- Tires: choose a coarser tread, or set Tread in solid bodies to Lugs on the crown, separate bodies, Flat lugs, to wrap in Plasticity or Leave it out. On a wire wheel, a cassette adds about ten seconds.
- Panel lines: Bevelled panel edges adds about a third of a second per panel; set it to 0 while you try things out.
- Corridor pieces: switch off Join each part's pieces into one body, and switch off parts you do not need under Export. In the level designer, leave Dress every piece in full off.
- Megastructures: set Windows lit to 0; lit windows are most of the parts.
An orange line appeared under the format choice after a build
It tells you something about the result: previews that have no solid (drag those for their curves), a tread too fine to build whole (copy the one pitch around the axle as it says), or a tread built differently from your choice because the kernel could not build exactly that. Read it and follow what it says.
A build says "the kernel reports a problem" or "Couldn't build the solid bodies"
The CAD kernel could not make a sound body from these settings. Try:
- a different Tread in solid bodies choice;
- changing the value you changed last a little, or Undo;
- building the curves instead (STEP) and making the body in Plasticity.
If it keeps happening, save the project (Save as) and send the .kitforge file with your question.
"These settings could not be drawn" or an orange warning under a preview
The values ask for a shape that cannot be built, for example lugs that overlap. Undo the last change, change a value, or click Reset to preset (Reset in Panels & parts).
Kit-Forger uses a lot of memory
The CAD kernel needs memory while it builds solids: up to about 900 MB in our measurements. Switch the format to SVG or STEP when you are done with solids, and Kit-Forger lets the kernel go (back to about 350 MB). The bodies you built are kept.
The 3D view says it cannot draw
Your computer does not offer WebGL to Kit-Forger. The solids are still built, and you can drag and export them; only the preview is missing.
The 3D view looks dim and asks me to build again
The design has changed since the bodies were built. The view shows the last build; click Build solids to bring it up to date. (In Props and Buildings the view is live and never dims.)
Round shapes look stepped in the 3D view of Props or Buildings
The live view is a quick picture drawn from the settings, with curves in short straight steps. The file has true circles and arcs. Build the solids to see the real bodies.
The whole space station ring arrives as one segment
That is the default: the file holds one segment, the hub and the spokes, and the message after the build says how to copy the segment round the ring. To get every segment in the file, switch on Whole ring in the file (large); off: one segment to copy round under Export. The file is then much larger.
Some panels have square edges after a build with Bevelled panel edges
A panel with a corner too tight for the bevel is left square, and the message after the build says how many were. A smaller bevel may leave fewer of them square.
Double-clicking a .kitforge file does not open Kit-Forger
Not supported. Start Kit-Forger and use Open or Recent.
Keyboard shortcuts
The keys below are the Windows ones.
| Keys | What it does |
|---|---|
| Ctrl+Z | Undo (not while typing in a field) |
| Ctrl+Shift+Z or Ctrl+Y | Redo (not while typing in a field) |
| Ctrl+N | New project |
| Ctrl+O | Open a project |
| Ctrl+S | Save the project |
| Ctrl+Shift+S | Save the project under a new name |
| F2 | Rename the selected favourite |
| Enter / Esc | Keep / drop a favourite's new name |
| Alt+← / Alt+→ | Move the selected favourite left / right |
| Mouse wheel over the thumbnails | Scroll the row sideways |
| Double-click the 3D view | Show everything again (same as Fit) |
Licences
The Kit-Forger licence agreement, in plain words
This is a summary. The agreement itself is what counts. You can read it in full in the installer, in Kit-Forger under About, Licence agreement, and in LICENCE-AGREEMENT.txt beside the program.
| Licence | Who it is for |
|---|---|
| Solo User | One individual using Kit-Forger for themselves, for any use, including paid work you take on job by job as a freelancer or sole trader. It does not cover work you do as an employee of a company, or while placed with one as a contractor for a period of time; for that the company needs a Commercial licence. A company cannot hold a Solo licence. |
| Commercial User, 1 seat | A company or other organisation: one person who works for it, as an employee or a contractor engaged for a period of time. The seat can move to another person when the first no longer uses Kit-Forger. |
| Commercial User, unlimited seats | A company or other organisation: everyone who works for it, while they work for it. |
- Under every licence, each person may install Kit-Forger on the computers they use. A seat is for one person and is not shared.
- What you make is yours. SVG, STEP and DXF files, solid bodies, projects and favourites, including those made from the built-in presets. You may use, sell and publish them, and build them into products, with no credit or fee.
- You may not pass Kit-Forger or its installer on to others, let more people use it than your licence covers, remove its notices, or take it apart, except where the open-source licences or the law allow.
- Kit-Forger comes as it is, without warranty. Check every file, size and body before you rely on it. Your rights under the Australian Consumer Law, and any your own country's law gives you that an agreement cannot take away, are not affected.
- The agreement is governed by the law of Victoria, Australia.
Open-source parts
Kit-Forger is built with open-source software by others, each under its own licence. About in the header shows the notices and opens the licence texts.
- Open CASCADE Technology, the CAD kernel that builds solid bodies, by OPEN CASCADE SAS. Kit-Forger makes use of and is based on facilities provided by the Open CASCADE Technology software. It is free software under the GNU Lesser General Public License 2.1 with the Open CASCADE exception. It ships unchanged, as two files in the
kernelfolder beside the program (on a Mac, inside the app), and you may replace them with your own build of it; the note in that folder says how, and where the source code is. - three.js draws the 3D view.
- Tauri is the desktop shell.
- The typefaces are Chakra Petch and IBM Plex.
The scale figure in the 3D view is cut out of a photograph by Iman Taufik on Pexels (the photograph), used under the Pexels licence. The About window names it too.
Their licences, and those of the smaller parts inside the program, are in THIRD-PARTY-NOTICES.txt beside the program.